
5 tips for organizing a closet
Your closet is often the first thing you look at in the morning, and it sets the tone for your day. Ideally, it should feel like a party where you know everyone and, more importantly, actually like everyone! Having an organized, functional closet not only helps you set yourself up for success, it also allows you to start off your day on the right foot because it will help you feel at peace and in control. Apparently, the New York Times said that 31% of people were more satisfied after clearing out their closet than after sex. Regardless of where you fall, read on for 5 simple organizing tips! (See here for product recommendations. As for decluttering tips, you get my list of 10 things to declutter from your closet when you sign up for my newsletter.)
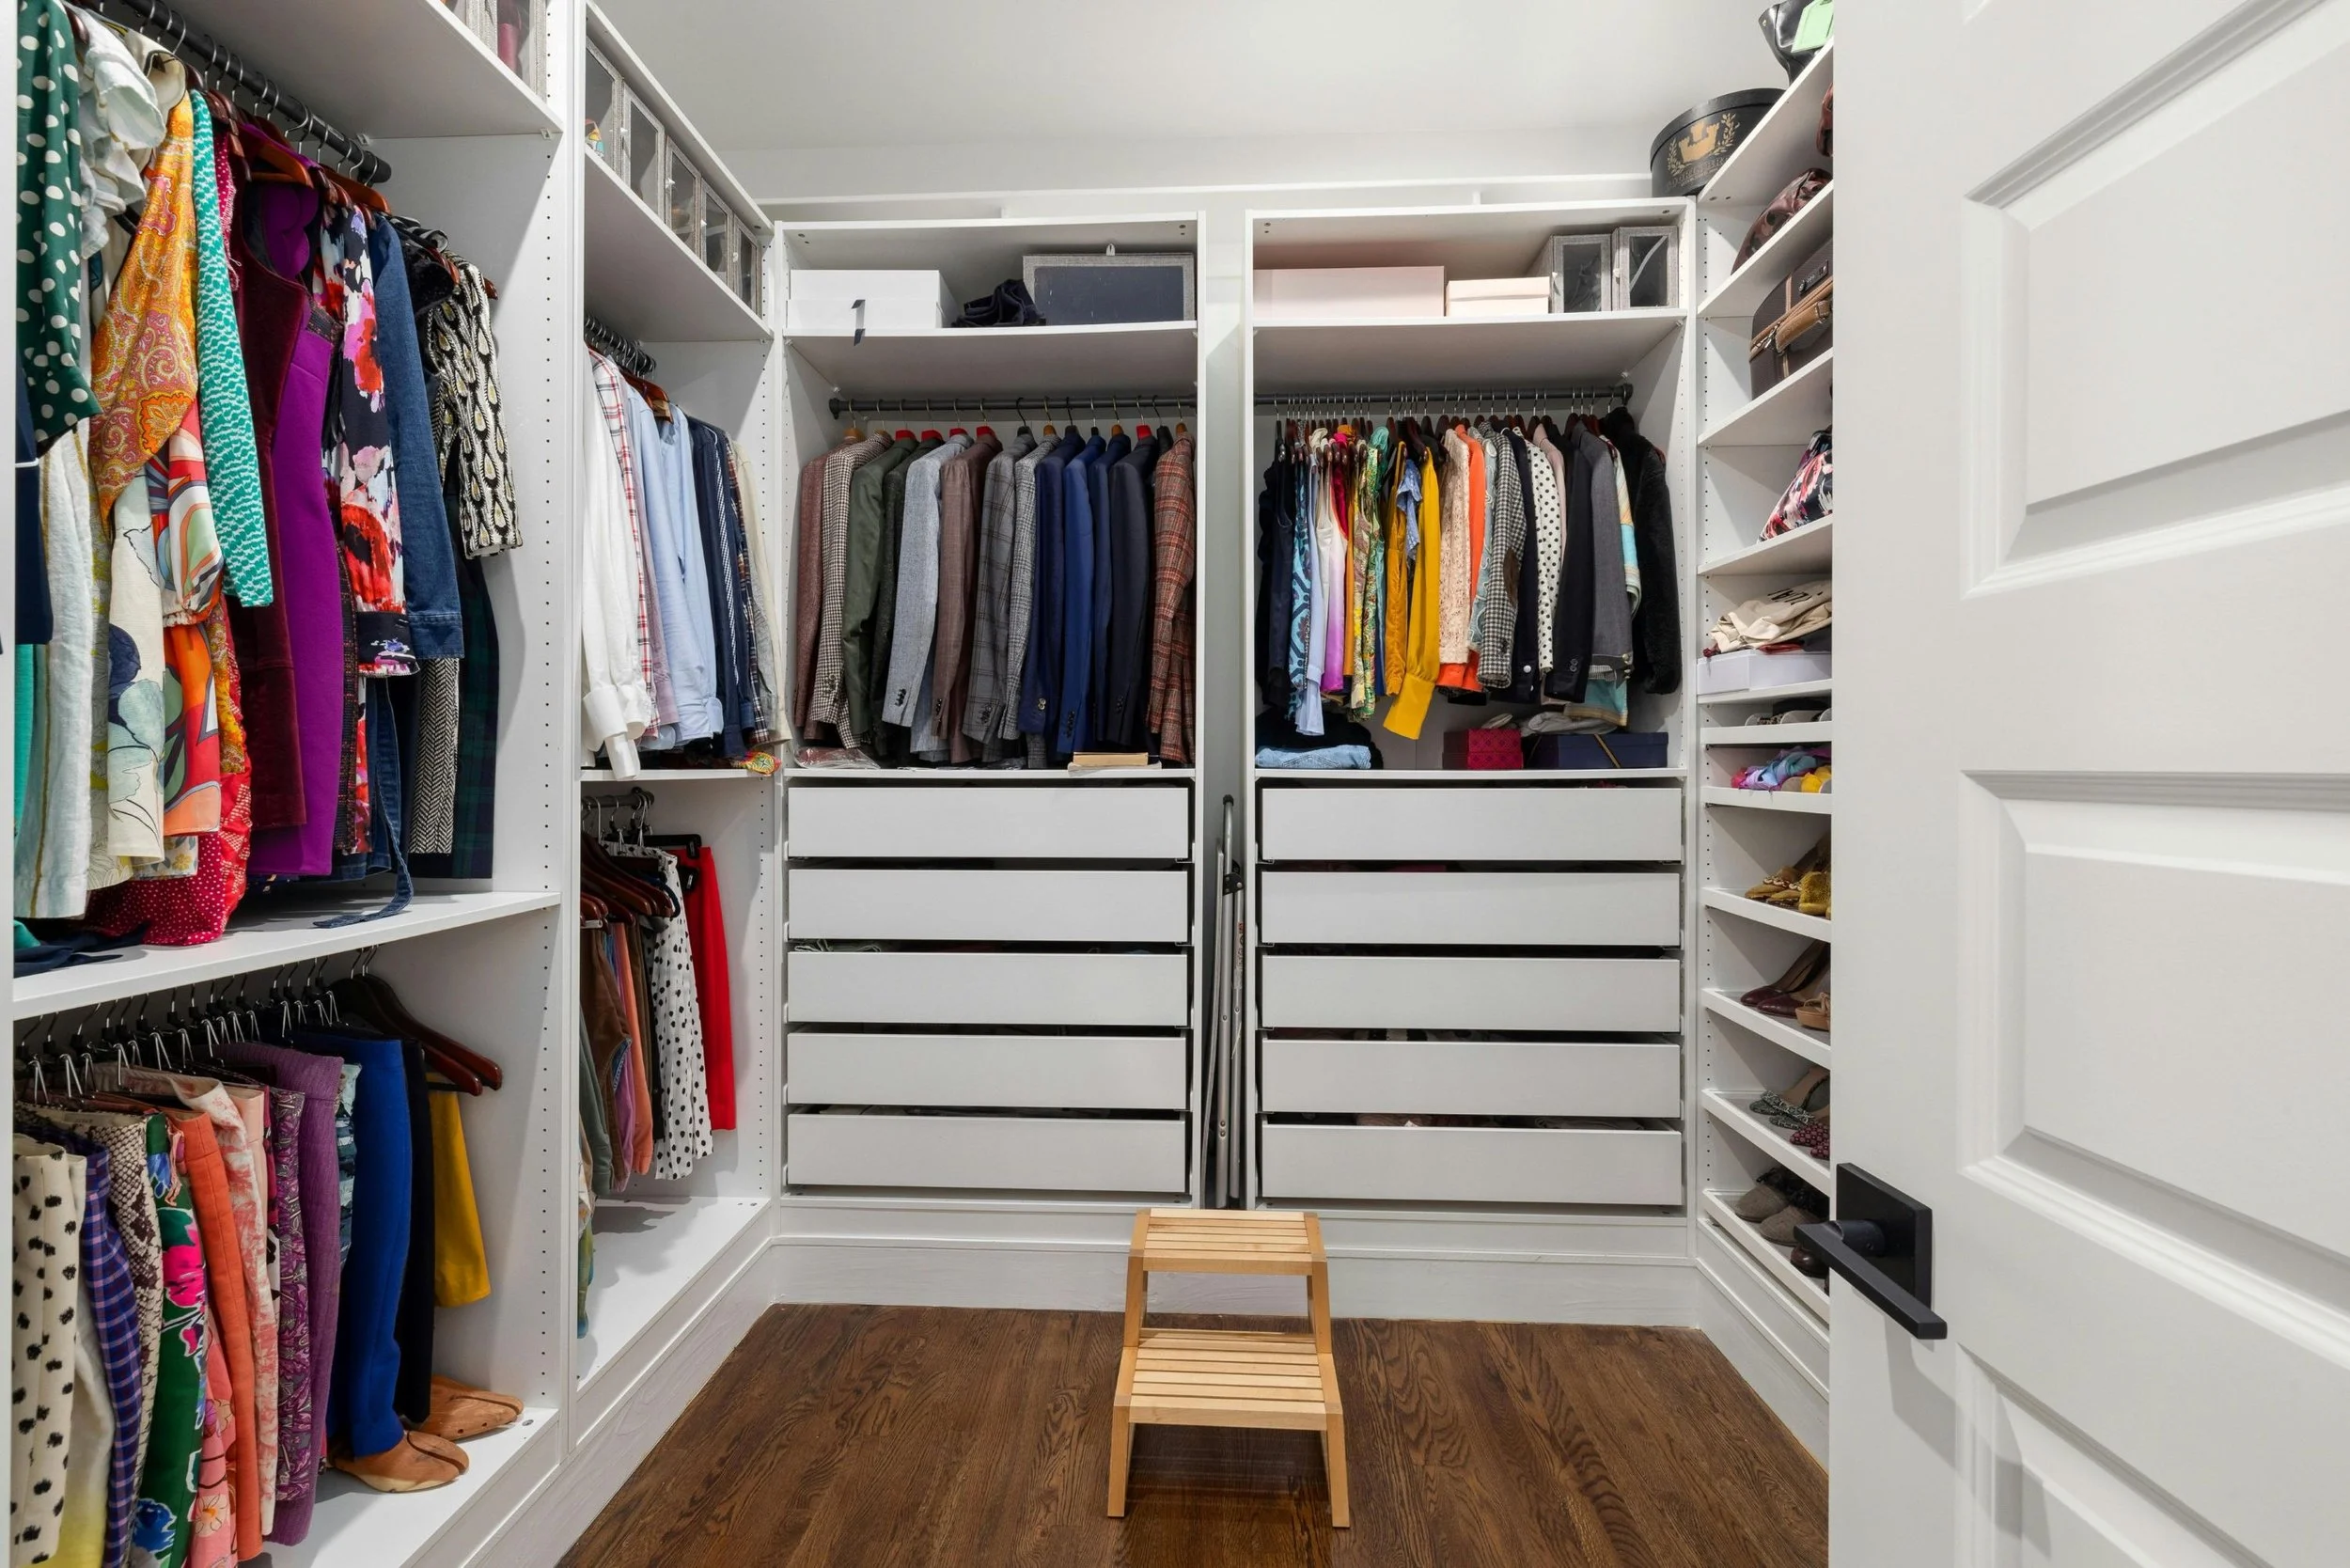
This photo was taken by Curtis Adams for Pexels.
1 – The easiest way to make your closet look better is…
There are small details that will help your closet look and feel more organized, but here’s the most effective one: use matching hangers. And absolutely get rid of the flimsy ones! Replacing your hangers is a simple step to take, but it will make such a big difference! Velvet hangers are inexpensive, yet look stylish, and are functional in that they help prevent your clothes from slipping off. Slim wooden hangers are also a great option, as are very sturdy plastic ones. You won't realize how good it feels to have all those hangers looking uniform until you try it!
2 – The floor is not for storage.
Another common issue is using the floor for storage. Ideally, you shouldn't have anything on the floor of your closet – I don't mean simply that it shouldn't be messy or cluttered, I mean that it should not be the designated home for items such as shoes, sandals, and boots. Try storing those on a shoe rack or on shelves, which will not only make them more visible and accessible, but will also help ensure that you are not tripping over your shoes when you reach for something else. The same is true of handbags and purses – try storing them on the top shelf in clear bags or acrylic boxes, so that they remain visible but do not get dusty. Alternatively, there are purse hangers that will keep them handy without bending the handles and straps.
3 – For the small things.
It is also worth looking at small accessories such as jewelry, belts, scarves, hair ties, etc. If you do not have the luxury of drawers with divider inserts, try a jewelry box (in a closet, I especially like the tall, shallow ones behind a full-length mirror that swings open) or specialty hangers for your belts and scarves. Again, the important thing is to keep your belongings both easily visible and easily accessible. You should also get rid of extra packaging, which I often come across in clients' closets (even if it's from a fancy store and looks nice, it will prevent you from seeing what it contains, and you will lose track of those items - or you will realize that the packaging was empty and just taking up space for nothing).
4 – Plan for the way you use your closet.
Next, see if specific items tend to pile up and see how you can remedy that. I suggest having a hamper in your closet for dirty clothes, as well as a donation box for those items you no longer want (when the box is full, simply donate the contents). I also pack all my travel items inside my largest suitcase, which keeps them contained until the next trip. Keep spare hangers directly on the hanging rod instead of making a pile elsewhere.
Consider installing a few hooks in your closet, too. Spare hooks can be great for those clothes that you wore once and therefore cannot be hung back in your closet, but that are not quite dirty enough to wash yet. You can also use a hook to set up your outfit for the day or for an upcoming special event.
5 – Use bins for folded items.
Most of the time, I recommend getting rid of hanging fabric shelves and stacking plastic drawers – they tend to be flimsy and really not as practical as one would think. Also, try not to stack folded clothes in piles – it’s impossible to reach the items on the bottom, and the piles will eventually topple over anyway. Instead, assuming vertical file-folding in a drawer is not an option, get some open bins and use those the same way you would a drawer. This helps keep items such as t-shirts visible and accessible. Bins are also great for swimsuits and coverups, or winter accessories like hats and gloves.

This photo was taken by Chastity Cortijo for Unsplash.

Hi there! I’m Amélie, a professional home organizer in San Antonio, Texas. I help people like you declutter their home, organize their belongings, and simplify their life. I love cleaning out a closet and removing a carload of donations from a home! My goal is to help you create a functional space that will make your life easier and more peaceful.
Interested? Check out my personalized services or book your complimentary consultation!
Do we really have 300,000 items in our homes?
You’ve probably heard that number being floated around: the average household contains 300,000 items. But does it really? It turns out I have a bit of inside information, as well as some thoughts, so here we go!
That number actually comes from a NAPO colleague of mine, Regina Lark, who was quoted in the LA Times in 2014 saying that the average house contains 300,000 items. I attended one of her webinars last month, where she explained that when asked, she said that she got the number from the UCLA’s 2012 book Life at Home in the Twenty-First Century – which I happened to be reading at the time! And then, try as she might, she was never able to find that reference, although she is convinced that she did read that number somewhere and did not make it up. I also could have sworn that it was in that book, but when I looked for it, I couldn’t find that figure either. However, her quote has since taken on a life of its own and is, to this day, being repeated everywhere as truth, probably because the LA Times is an important publication.

So, the book was published after UCLA conducted a great anthropological study with 32 American families in 2012, and they talk a lot about their methodology. They did count objects, but it was more of an estimate: they made educated guesses about certain groups of items, and they only ever counted items in plain sight – meaning that anything that would have been in a drawer, in a cabinet, or behind something visible was not counted. Here are some figures from that study, along with a quote that will not surprise you: “Middle-class America has the most possessions per family in history.” Households surveyed had an average of 438 books and magazines, 139 toys, and 39 pairs of shoes per family (again, these are only visible items). In home offices, the lowest number of plainly visible non-paper objects was 21, and the most was 2,337. In the garage, it ranged from 50 to 650. Having more items on one’s refrigerator (magnets, papers, etc.) was correlated with having more objects in the home. But there is no total anywhere in sight!
Now, here’s where my opinion comes into play. Let’s be generous by rounding up and saying that a person lives for 30,000 days. From those days, we wouldn’t really count childhood, so there’s maybe 25,000 days left? Let’s say the average household has two adults, and they are acquiring objects not just for themselves, but also for their 2.5 kids. Okay. So with my rough mathematical model here, those adults would have to acquire (while never discarding!) about 12 items each day in order to have 300,000 by the end of their life, right? So it would have to be an even faster rate of acquisition in order to have that many items while their kids are still living with them, as in the UCLA study. I’m not counting perishable items like groceries or cleaning products in this tally, and I wouldn’t be counting every last piece of paper either, since the UCLA anthropologists didn’t.
Speaking for my household, we are not acquiring items at nearly that rate. Sure, there are isolated times when I will buy a lot at once. For example, in one shopping spree, I could buy several outfits for my kids to go back to school as they grow, along with school supplies. But on an average day, I am not buying anything. And regardless of how much I buy, I do get rid of some items along the way (like the kids’ clothes that have been outgrown, plus the school supplies that get used up).
All this to say that while I do not have any idea how many items are in my household, and while I’m sure the number would seem very large if I were to learn it, I don’t think it’s anywhere close to 300,000!
Hi there! I’m Amélie, a professional home organizer in San Antonio, Texas. I help people like you declutter their home, organize their belongings, and simplify their life. I love cleaning out a closet and removing a carload of donations from a home! My goal is to help you create a functional space that will make your life easier and more peaceful.
Interested? Check out my personalized services or book your complimentary consultation!
Organizing v. cleaning
Have you ever noticed that even after your house is cleaned, it still feels cluttered? A lot of people conflate cleaning with organizing, perhaps even more so since Marie Kondo’s book was published in English with the title The Life-Changing Magic of Tidying Up. You see, “tidying up” sounds like something you do before company comes over, by quickly putting things away. But in this case, it actually refers to a specific method of organizing your belongings. I’ll talk more in depth about the KonMari Method™, since I am a Certified Consultant.
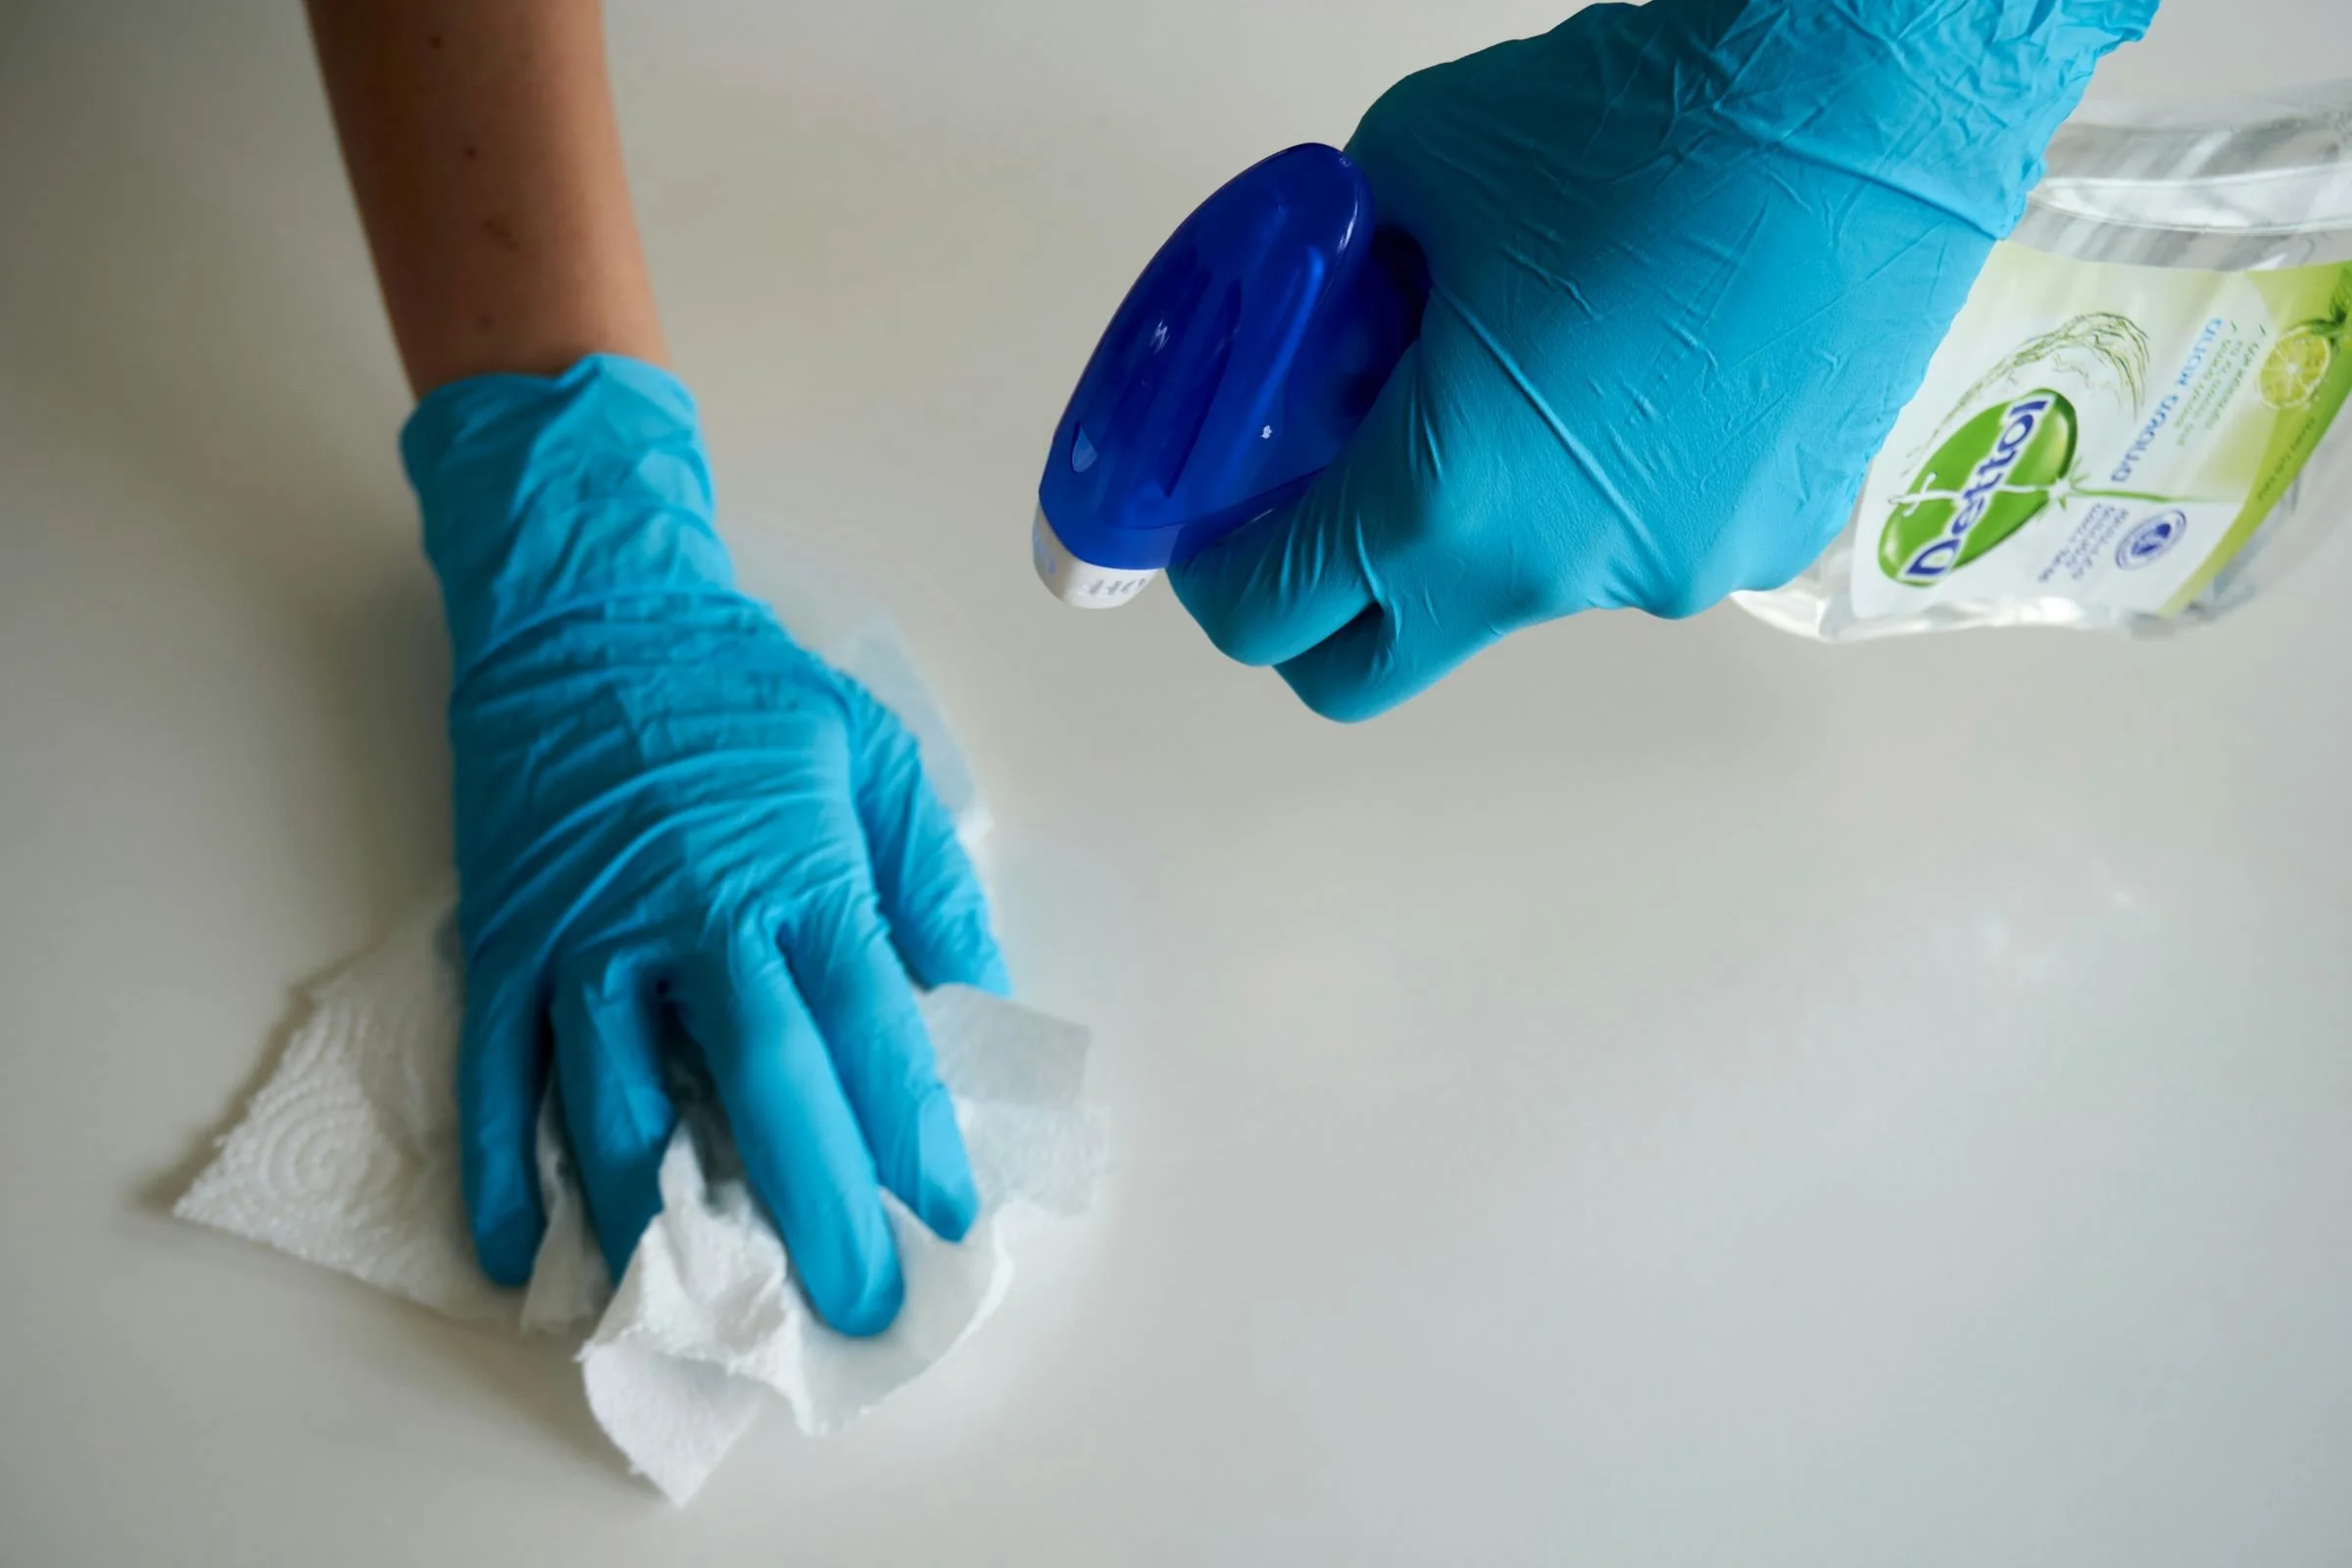
This photo was taken by Anton for Unsplash.
Marie Kondo says that cleaning opposes you to nature – for example, as you use your bathroom, it will get dirty, and that’s perfectly normal. You’ll have to clean it periodically to keep it in good condition. However, organizing, or tidying in the KonMari sense, is something that opposes you to yourself. It’s your own belongings that are getting in your way, so change must come from you.
Cleaning, or even putting your things away, is maintenance that is performed in the short term. Cleaning removes dust and dirt. Organizing with the KonMari Method™ is for the long term, and it aligns your possessions with your values. It also creates less upkeep in general, thereby freeing more time and energy. Organizing removes clutter and stress.
To create an easy analogy, cleaning is like mowing the lawn, while organizing is akin to landscaping your yard. It’s resetting your home versus transforming it.
And here’s a point that I really want to get across: the KonMari Method™ will empower you. It is something that I will do *with* you, by teaching you skills and helping you develop your mindset. By finding what sparks joy, you will be the most authentic version of yourself. We’re not following a specific aesthetic, and there’s no need to be a minimalist – it’s simply about eliminating the things that do not serve you and that are not enhancing your life.
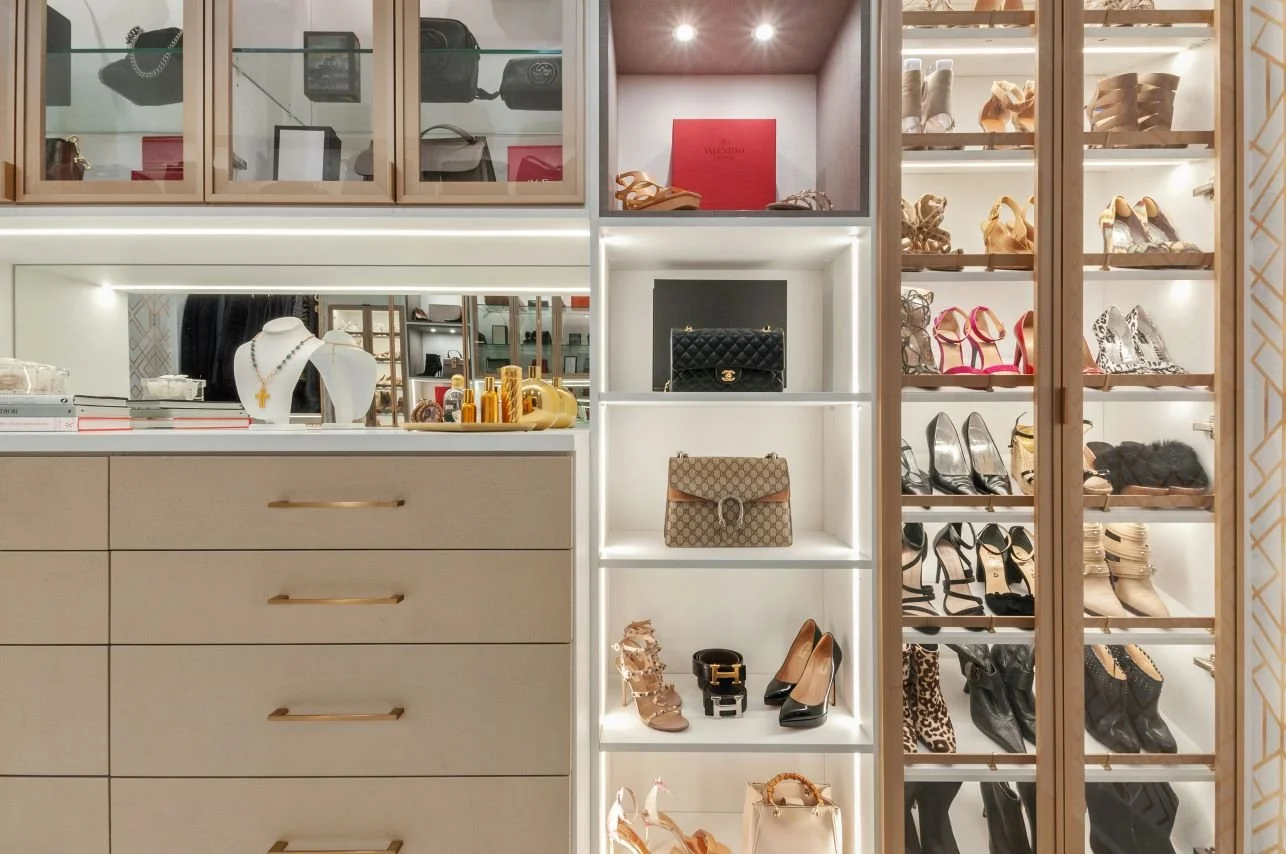
This photo was taken by Chastity Cortijo for Unsplash.
Imagine opening your closet, and everything you see sparks joy instead of stress. Imagine standing in your kitchen and you know exactly where everything goes – and it stays that way, even weeks later.
If you’re tired of cleaning the same clutter again and again, let’s set up a KonMari® session. It’s typically a one-time investment for long-term change. You’ll have less stress, more calm, and more time for what matters most.
Hi there! I’m Amélie, a professional home organizer in San Antonio, Texas. I help people like you declutter their home, organize their belongings, and simplify their life. I love cleaning out a closet and removing a carload of donations from a home! My goal is to help you create a functional space that will make your life easier and more peaceful.
Interested? Check out my personalized services or book your complimentary consultation!
What to expect when working with a professional organizer
Are you overwhelmed by clutter in your home or workspace? Do you find it challenging to keep things organized and in order? If so, hiring a professional organizer may be the perfect solution for you – getting organized is an investment in your home and in yourself. In this blog post, I’ll walk you through what to expect when working with a professional organizer, helping you to understand the process and how it can transform your space.
1. Choosing your organizer
Just like you wouldn’t hire an electrician or financial planner without checking their references, you’ll want to make sure you hire an insured, trained professional when it comes to organizing your home. Members of NAPO abide by a code of ethics and have received education in the field; they offer professional, confidential, and non-judgmental services tailored to your needs. Likewise, KonMari® Consultants have completed supervised training and have been certified by Marie Kondo. Amélie is one of only a handful of people in the world to be a member of both organizations! If you suffer from specific challenges, you might want to turn to the ICD. You can also look up an organizer’s reviews.
What to consider:
- What type of qualifications are important to you?
- Is there a personality type that meshes best with yours?
- What style of organizing are you most drawn to?
- Can you form an idea of who this organizer is based on their website or social media presence?
2. Initial consultation
Before any organizing begins, a professional organizer will typically schedule an initial consultation. This meeting (which can be on the phone, online, or in person) allows you to discuss your challenges, goals, and expectations. During this time, the organizer will assess the scope of your project and discuss potential strategies, timelines, and pricing.
What to prepare:
- Have a list of your organizing challenges.
- Identify any specific areas you want to focus on.
- Be ready to discuss your goals and vision for the space.
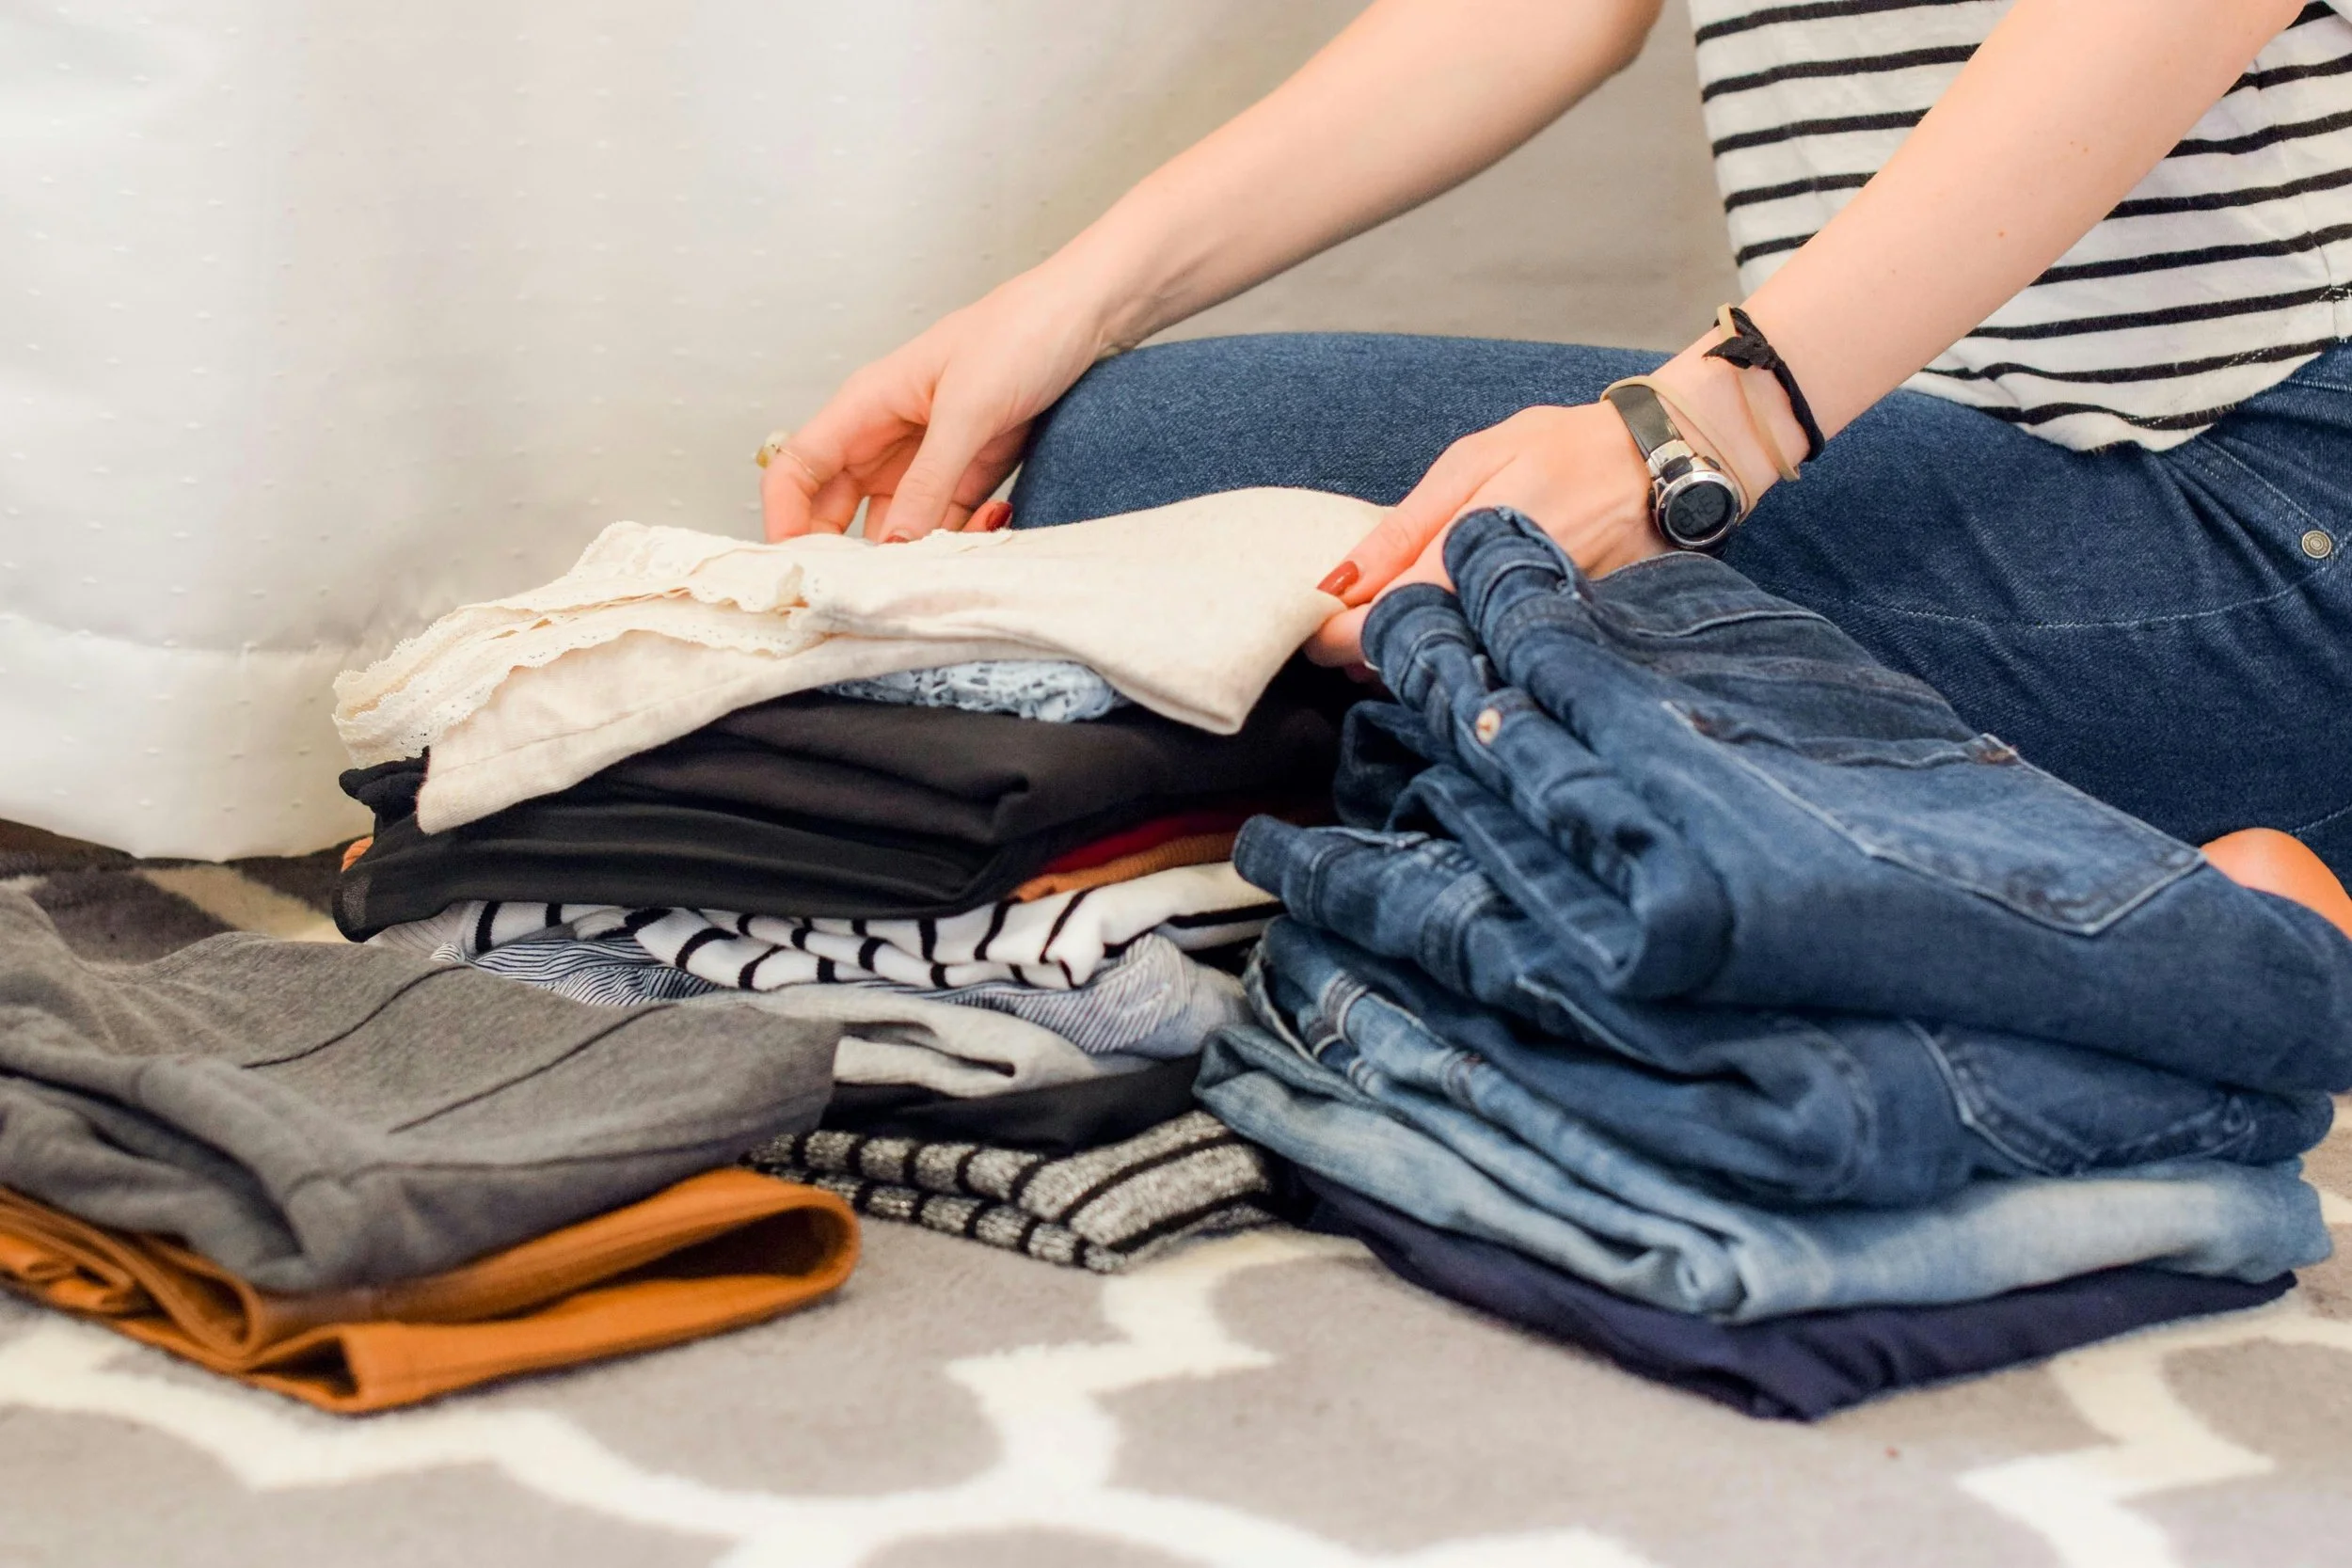
Photo by Sarah Brown for Unsplash.
3. Decluttering process
The first essential step in organizing is decluttering. Your professional organizer will guide you through deciding what to keep, donate, or discard. This can be an emotional process, so having an expert by your side can provide motivation, guidance, and support – though the final decision is always yours. Plus, an organizer like me can remove donations from your home and drop them off where they will be used, greatly simplifying your to-do list!
Key tips:
- Do NOT tidy up before your organizer gets there!
- Prepare some boxes or sturdy bags for carrying donations.
- Be honest about why you’re keeping certain items; understand that it’s okay to let go of things that no longer serve you.
- Embrace the feeling of liberation that comes with decluttering.
4. Hands-on organization
Once decluttering is complete, the fun part begins: organizing! Your professional organizer will work with you to create functional and aesthetically pleasing systems for storing your belongings. This might include everything from labeling bins to rearranging furniture and buying organizing supplies.
What to expect:
- Selecting organizing supplies based on your needs and budget.
- Using space-efficient storage solutions, including racks, bins, and specialty organizers.
- Customized systems that are easy for you to maintain.
5. Education and empowerment
A good professional organizer will not only help you organize your space but will also empower you with skills and strategies to maintain the organization over time. They’ll teach you how to create effective organizing systems that work for your specific habits and lifestyle.
Learning components:
- Practical tips for daily maintenance.
- Strategies for preventing clutter accumulation in the future.
- Recommendations for ongoing organization systems.
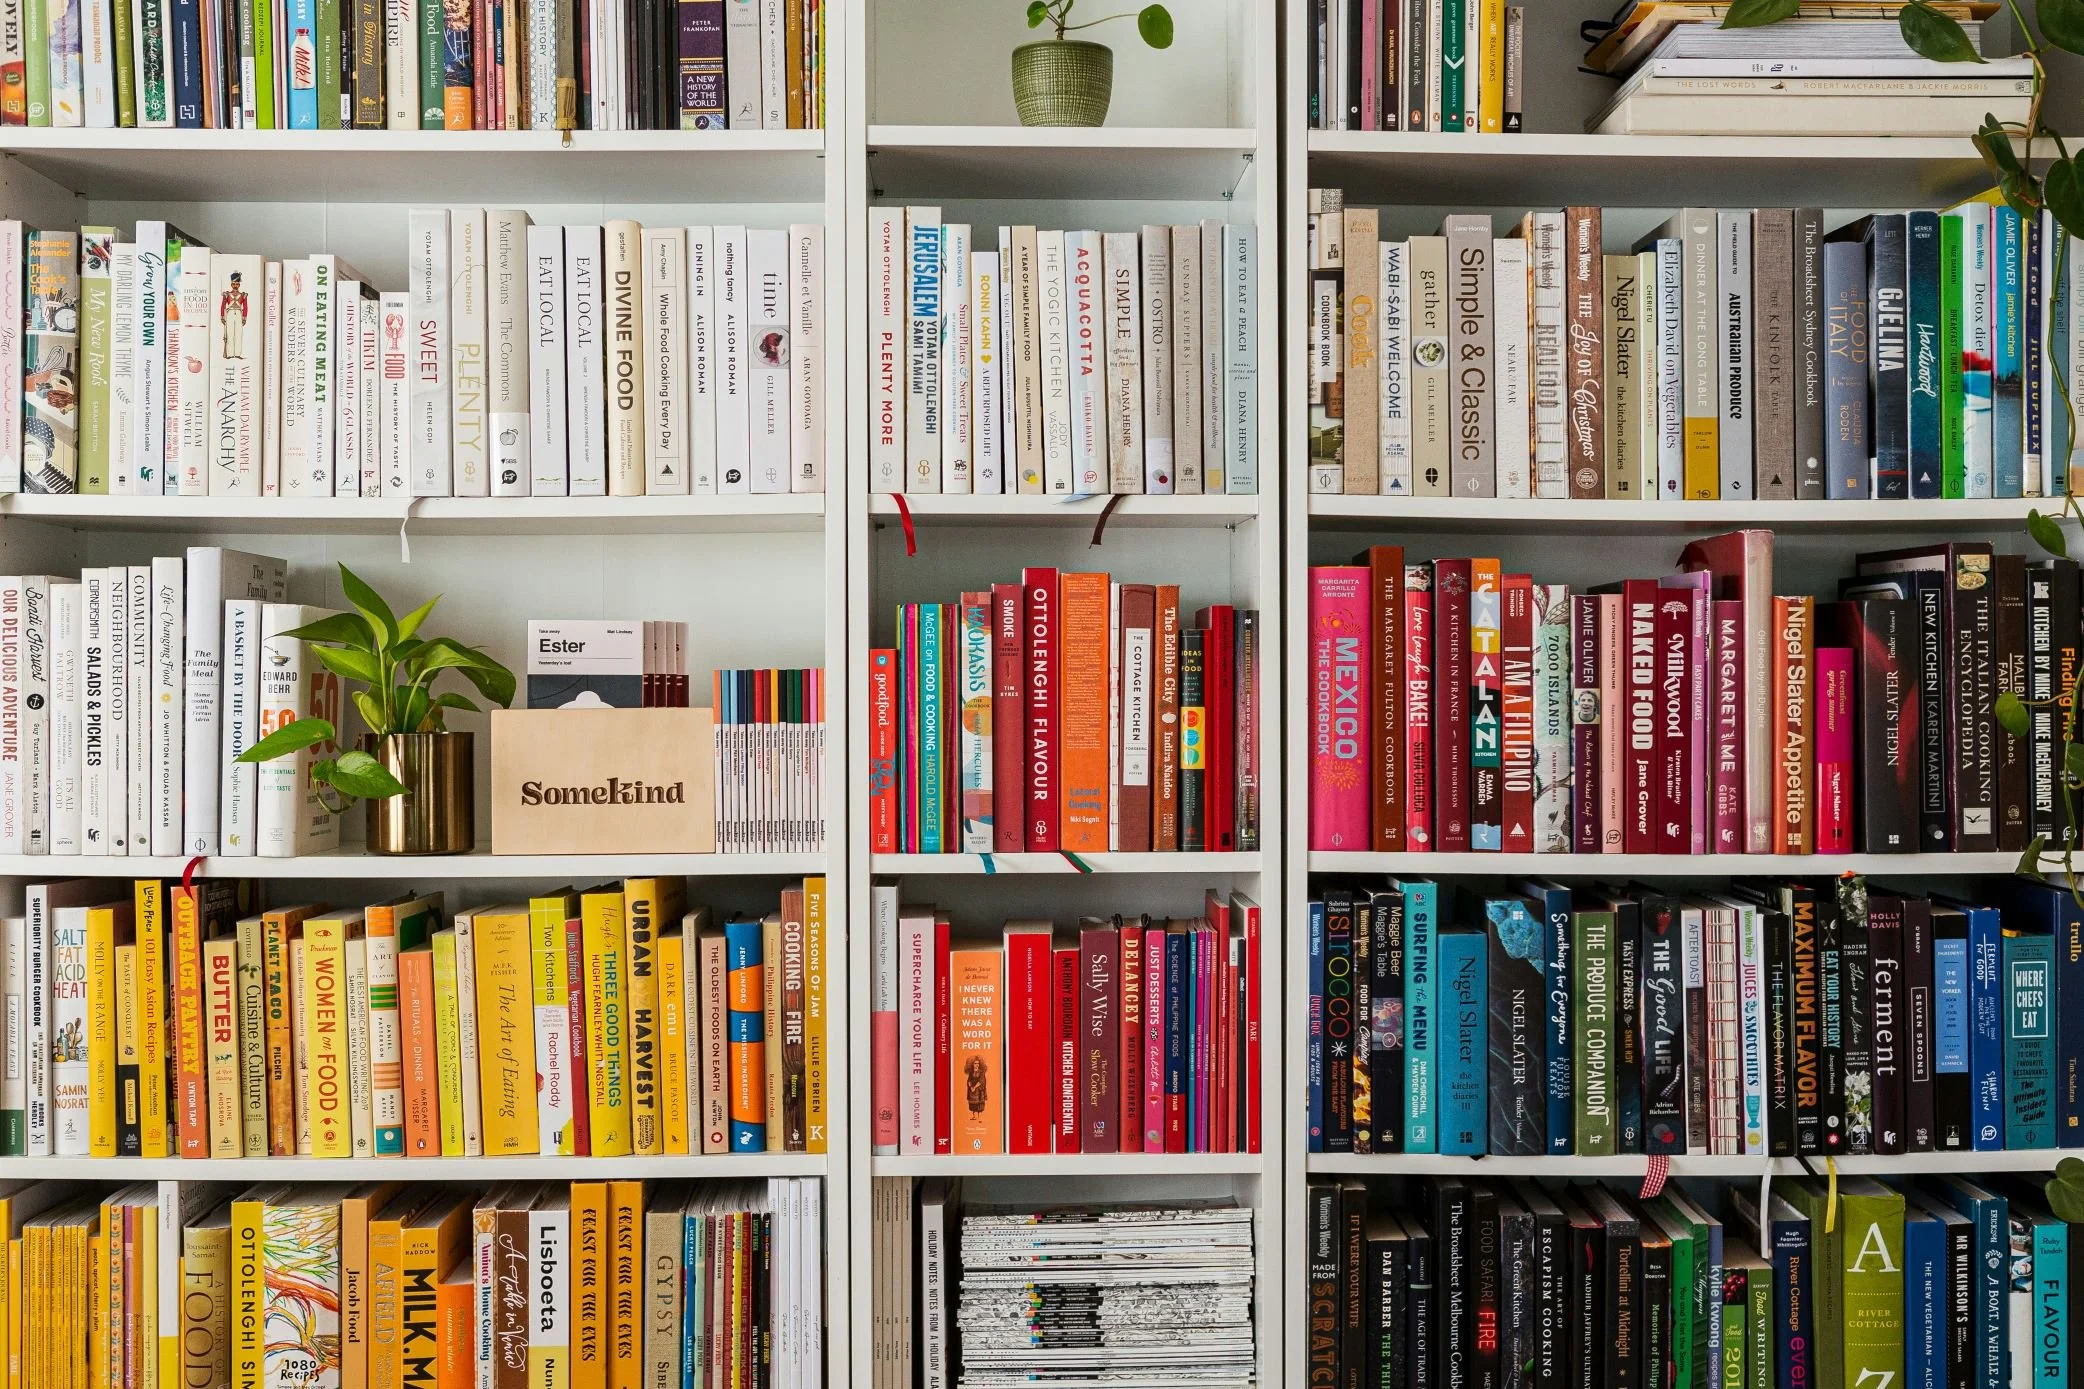
Photo by Luisa Brimble for Unsplash.
6. Follow-up support
Many organizers offer follow-up support and check-ins to ensure you’re still on track. This could include additional sessions to tackle new areas or to refine existing systems. Having ongoing support helps maintain motivation and accountability.
What you might experience:
- Scheduled follow-up sessions to reassess and adjust your organizing system or reset things.
- Resources for ongoing support, such as articles, workshops, or online communities.
- Encouragement to keep the momentum going after the initial project.
7. Realistic expectations
Remember that organizing is a process, not a one-time fix. It may take time to see the full results, depending on the extent of the work and your ability (as well as that of other household members!) to adjust to new systems. Professional organizers understand this and will work at a pace that feels comfortable for you.
Important points to consider:
- Be patient with yourself and the process.
- Celebrate small achievements along the way.
- Understand that developing new habits takes time.
Conclusion
Working with a professional organizer can be a rewarding experience that transforms your space and your mindset towards organization. By understanding what to expect, you can embark on this journey with confidence. From initial consultations to ongoing support, a professional organizer is dedicated to helping you create a functional, serene, and clutter-free environment.
Ready to take the first step? Reach out today and begin the process of reclaiming your space!
Hi there! I’m Amélie, a professional home organizer in San Antonio, Texas. I help people like you declutter their home, organize their belongings, and simplify their life. I love cleaning out a closet and removing a carload of donations from a home! My goal is to help you create a functional space that will make your life easier and more peaceful.
Interested? Check out my personalized services or book your complimentary consultation!
MYTH - “Your house must be perfect”
When people find out that I am a professional organizer, I typically get one of two responses. It’s either “I really need you in my life” (yes, please – click here for your complimentary consultation!) or “Oh, I bet your house is perfect!” And, about that latter statement… no, it’s not. But as I keep saying, there is a difference between having a tidy house (as in, picture-perfect at all times) and having a house that is *easy to tidy*. I aim for the latter because that’s what I feel is realistic.
Here's what I mean by that. Once you declutter and organize, all your things will have a home. Of course, your house still will get messy at times because, well, you live there, and you use your stuff! But if those items have a designated home, then when you want to put things away, you can do so quickly, so your house can look neat again without too much effort. But if your house is cluttered, those items don’t have anywhere to go, and that’s really the issue that I try to address with my clients.
Resets are important
Everyone needs to “reset” their home, myself included. It might be a nightly reset, like making sure the dishes have been washed and the kitchen counters are wiped clean each night. It could be weekly, like picking up toys and vacuuming, or doing the laundry that has piled up. It could be quarterly, like assessing your wardrobe when the weather changes every season or setting up the garage based on your needs for the next few months.
Sometimes, we need to do more than a reset – it might need to be a complete overhaul, because our life changes. Looking at my pantry, for example, I remember a time when it was used only to feed two adults; then we had to store jars of baby food and boxes of Mum-Mum crackers and rice puffs; now, it has school-safe snacks and other sundries that the kids access themselves. It works because we zone everything, and rezone as needed.
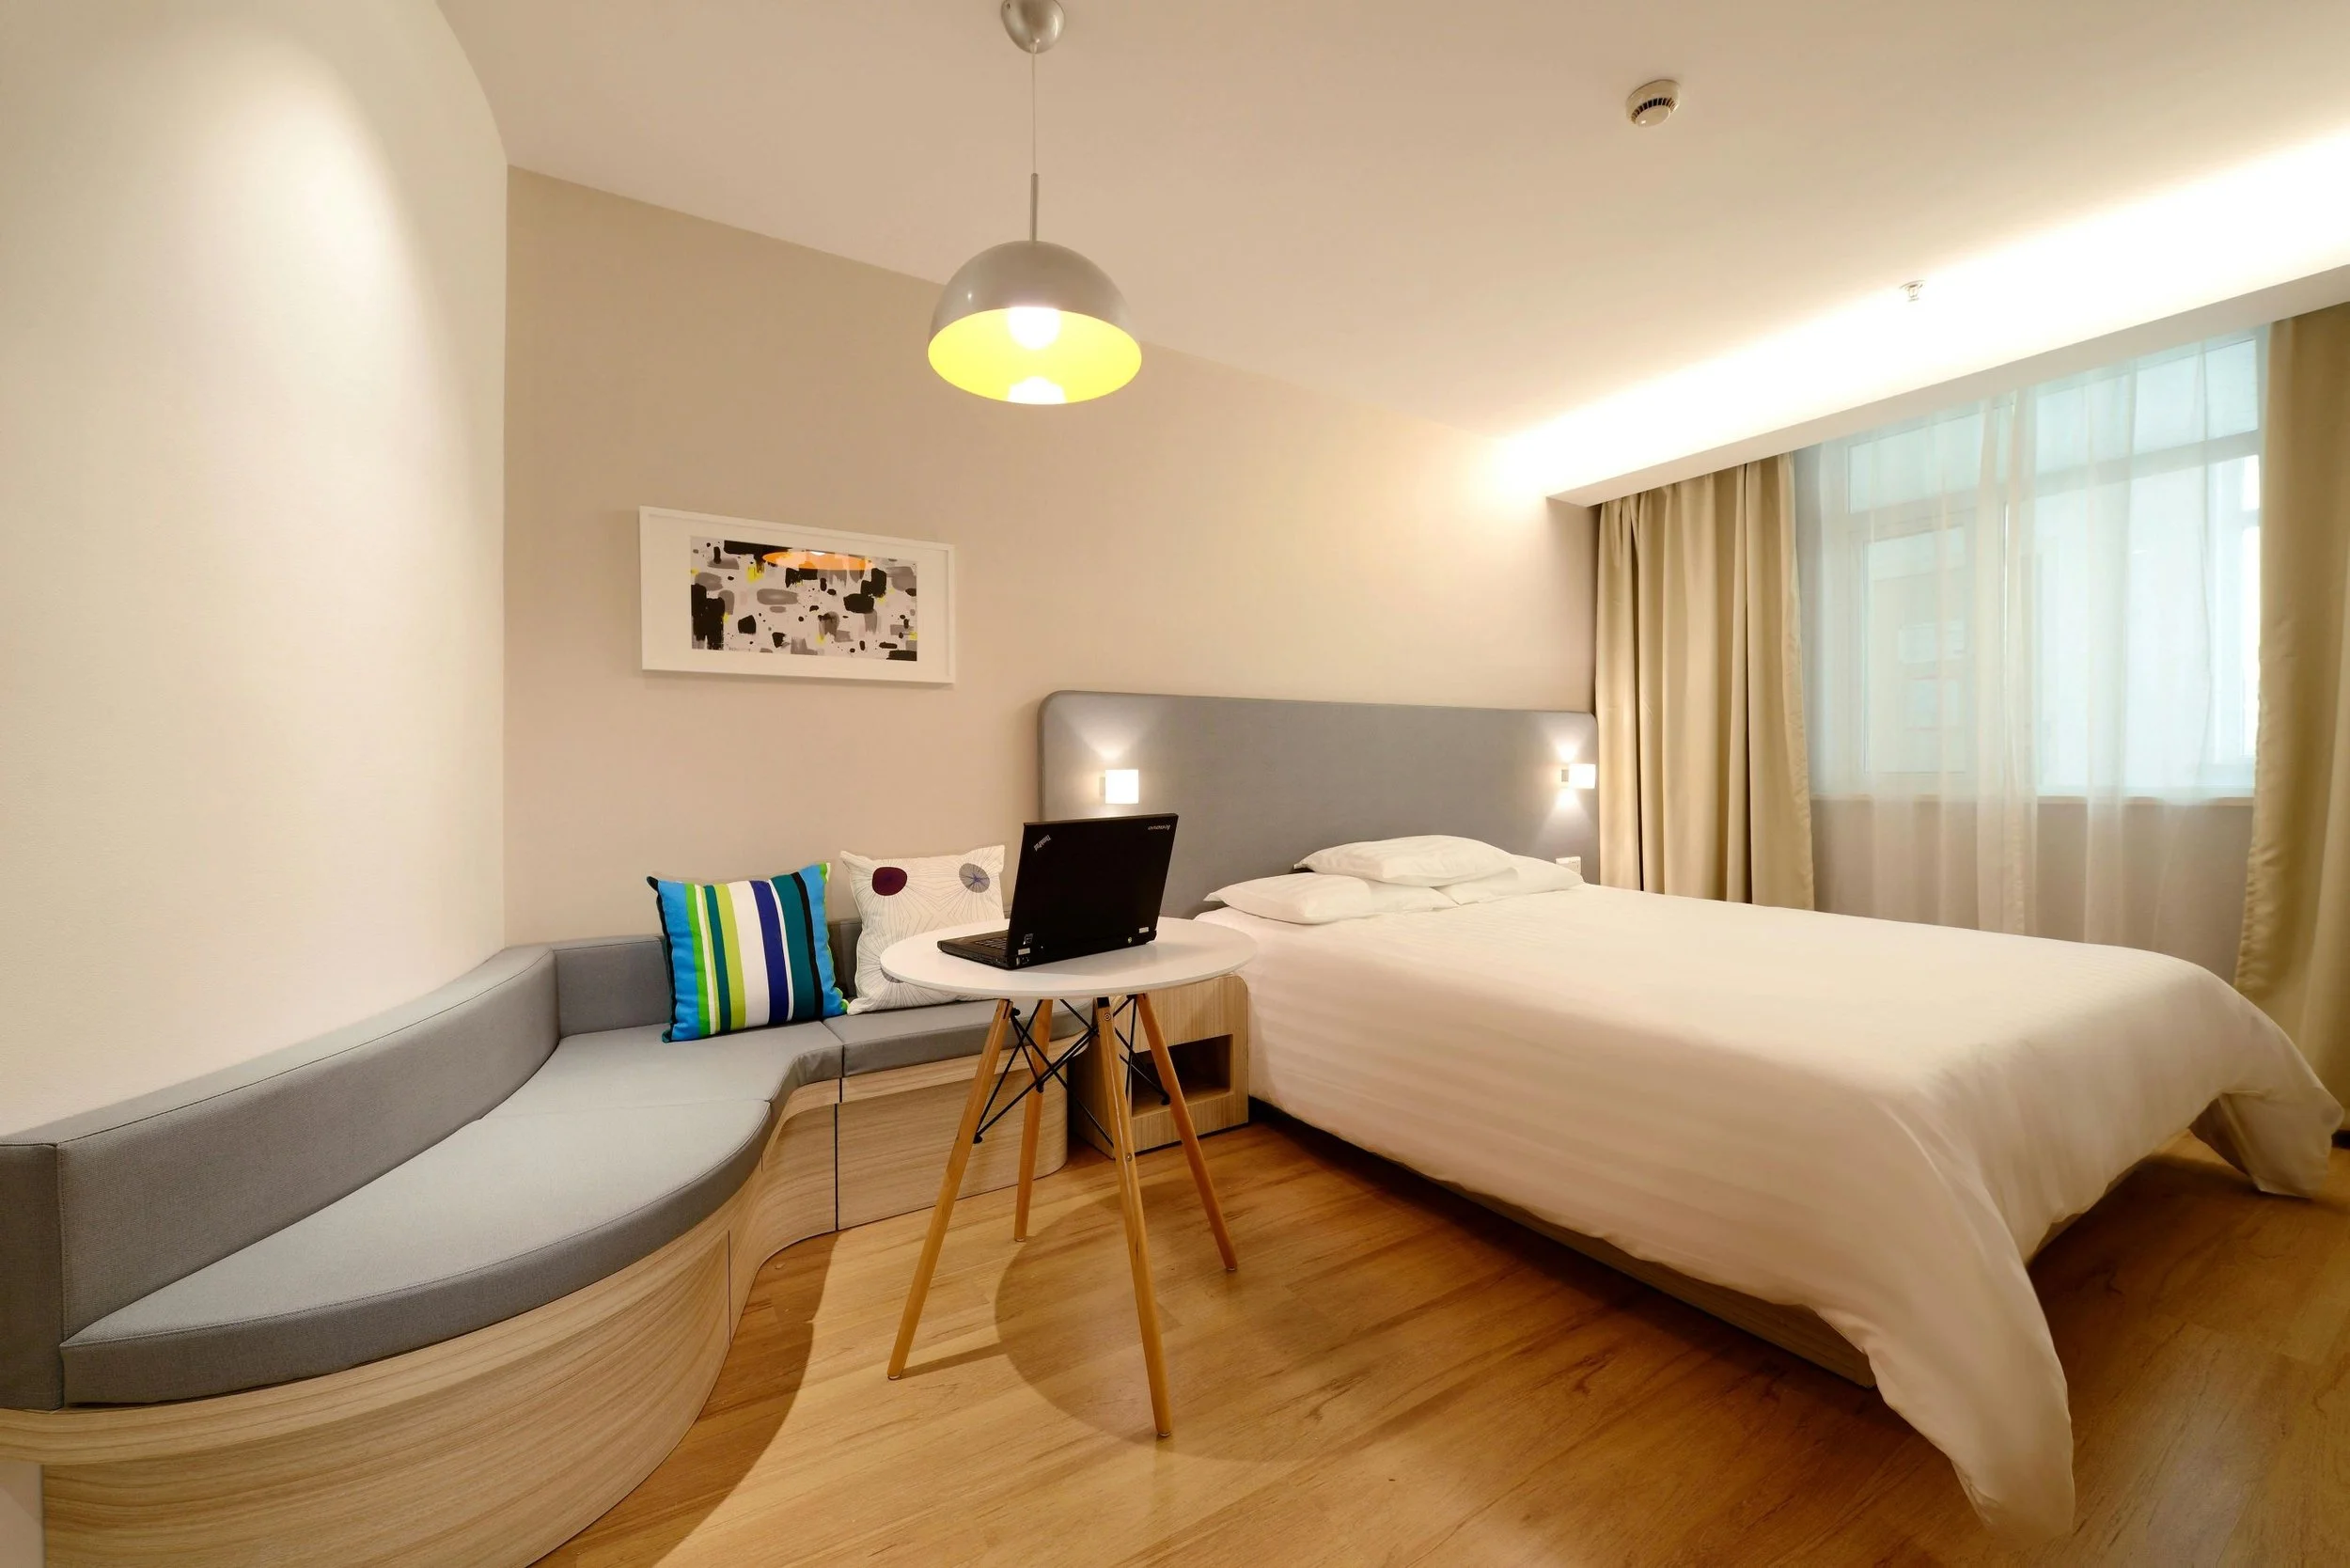
This is not my guest bedroom, but I like this photo because it does show proper zoning, with a defined zone for sleeping and one for sitting and working on the laptop. Photo by Pixabay for Pexels.
Zoning a room
Let’s bring this together with a real-life example from my own home: the spare room. When my husband and I first moved into the house, this room was strictly a guest bedroom, with a double bed and two nightstands. Eventually, we had kids, and the room that I had been using as a craft room (sewing supplies, wrapping paper, etc.) had to become a child’s bedroom, so we relocated the craft supplies to the guest bedroom. This meant trading the bed for a Murphy bed, which takes up very little room when not in use, and setting up the sewing machine on a sturdy folding table, which can be put away in the garage when we have guests. Eventually, during the pandemic, it doubled (tripled?) as a home classroom, with the sewing machine set aside on the floor and a laptop on the table instead. Fast-forward to today, and it’s also the music room, currently holding a marimba as well as a drum set, plus an electric guitar. Oh, and did I mention it’s where I do my ironing?
As you can imagine, this room has A LOT of stuff in it! But it works for us because we use all those things, albeit at different times. And yes, we do have to move them out of the way temporarily when we have guests, so our “guest bedroom” is certainly not Pinterest-worthy! But it is organized because we’ve set up the items there in zones and we kept only what we used. And, let’s be honest, because we have a contingency plan for where to temporarily store those items when the room is used as a guest bedroom! It is perfectly functional for our lives at the moment, though it’s not “perfect” at all.
Hi there! I’m Amélie, a professional home organizer in San Antonio, Texas. I help people like you declutter their home, organize their belongings, and simplify their life. I love cleaning out a closet and removing a carload of donations from a home! My goal is to help you create a functional space that will make your life easier and more peaceful.
Interested? Check out my personalized services or book your complimentary consultation!
Storing Christmas ornaments
[Note that this post contains some affiliate links. This means that if you were to make a purchase on Amazon using one of those links, I would get a tiny commission, at no extra cost to you. The hard-sided bin I recommend is one I own and paid for myself; the tree bag is the one I would buy if I had to part with my current model, which is no longer being made.]
Here is how I store Christmas ornaments to make things easier on myself when I put up the tree the following year. Really, a lot of organizing is about making things easier for Future-You! (You can also check out my recommendations on how to store your gift wrapping supplies.)
First, make sure to donate any ornaments you no longer love, and discard those that are damaged.
Tree ornaments
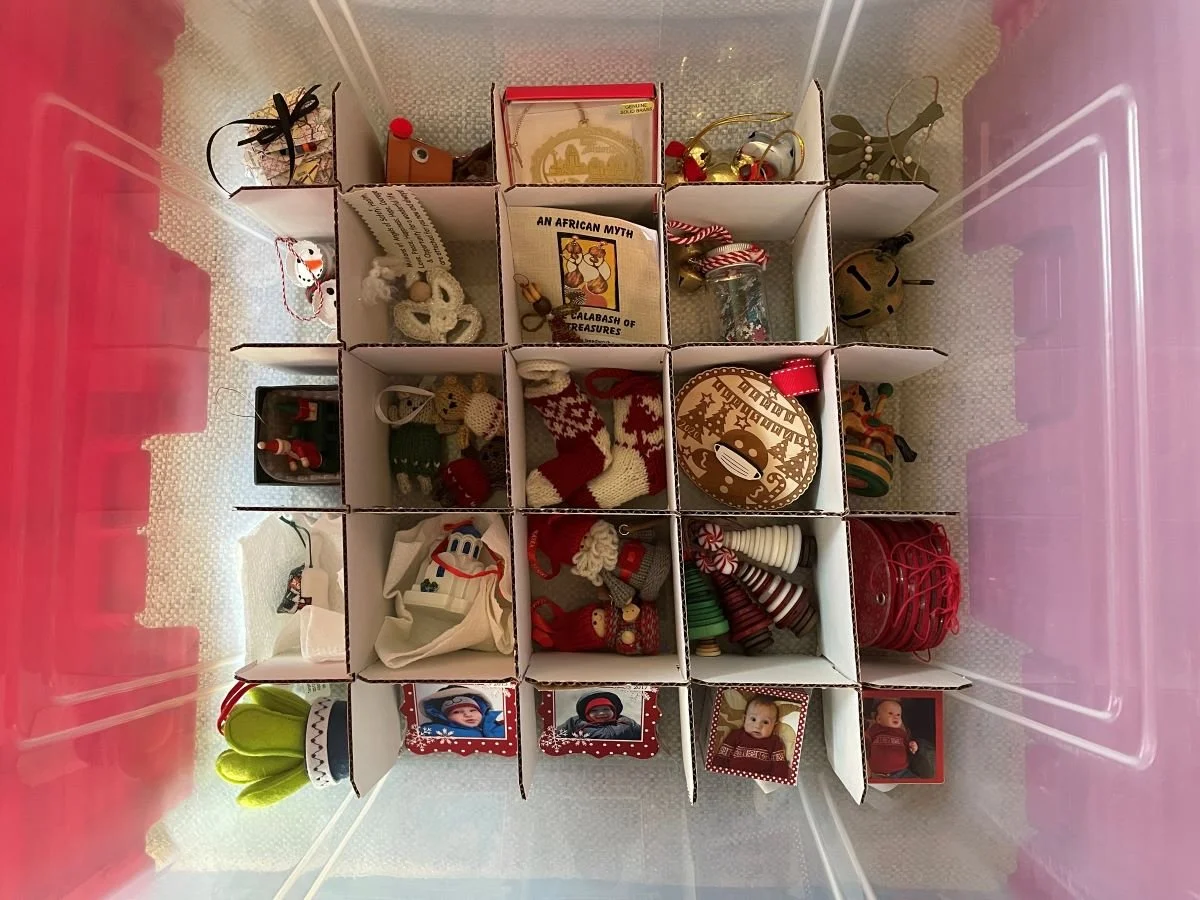
I use a hard-sided storage box like this one, though some soft-sided boxes (like this small one or that larger one) look great, too. I especially love the cardboard dividers inside, which keep your ornaments secure and tidy! They also help set a limit as to how much stuff you can keep – if you are getting those boxes for the first time, make sure you have decluttered your decorations and then buy a box (or more) with enough compartments for your collection.


Resist the temptation to cover things in layers of tissue paper. You run the risk of tossing out ornaments because you can’t see them and assume it’s just a wad of paper! You can always create a nest of tissue paper in a cardboard compartment for something especially fragile, or get a special box for it, but make sure you can still see everything. Another idea would be to store the small fragile ornament in colored tissue paper to make sure it stands out.
To take things one step further, here’s what I recommend: put all the smallest ornaments on the bottom layer in the box. Those are the last ornaments that you’ll be putting in your Christmas tree, so it makes sense for them to be the last ornaments you’ll unpack from that box! You can put the other layers on a flat surface in the meantime and fill them, then transfer them back to the box when you’re ready. I’ve added a jar of extra hooks in one slot.

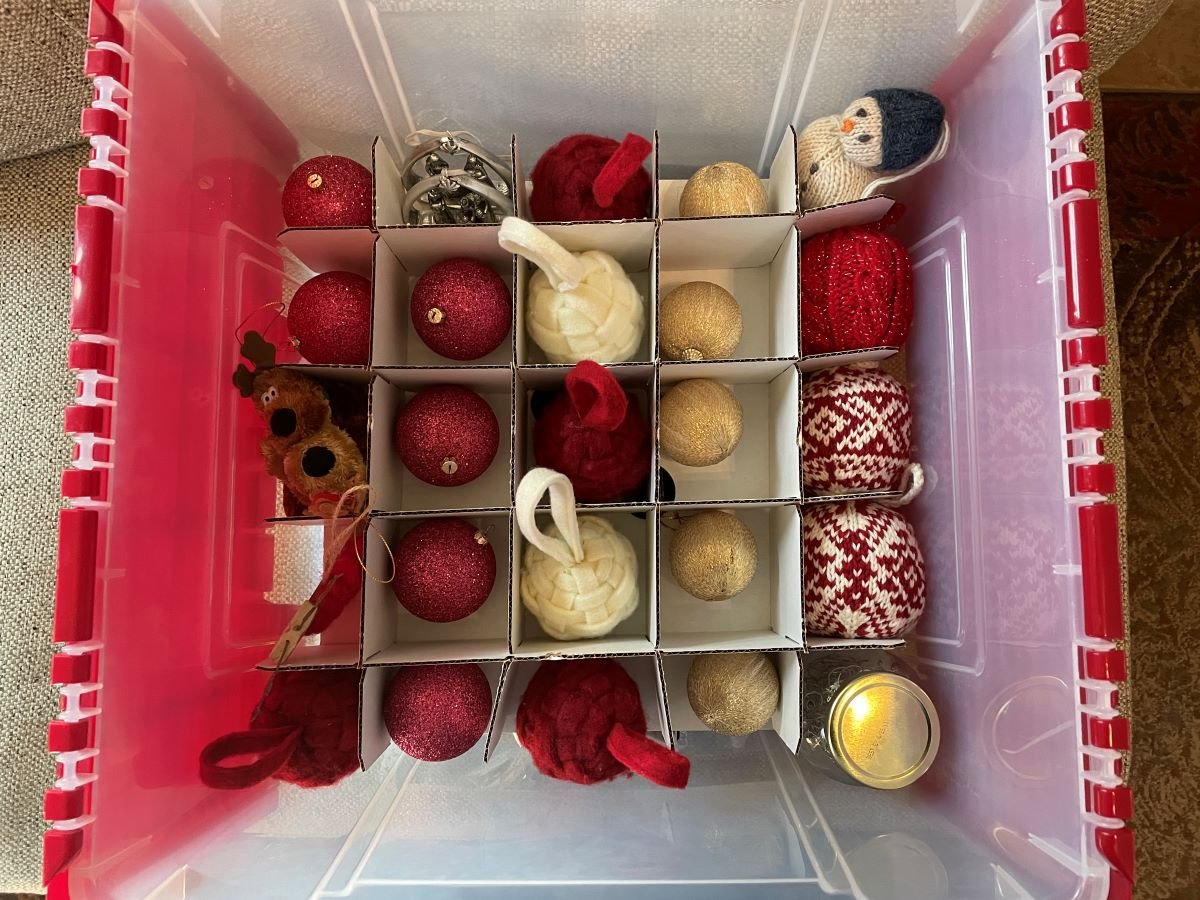
When there are a lot of the same series of very small ornaments, I put them together in a clear plastic bag so that they are visible and are stored together.

I also wrap garlands around a piece of cardboard, which keeps them tangle-free until the following year.


Another idea is to use velcro straps to wrangle garlands or strings of lights if you prefer that to cardboard.

Artificial trees and wreaths
As for storing an artificial Christmas tree, I’m a big fan of sturdy bags like this. The large handles and wheels make it easier to carry. It’s water-resistant and will help protect the tree from dust and critters. Just make sure you take the tree apart (it’s often in three sections), fold back the branches to prevent them from getting bent, and store them in the bag, biggest on the bottom, with the pole end toward the middle. This also helps keep the tree and its accessories contained in one spot. Ideally, you’ll want to store it someplace that doesn’t get too hot or too cold (so, not the attic or garage), especially if it has white limbs or fake snow, though this isn’t much of an issue with green trees. The same is true with artificial wreaths, for which you should get a container of the appropriate size.
Let me know if you have any decorations that I have not addressed here!
Organizing crafting supplies
There are lots of reasons why you might want to organize your crafting supplies. Maybe they take up too much space in your home, space that you could use for something else. Maybe you would save money if you didn’t end up buying the same things multiple times because you couldn’t find them when you needed them. Or maybe being less frustrated with your supplies would increase your enjoyment when you craft, making it more likely that you would complete your projects. The reason decluttering them gets tricky is that, by their very nature, crafting supplies spark joy!

This photo was taken by Volodymyr Proskurovskyi for Unsplash.
How to choose what to declutter
First, get real about what you do. Is this a case of fantasy self, where you imagine a version of you scrapbooking, but in reality, you know you’ll never actually sit down and do it? Do you have enough supplies to sew several quilts, but really, you’ll never get around to making even one? Did you start a project that you are no longer excited about and don’t want to continue? It’s fine to let go of those supplies that can still be useful if YOU won’t use them. (I can also help find good homes for those items so they don’t end up in a landfill – I’ll give you some ideas below.) This helps make room for the supplies you will actually use!
Second, look at the leftovers from previous projects. If you have a yard of fabric left and really love it, it’s reasonable to think you will find a way to use it! But if all you have left are a few scraps, or less thread on your spool than it takes to fill a bobbin, please let it go. These items can be recycled responsibly, and getting rid of them will free up so much space! On the off chance that you then need to purchase something again, I guarantee you that the 20 minutes or $20 you spend doing it will be worth the extra space you’ll have after decluttering.
If there is anything clearly expired or unusable, like dried up paint, frayed or stained fabric, or paper with water damage, please let it go without guilt.
You can also assign yourself a specific project with a deadline. For example, if you love love making greeting cards and gift tags with odds and ends from various projects, gather ALL your scrap supplies and schedule a time to use them. Whatever is left over after that date goes – and then remember to actually use the cards!
Finally, you know which items were pleasant to work with and which were low-quality and made the experience frustrating. Recycle all those unreliable items and keep only the best, most useful ones.

This photo was taken by Jess Bailey for Pexels.
How to store your crafting supplies
I always say that your things should be easily accessible. It may not be feasible to leave your sewing machine set up on a table at all times, but it can’t be stored away too far either, or you’ll get overwhelmed by the mere thought of setting it up!
A spare dresser is usually a great way to keep things accessible, but not in plain sight all the time. If you want to use labels, you can put them on the lip of the drawers so that they are only visible when the drawer is open – this will reduce visual clutter. You can also use stackable plastic drawers, or add an over-the-door storage rack in a closet or craft room.
Location is important as well. I love knitting, and I pretty much only knit when I’m in front of the television. So for me, it doesn’t make any sense to store my knitting supplies in a separate room – I store them in the living room, where they are easily accessible when I use them. That also limits how much I can own at any given time, because I don’t want the space to look messy!

This photo was taken by Tanaphong Toochinda for Unsplash.
Where to donate your discards
If the item can still be useful to crafters, you have several options. You could donate your supplies to schools or scout troops. You can also post them for free on Nextdoor or a local Facebook group.
In San Antonio, we have a second-hand store called Spare Parts which accepts donations of arts and craft supplies. If you want to find a good home for your discards while supporting a non-profit, this is a great place!
If you have a project that is unfinished due to disability or a loved one’s death, consider Loose Ends, which can match you up with a volunteer who will finish the project for you.
March may be National Craft Month, but it is always a good time to organize crafting supplies!
Gift Wrap Storage
This post contains one or two affiliate links with Amazon, which means that if you make a purchase using that link, I’d receive a small commission, at no cost to you. I do not have such a deal with The Container Store, though if you hire me to shop with you, I can get you my organizer discount on your purchase!
A common pain point, especially around Christmas, is how to store gift wrapping supplies. I’ve even met one person who is so unsure of how to deal with it that she actually throws everything away after Christmas and just buys new supplies every December. That’s certainly one way to deal with it, but let me help you be more efficient!
Declutter
The first step is to declutter what you own. I’m the type of person who always saves supplies if they are still in good condition, but I do get rid of those that are torn or wrinkled. I’ve also added a few reusable supplies, like furoshiki (squares of fabric) and cloth ribbon for wrapping gifts, alongside the usual disposable or recyclable supplies.
If you are trying to streamline what you own, consider creating a capsule of sorts. For example, if you were to buy plain red paper, you could use it for Christmas and Valentine’s Day as well as birthdays! You can also pick only wrapping paper that contains at least *some* red, and then as long as you have red ribbon and red gift tags, you’re all set! Limiting the colors of your supplies actually make them more versatile.
Store
As for storage, if you are low on space and/or budget, the easiest solution is to use a hanging garment bag for wrapping paper and perhaps a pants hanger for ribbon, as below. You might even have those supplies on hand already! If you have a lot of rolls of paper, consider subdividing them, such as one bag for Christmas and one bag for birthdays.


If you like this idea and want something that is more specialized, I recommend this hanging two-sided storage caddy. I love that it has space for bags and gift tags, and you could even store premade bows safely.

Another good way to store gift wrapping supplies is in a tote under your bed. You can opt for a canvas tote or a plastic one. Both allow you to store all your supplies in one spot, though I have a slight preference for the nesting boxes in the plastic tote, which will protect bows more adequately and help you keep accessories in their designated space.

Another solution that doesn’t take up too much space is an over-the-door rack like this Elfa version, below. It fits behind most closet doors, and Elfa systems are highly customizable to your needs.
Finally, if space and budget are not an issue, let me introduce you to the Cadillac of storage solutions: the Elfa Gift Wrap Cart below! I bought mine about 20 years ago and it’s still as good as new! I believe the price was lower back then, but I recommend that you wait for an Elfa sale before buying it. I haven’t labeled the drawers (because I’m basically the only member of my household who uses it), but the top one is for gift tags and scotch tape; the second one is ribbon; then tissue paper, bags, and boxes. And rolls of wrapping paper on the side. Wrapping gifts is such a joy when you’ve got a place for everything!

Keeping counters clear
I am going to be brutally honest and vulnerable here… My kitchen counter was a mess. Not the whole counter, mind you, just the part of it that was on the edge between the kitchen and the living area, right next to the pantry. But things had begun piling up, and the law of entropy kicked in – once things start piling up, the pile attracts more and more things. It’s just physics. It goes beyond “flat surfaces are clutter magnets” because once the first few items have been set down, your brain unconsciously sees it as an invitation to just put more stuff there (one or two more things won’t matter, right?), and then it’s a complete mess.

So when I absolutely couldn’t stand it anymore, I did the only reasonable thing: I took myself on as a client. Meaning, I stopped just letting this pain point exist, I detached myself from the situation, and I looked at it the same way I would look at a client’s kitchen to come up with a solution. Here’s my process.
1- What types of items are on this counter?
Figuring out what types of items make up the clutter is crucial to figuring out how to stop them from piling up! In this case, I had two big categories: electronics (that spot is where we put the tablets and chargers because it’s super convenient) and pantry overflow (things that had not been put away in the pantry properly). The pantry overflow started because I had a big canister that I meant to replace with a smaller one, but I procrastinated and left it out on the counter. Clutter is just unmade decisions, right? And from that moment onward, various items that belonged in the pantry just settled down to live on the counter with the big canister – either they didn’t make it back into the pantry after being used, or they were not put away with the rest of the groceries.
2- Figure out a solution for those types of items!
Alright, the electronics are there to stay, so let’s make it work. I went to The Container Store and looked at a bunch of trays and shallow bins before settling on a water hyacinth basket that looked good to me. Now, the tablets and chargers live in that basket. This works because not only do things stay corralled in there, but they also visually come across as having been put away where they belong rather than left out on a countertop.
As for the pantry overflow, I finally got that smaller canister that fits in the pantry. A few items were consumed as intended, some were returned where they belong, and I made a larger spot in the pantry for backstock to help prevent this situation.


3- Evaluate the solution
To prove my point that clutter attracts clutter, I didn’t tell my family members what I was doing, nor did I give them specific instructions for maintenance. They liked the basket and instinctively understood that electronics go in there. Because there was no clutter on the counter, things no longer piled up there unnoticed. After two weeks, I took another picture to show how it’s going. Two extra things made their way back: one is my husband’s glass of water, which he just always puts down in that spot, and that’s fine. The other is a bottle of supplements to stir in water for one of our kids – it’s just way more practical to have it there instead of in the dining room with the other supplements, so that’s where it lives now. And that’s it!

4- Tweak as needed
Things change in our life – right now we’re in a season where we use those supplements, but eventually we won’t need them anymore. Maybe it’ll be something else left out on the counter instead, and we’ll have to tweak the system to suit our situation at that point. Or maybe I would have needed to reevaluate the solutions I came up with if they had not been working well for us – that happens, and it’s normal. But I think we’ve got it handled for now!
The ongoing cost of ownership
Sometimes, people are reluctant to get rid of items they own because they paid a lot of money for them. I’m talking here about items that are no longer useful or loved or important, but are kept simply because the owner perceives them, rightly or not, as valuable. After all, why would you get rid of something if you paid a lot of money for it? Well, I can see that point, but… Have you ever thought about the ongoing cost of ownership?
First of all, an item takes up space. It doesn’t matter whether it’s a grand piano or a diamond ring, it takes up space in your home, and you pay for space. If it’s a piano, the amount of space is significant! Think about what else you could do with that space if the piano that you don’t use weren’t there. Could you turn that room into a dining room? A home office? A reading nook? Do you have so many unused large items that you are essentially paying rent or a mortgage for a room you don’t need? Are you getting your money’s worth from your space?

This photo was taken by Geert Pieters for Unsplash.
Plus, any object needs to be managed. You have to clean it, clean around or under it, maintain it, repair it, insure it, pick it up and put it away… It costs you time and energy, in addition to mental bandwidth! Managing this item will cost you, and you need to make sure that the cost is worth it in this season of your life.
Then it comes down to the sunk cost fallacy. When we have invested heavily in an item (because we paid a lot of money for it, because we believe that someday we will use up all those scrapbooking supplies, etc.), we are reluctant to let it go, even when we know that letting it go would be more beneficial than keeping it.

This photo was taken by Volodymyr Proskurovskyi for Unsplash.
There are two quotes on this topic that I’d like to share, and I say variations of these things to my clients often. First, Peter Walsh wants us to keep in mind that just as “inexpensive is not a good reason to buy something, expensive is not a good reason to keep something.” Also, Cassandra Aarssen says, “Remember that the money you spent on your item is gone. You will not be richer because you store this item in your home, and you won’t be poorer if you let it go.”
An obvious solution, in those cases, is to sell the item. Or at least, it seems easy in theory, but is less so in practice. Ask yourself whether selling the object is really worth your time and effort. Will you post pictures of it online and field inquiries from people who might be interested, or pay to ship it to the buyer? Will you really have a yard sale or go to multiple consignment stores? Will you be satisfied with getting only a fraction of your money back after all that effort? If yes, then go for it!
Here’s another solution: look at the cost you already paid as a rental fee. You’ve gotten whatever use you were going to get out of this, and now it’s time to let it go. If you must try to sell it, give yourself a deadline after which you will just donate it. Move it along to its next owner, and your payment will be the peace this brings into your life. Besides, the money you spent on it is gone already, even if you were to keep the item! At least this way you get your life back.

This photo was taken by Fuu J for Unsplash.
8 organization hacks for families with kids
As any parent knows, keeping a home organized and orderly is no small feat, especially when kids are involved! From toys and clothes to school supplies and sports gear, kids tend to come with a lot of stuff that can quickly take over the house. Fortunately, with a few smart organization hacks, it’s possible to maintain a tidy, clutter-free home even with children around.
Here are some of my top organization hacks for families with kids!

1- Create designated toy zones. Instead of letting toys take over the entire house, consider creating specific zones where they can be stored and played with. This could be a toy chest or pull-out drawers in the living room, a playroom with shelves or cubbies, or a basket in a corner of your child’s bedroom. By keeping toys contained to specific areas of the house, you can both keep things tidy and help your kids stay more focused during playtime. This also prevents a collection of toys from growing out of control, since it sets a limit to how many toys they can have – when toys no longer fit in the designated space, you must get rid of some of them.
2- Use storage bins and baskets. Bins and baskets in various sizes are a great tool for organizing all sorts of items, from blankets and throw pillows to stuffed animals and small toys. Consider getting a few different types – some with lids for items that need to be hidden away, and others that are more open and accessible. You can have your kids help you label the bins and baskets with words or pictures to make it easier for them to put things back where they belong. (I recommend having no more than a few different types of containers in the same space, though, to keep the overall look cohesive.)
3- Install hooks. Whether you’re dealing with backpacks, jackets, or sports gear, having plenty of hooks around the house can go a long way in keeping things organized. Consider installing hooks in your child’s bedroom, in the entryway or mudroom, and in the garage. You can even get creative with the placement and appearance – for example, you could hang a few hooks on a reclaimed wooden board and mount it to the wall for a rustic-chic look. Just make sure that the hooks are low enough for the kids to reach!
4- Simplify your child’s wardrobe. Kids can accumulate an impressive number of clothes, but just like us, they tend to wear the same few items over and over again. To cut down on clutter and simplify your child’s morning routine, consider curating their wardrobe to include only their favorite pieces, making sure that everything fits them and that they have enough seasonally appropriate items. You can also try doing a capsule wardrobe by choosing a limited number of pieces that can be mixed and matched to create a variety of outfits. (I like to buy my sons neutral pants and colorful shirts, so they can’t really go wrong when they get dressed by themselves.)
5- Utilize vertical space. Even if your home is on the larger side, it’s important to make use of every inch of space you have. Consider using vertical space to your advantage by installing shelves or cubbies, or even hanging a shoe organizer on the back of your children’s bedroom door. This is a great way to store items that might otherwise take up valuable floor space.
6- Get creative with labeling. Labels are a great way to keep your home organized, but they don’t have to be boring! You can use fun graphics or assign colors to different categories (like green for sports gear, blue for sidewalk chalk and bubble wands, and so on). You can even have your kids help you design the labels as a fun family activity.
7- Make cleaning up fun. It’s important to remember that organization doesn’t have to be a chore. Get kids involved in keeping the house tidy by turning it into a game or a race, or play upbeat music while you work. By making organization a positive experience, you’ll all be more likely to stick with it long term. You’re also instilling good habits in your kids and teaching them life skills.
8- Have a donation bin. Use a large box (such as this one) to store any clothes, toys, and books that have been outgrown. Once it’s full, donate the contents!

In conclusion, keeping your home organized with kids can be a challenge, but with a few smart hacks and a little creativity, it’s absolutely doable. By creating designated toy zones, using storage baskets and hooks, simplifying your child’s wardrobe, utilizing vertical space, labeling, and making clean-up fun and practical, you can maintain a tidy, clutter-free home that’s both functional and beautiful. Remember, organization isn’t a chore, it’s what makes your life easier!
The junk drawer
I recently saw this Etsy listing for a junk drawer starter kit, containing batteries, rubber bands, matches, a screwdriver, a flashlight, scissors, tape, and a pen. At first I laughed, but then realized that the things in there were useful and, therefore, this was not necessarily a gag gift. But it also made me want to define exactly what a junk drawer is.

Photo taken by Karolina Grabowska for Pexels.
According to Wiktionary, a “junk drawer” is a “drawer designated for the storage of various miscellaneous, small, occasionally useful items of little value.” The reason I don’t really like the term “junk drawer” is because to me, “junk” makes it sound like useless stuff, whereas in people’s homes, the contents of the junk drawer are actually useful!
The mid-century modern furniture company Joybird conducted a survey of 1,900 people in 2020 and determined the top 10 items that people keep in their junk drawer, which are (in order): tape, pens, spare batteries, scissors, flashlights, glue, paper clips, matches, rubber bands, and keys.

Infographic reprinted with permission from Joybird.
So here’s the thing: even though I consider myself to be someone who does not have a junk drawer, I do have all of these items in my home – they are just not stored together. I have a home office (albeit in an open area), so office supplies like tape, pens, scissors, glue, and paper clips are stored there. I keep the flashlight and spare batteries in the hall closet, the rubber bands in the pantry, and the matches (along with birthday candles) in a high cupboard out of reach of the kids. In the kitchen, I do have a small drawer of miscellaneous useful items such as masking tape and a marker (to label things going into the freezer), kitchen twine, bag clips, and a first aid kit, but to me that’s a utility drawer, not a junk drawer. It’s all in the wording, right?
The important thing is for every item to have a place, so that you know just where to look for them (and put them away). I love using small trays such as these to corral small items in place. Small trays allow you to customize your drawer, and designating a home for your items keeps order in the drawer and helps you find things more quickly. You can also use small boxes, lids, or even mismatched saucers. If you’re like me and like to label all the things, consider clip labels made specifically for drawer organizers! Labels aren’t necessarily for you so much as for the other members of your household to know where to put things back, instead of just tossing them in there and shutting the drawer.
Here’s to making peace with your junk drawer!
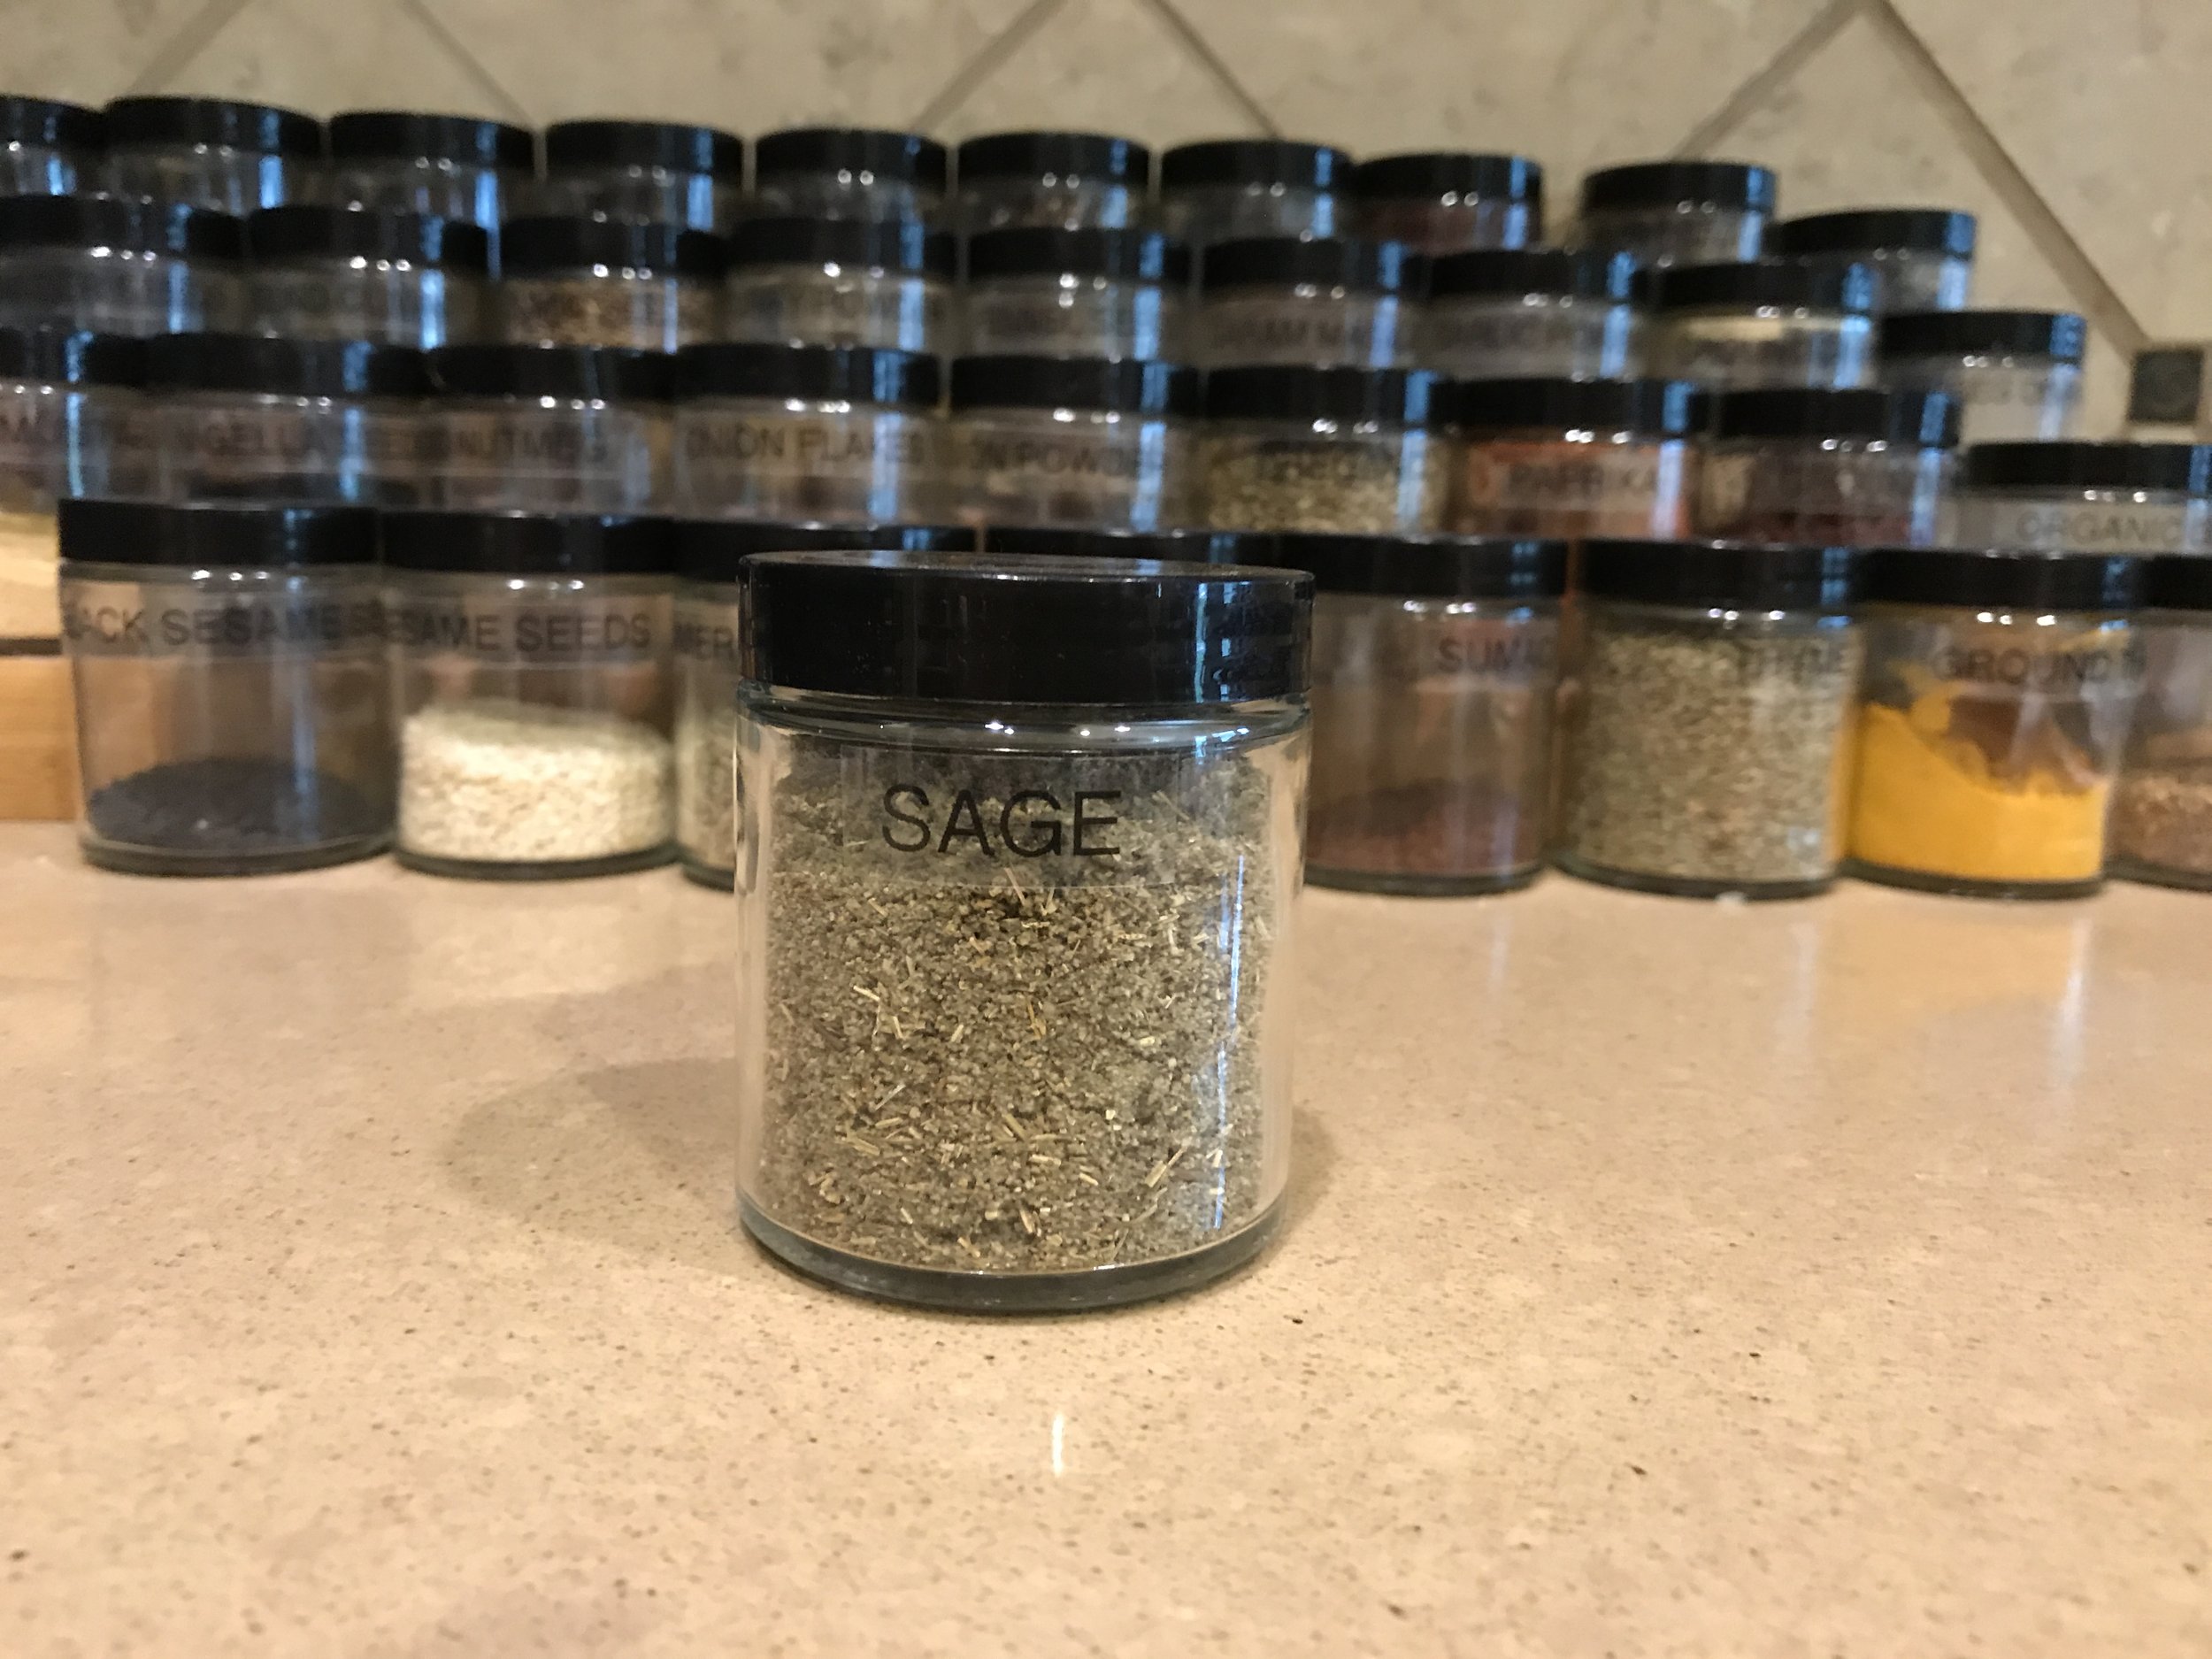
Spice storage
[This post contains some affiliate links. This means that if you were to purchase a product using my affiliate link, I would get a tiny commission, at no cost to you. As always, I only recommend products that I own myself or that I would buy if I were starting from scratch.]
I decided to write a quick post about my spice storage at home. No matter where you live, whether it’s a single-family house or a studio apartment, whether you own or rent, one constant is that you have a kitchen. There’s a place where you prepare food, which means there are spices. And it’s so common to see spices out of control in a kitchen! They come in different containers: glass jars, metal tins, plastic bags and boxes. Even if you stick to only glass jars, they come in different shapes and sizes! What’s a home cook to do?
The main problem with commercial spice racks is that they don’t seem to be designed by people who cook. If they were, they would hold more than 12 or 20 jars, for one thing! I have about 44 spices in my set, and I would be at a loss to pare it back below 40!

Here’s my recommendation for storage: If there is one single thing you can do to help get things under control, it’s to decant all your spices into uniform-looking jars. Personally, I favor short, wide jars with a 4-ounce capacity, like these affordable and sturdy ones. The wide mouth of the jar allows you to dip measuring spoons into it, which makes your life so much easier than trying to tip out the right amount of spice! They are also big enough for the contents of most spice bottles. Then, instead of a rack, place your jars on expandable risers like these. You can put them in a cupboard to protect the spices from the light, but tinted jars work too.
The set to which I linked above comes with chalkboard labels and a chalk marker, so there’s no need to buy a label maker if you don’t have one already. You can also consider using a white paint marker directly on the glass jar. If you have room for the jars in a drawer, you can label the cap. And with a custom-sized sheet of galvanized metal and some magnets, you can make a magnetic spice rack!
Another tip is to organize your spices alphabetically. I started doing this when I was 20 or so, after accidentally buying a second jar of tarragon when I didn’t realize I already had one – and I don’t even like tarragon all that much in the first place! Some people like grouping their spices by themes, like putting all the holiday baking spices together, but to me this becomes confusing when I’m cooking Indian food and need cinnamon, for example.
You’ll notice that this set creates clear limits for my spices. When I added dried sage last fall, it took the place of grains of paradise, which I wasn’t really using anyway. Having a space budget helps keep things under control!

Not only do these jars look fantastic, but they are also more functional than the original containers. Both aesthetics and functionality will help you be more at peace in your kitchen, and that, to me, is the point of organizing.
Minimalism
As I start my journey into professional organizing, I’ve noticed that there’s a chasm between what the word “minimalism” means and what the general public envisions. I bet some of you are already picturing a monk’s room, devoid of all material possessions. While that may look peaceful to some, it can lack warmth and comfort, not to mention that it is not at all practical for most people! However, I’m here to say that what you’re thinking of is actually asceticism, not minimalism. The Oxford Dictionary defines “asceticism” as “severe self-discipline and avoidance of all forms of indulgence.” That’s not what I preach.
I like the way Joshua Becker, of Becoming Minimalist, defines it: “Minimalism is the intentional pursuit of the things we value the most and the removal of anything that distracts us.” This essentially means that it’s about removing clutter from your life, whether we’re talking about clutter that is physical (my specialty) or not (overloaded schedule, for example). He says that “minimalism isn’t about removing things you love. It’s about removing the things that distract you from the things you love. It’s about living more by owning less.”
You see, removing distractions allows you to focus on what is most important to you. You own your stuff, not the other way around! When you aren’t distracted by clutter taking up your mental bandwidth (what we might call “visual pollution”) or by objects taking up your time (maintaining them, cleaning them, putting them away), you are then able to focus on what you actually want to do.
I’m aware that some people are vehemently opposed to minimalism, because they see it as “just another boring product wealthy people can buy”. However, to me, that’s missing the point. It’s really just criticism of a certain aesthetic that, granted, we see often, but is not minimalism per se. Minimalism will look different for every household, but to me, it always seeks to improve one’s life by simplifying it.
Of course, that’s easier to say when minimalism is a choice, but it’s not pleasant when it is forced upon us. Did you know that over 60% of Americans can’t deal with a $500 emergency? And that was BEFORE 2020 hit!
In Quebec, where I’m from, I often heard the concept of “voluntary simplicity,” which doesn’t seem as widespread in Anglophone culture. It’s essentially about mindfully choosing how we spend our money and being satisfied with less. In an article titled “The Voluntary Simplicity Movement: A multi-national survey analysis in theoretical context” (published in the Journal of Consumer Culture), Samuel Alexander and Simon Ussher say that “the Voluntary Simplicity Movement can be understood broadly as a diverse social movement made up of people who are resisting high consumption lifestyles and who are seeking, in various ways, a lower consumption but higher quality of life alternative.”
In my line of work, I’ve seen that the initial effort (decluttering, organizing, and changing habits) is time-consuming, but the rewards are reaped later and are well worth it. Don’t let people scare you with tiny living and drastically down-sizing, because that’s not at all necessary! Simple living is the way to go.
If you want to read more on the subject, in addition to Becoming Minimalist, I also recommend Be More with Less. That blog is run by Courtney Carver, who created the fashion challenge Project 333, which I believe was the original capsule wardrobe. If videos are more your thing, there’s the lovely Minimal Mom on YouTube. And let’s not forget Minimalist Baker, whose food blog has recipes call for 10 ingredients or fewer, 1 bowl only, or 30 minutes or less to prepare.
As always, I’m available to answer your questions on the topic!