Gifting without the clutter
We all want to give gifts without creating clutter for the recipient. And when we come across something we just know they will love, it’s like everything falls into place! But what if we simply don’t know what to give them? I’m thinking of someone whose gifts from his father have consistently missed the mark for the last 20+ years, and I’m sure we would all like to avoid similar situations!
This photo was taken by Jess Bailey for Unsplash.
It turns out that gifts must actually fill two purposes: please the recipient, but also please the giver. The recipient might prefer meaningful or practical gifts, while the giver will often focus on the “wow factor” when the recipient unwraps the gift, instead of on the pleasure the recipient will have when they use the gift in the weeks, months, or years to come. The giver will also want to find a gift that aligns with their own tastes and values – someone who reads only fiction will not instinctively be drawn to gifting self-help books or biographies, despite the recipient’s own preferences.
One thing that my family has always done, and that is apparently controversial for some, is to create wish lists. Some people are completely opposed to the idea because to them, surprising the recipient is part of the fun. However, research actually shows that recipients are happier when they get what they wanted in the first place! And isn’t that what giving should really be about, making the recipient happy? We always take the time to write our own wish list and to ask our loved ones what they would like. (An online wish list has the added advantage of avoiding duplicate gifts, which are disappointing for all parties involved.)
As adults, my husband and I have reached the point where there aren’t always many material possessions that we want. Our wish list will therefore include items like an experience: a restaurant meal, concert tickets, a spa treatment, a magazine subscription, a class or workshop, or even a weekend getaway are all possible options. Experiences often make people happier than material goods, anyway. Creating a wish list is itself a joyful experience, because we go through the anticipation and visualization process of getting those things we really want.
With our children, I like to encourage decluttering before the holidays, which not only helps create more room for incoming presents, but can also help our kids verbalize what they would want. They might get rid of a toy because it is broken but ask for a replacement, or they might decide that they want more building blocks of a specific brand because they enjoy them so much, or they might realize that a certain type of toy has been outgrown and is no longer interesting to them. (We donate all items that are still in good condition, which is why I prefer doing this before the holidays so that other kids can enjoy them then, but of course decluttering after the holidays is still a great idea!)
This photo was taken by Valentin Petkov for Unsplash.
When it comes to giving items to people we don’t know very well, or at least not well enough to ask them for a wish list, I like to choose things that are overall crowd-pleasers and that don’t create clutter. Some favorites include gourmet food or gift cards (to a restaurant, a favorite store, or something fun like the movie theater). These are usually superficial enough that they can be enjoyed by most people (or regifted, at worst), and they do not create clutter. That being said, research shows that something with even broader appeal could be better (say, a gift card to Amazon or Target or a Visa gift card, so that the recipient can get what they really want).
Finally, I will leave you with some words from Marie Kondo: “The purpose of a gift is to be received.” If you receive a gift that underwhelms you, make sure to thank the giver for their kindness, because it was indeed nice that they thought of you. You can try using the gift to see if it grows on you, but if it doesn’t, do not feel obligated to keep it! The giver would not want to burden you with it. Feel free to pass it on to someone else who could use it.
By the way, you can see my previous blog post with ideas for Advent calendar options that won’t create clutter!
Hi there! I’m Amélie, a professional home organizer in San Antonio, Texas. I help people like you declutter their home, organize their belongings, and simplify their life. I love cleaning out a closet and removing a carload of donations from a home! My goal is to help you create a functional space that will make your life easier and more peaceful.
Interested? Check out my personalized services or book your complimentary consultation!
Storing Christmas ornaments
[Note that this post contains some affiliate links. This means that if you were to make a purchase on Amazon using one of those links, I would get a tiny commission, at no extra cost to you. The hard-sided bin I recommend is one I own and paid for myself; the tree bag is the one I would buy if I had to part with my current model, which is no longer being made.]
Here is how I store Christmas ornaments to make things easier on myself when I put up the tree the following year. Really, a lot of organizing is about making things easier for Future-You! (You can also check out my recommendations on how to store your gift wrapping supplies.)
First, make sure to donate any ornaments you no longer love, and discard those that are damaged.
Tree ornaments
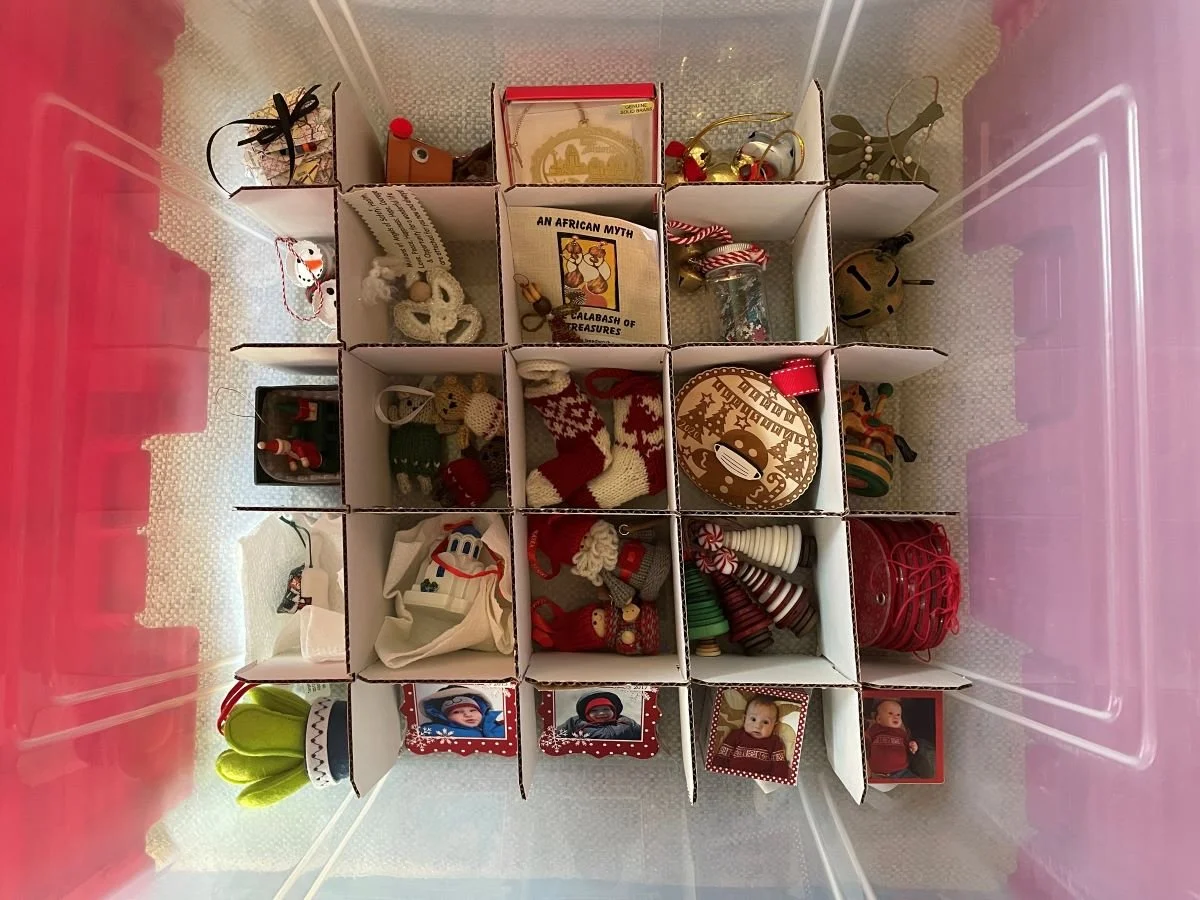
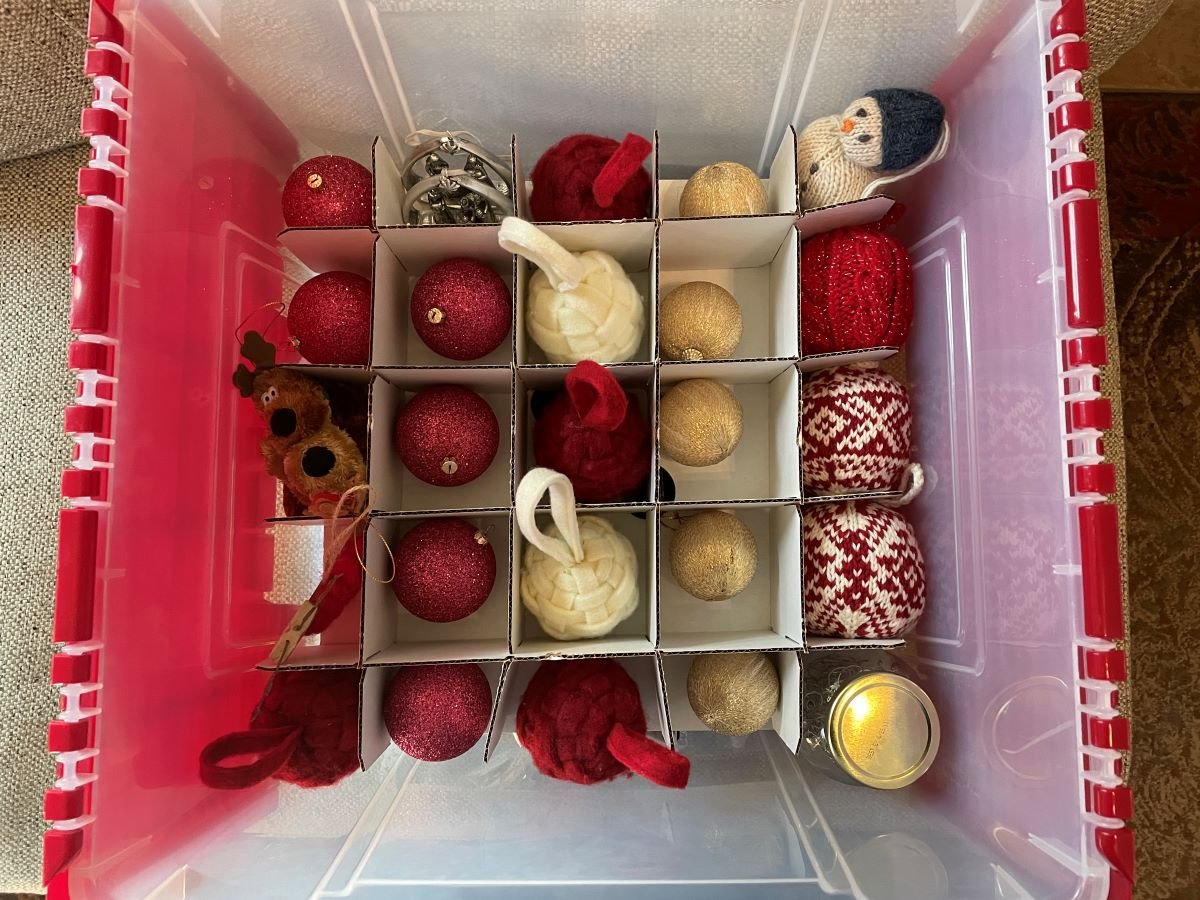
I use a hard-sided storage box like this one, though some soft-sided boxes (like this small one or that larger one) look great, too. I especially love the cardboard dividers inside, which keep your ornaments secure and tidy! They also help set a limit as to how much stuff you can keep – if you are getting those boxes for the first time, make sure you have decluttered your decorations and then buy a box (or more) with enough compartments for your collection.
Resist the temptation to cover things in layers of tissue paper. You run the risk of tossing out ornaments because you can’t see them and assume it’s just a wad of paper! You can always create a nest of tissue paper in a cardboard compartment for something especially fragile, or get a special box for it, but make sure you can still see everything. Another idea would be to store the small fragile ornament in colored tissue paper to make sure it stands out.
To take things one step further, here’s what I recommend: put all the smallest ornaments on the bottom layer in the box. Those are the last ornaments that you’ll be putting in your Christmas tree, so it makes sense for them to be the last ornaments you’ll unpack from that box! You can put the other layers on a flat surface in the meantime and fill them, then transfer them back to the box when you’re ready. I’ve added a jar of extra hooks in one slot.
When there are a lot of the same series of very small ornaments, I put them together in a clear plastic bag so that they are visible and are stored together.
I also wrap garlands around a piece of cardboard, which keeps them tangle-free until the following year.
Another idea is to use velcro straps to wrangle garlands or strings of lights if you prefer that to cardboard.
Artificial trees and wreaths
As for storing an artificial Christmas tree, I’m a big fan of sturdy bags like this. The large handles and wheels make it easier to carry. It’s water-resistant and will help protect the tree from dust and critters. Just make sure you take the tree apart (it’s often in three sections), fold back the branches to prevent them from getting bent, and store them in the bag, biggest on the bottom, with the pole end toward the middle. This also helps keep the tree and its accessories contained in one spot. Ideally, you’ll want to store it someplace that doesn’t get too hot or too cold (so, not the attic or garage), especially if it has white limbs or fake snow, though this isn’t much of an issue with green trees. The same is true with artificial wreaths, for which you should get a container of the appropriate size.
Let me know if you have any decorations that I have not addressed here!
Gift Wrap Storage
This post contains one or two affiliate links with Amazon, which means that if you make a purchase using that link, I’d receive a small commission, at no cost to you. I do not have such a deal with The Container Store, though if you hire me to shop with you, I can get you my organizer discount on your purchase!
A common pain point, especially around Christmas, is how to store gift wrapping supplies. I’ve even met one person who is so unsure of how to deal with it that she actually throws everything away after Christmas and just buys new supplies every December. That’s certainly one way to deal with it, but let me help you be more efficient!
Declutter
The first step is to declutter what you own. I’m the type of person who always saves supplies if they are still in good condition, but I do get rid of those that are torn or wrinkled. I’ve also added a few reusable supplies, like furoshiki (squares of fabric) and cloth ribbon for wrapping gifts, alongside the usual disposable or recyclable supplies.
If you are trying to streamline what you own, consider creating a capsule of sorts. For example, if you were to buy plain red paper, you could use it for Christmas and Valentine’s Day as well as birthdays! You can also pick only wrapping paper that contains at least *some* red, and then as long as you have red ribbon and red gift tags, you’re all set! Limiting the colors of your supplies actually make them more versatile.
Store
As for storage, if you are low on space and/or budget, the easiest solution is to use a hanging garment bag for wrapping paper and perhaps a pants hanger for ribbon, as below. You might even have those supplies on hand already! If you have a lot of rolls of paper, consider subdividing them, such as one bag for Christmas and one bag for birthdays.
If you like this idea and want something that is more specialized, I recommend this hanging two-sided storage caddy. I love that it has space for bags and gift tags, and you could even store premade bows safely.
Another good way to store gift wrapping supplies is in a tote under your bed. You can opt for a canvas tote or a plastic one. Both allow you to store all your supplies in one spot, though I have a slight preference for the nesting boxes in the plastic tote, which will protect bows more adequately and help you keep accessories in their designated space.
Another solution that doesn’t take up too much space is an over-the-door rack like this Elfa version, below. It fits behind most closet doors, and Elfa systems are highly customizable to your needs.
Finally, if space and budget are not an issue, let me introduce you to the Cadillac of storage solutions: the Elfa Gift Wrap Cart below! I bought mine about 20 years ago and it’s still as good as new! I believe the price was lower back then, but I recommend that you wait for an Elfa sale before buying it. I haven’t labeled the drawers (because I’m basically the only member of my household who uses it), but the top one is for gift tags and scotch tape; the second one is ribbon; then tissue paper, bags, and boxes. And rolls of wrapping paper on the side. Wrapping gifts is such a joy when you’ve got a place for everything!
Advent calendar options
I know what you’re thinking – Halloween is just barely over, why are you posting about Christmas already? Well, bear with me! Those of us who fill our own Advent calendars need to get it done before December 1st, so… it’s gotta happen this month. If you’re like me, you don’t want to buy a bunch of trinkets at the dollar store, because then you’ll just end up with a bunch of clutter. But, if your kids are like my kids, they will become *completely* blasé about the chocolate on day 3, and you’ll need some variety in there to keep things interesting.
I figured I’d give you some ideas of things that don’t usually become clutter, as they are meant to be used up. Note that these can also make good stocking stuffers or Hanukkah gifts, or even party favors for the classroom on your child’s birthday or on Valentine’s Day. Let me know if you have other ideas!
Knick-knacks that are not disposable so much as consumable:
individual-sized bubble wands (0.2 oz.)
temporary tattoos
balloons (inflating them and playing with them will make my kids surprisingly happy)
small candy canes
chocolate
Hanukkah gelt
jelly beans
mini Nutella containers (0.88 oz.)
popcorn
cute tissue packets
lip balm
crayons / pencils / erasers
bubble bath / bath bomb
chocolate spoon or individual hot cocoa / hot chocolate packet
fun socks
gift cards/tickets to an activity (movie, zoo, museum…)
Be aware of which days are weekends or early release days, and plan activities for those – just let it be a surprise for your kids!
Activity ideas:
buying / trimming the tree
making hot cocoa / hot chocolate
making gingerbread people or sugar cookies
decorating gingerbread houses
driving out to see holiday lights
watching a holiday movie
doing a puzzle together
playing a new card game or board game


