
Storing socks
This isn’t a real blog post. It’s an inevitable follow-up to my post about simplifying. I want to address a question I get from friends and clients alike, about how to store socks. Can you fold them in such a way that they will stay together? Is it okay to roll them one onto the other or to tie them together? As is the case with many such organizing questions, my answer is: It depends.
The first thing to take into consideration is how you wash and dry your socks. Personally, I do not use the dryer on my clothes (linens, yes, but clothes, no). So once I have clean but damp socks, I smooth them out and hang them on a clothing rack to dry. This means that they dry in a nice, smooth shape, and are then very “docile” about being folded and staying that way.
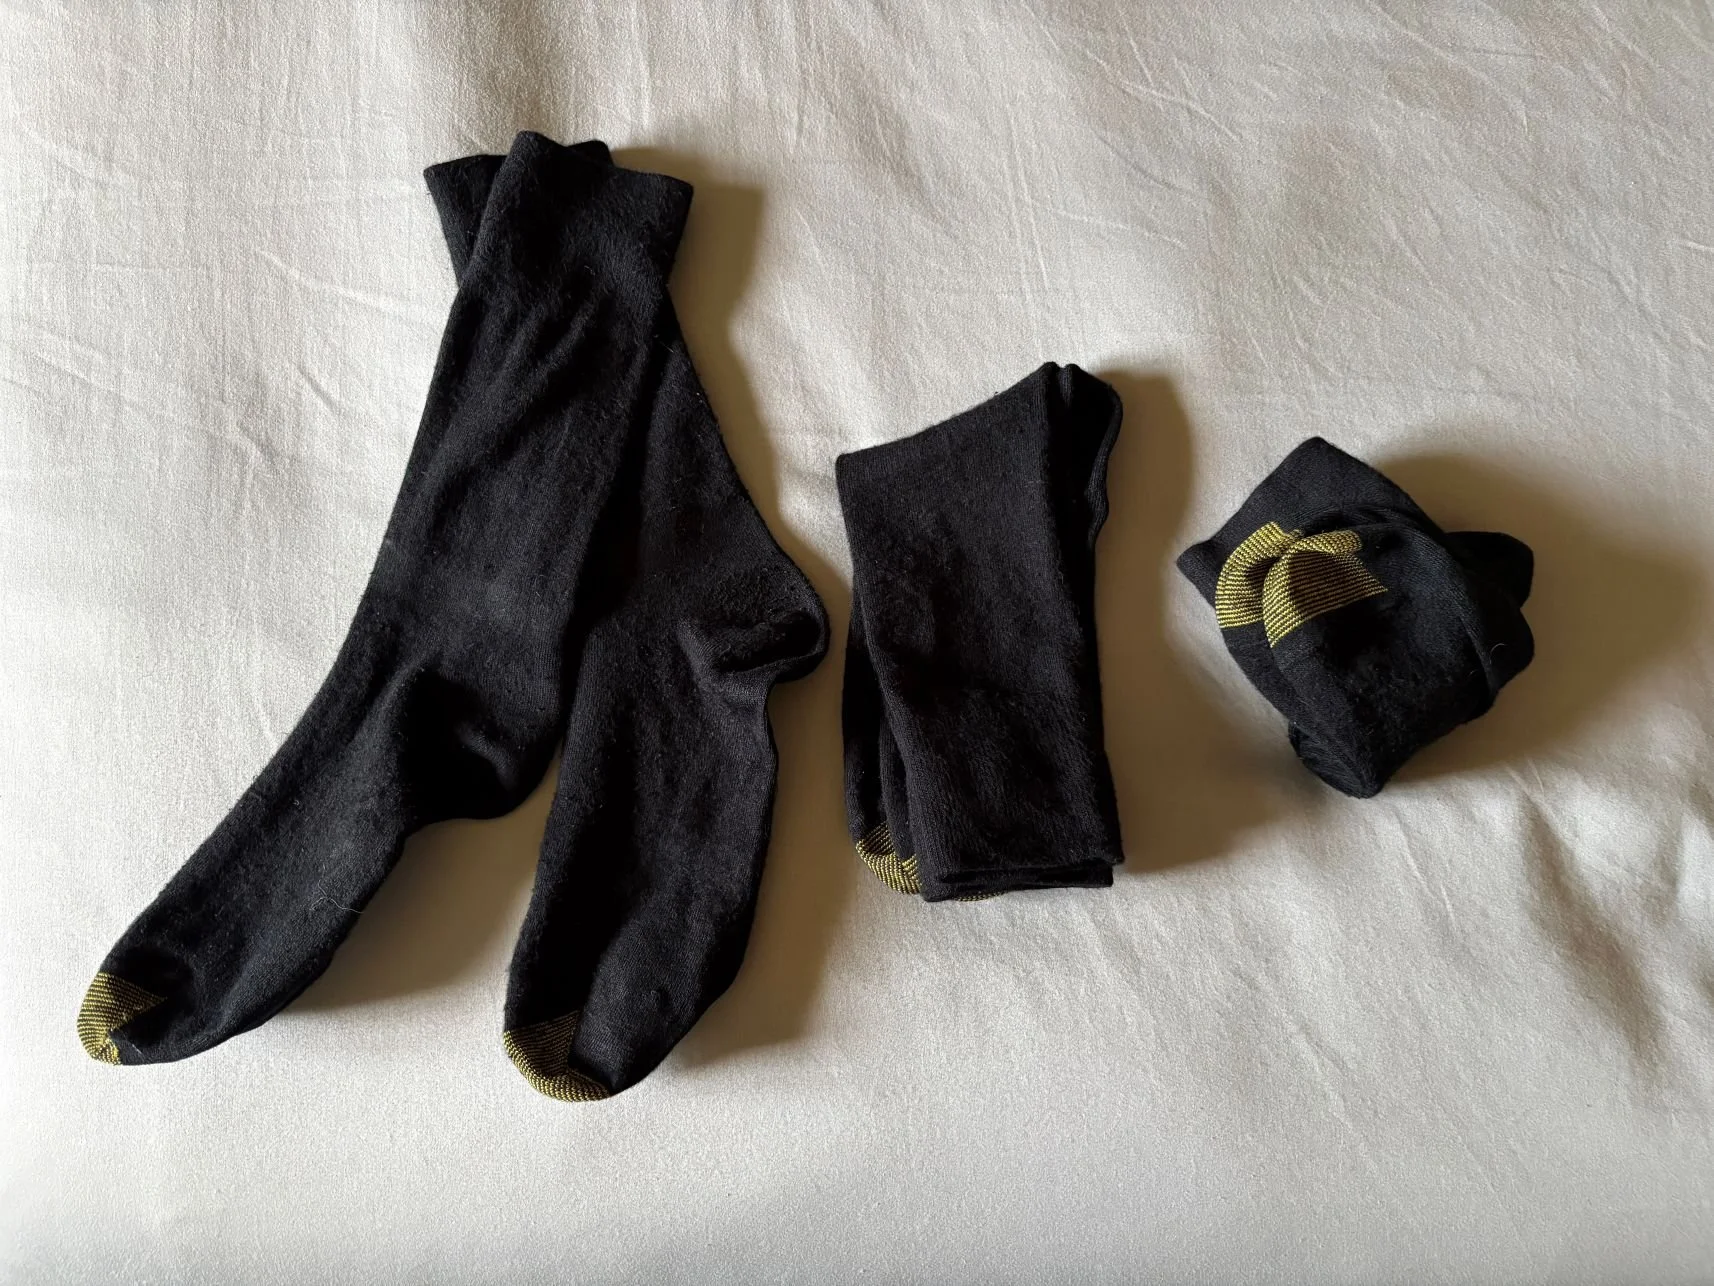
Am I saying that this is how you must wash socks? NO! Many people do not have the time or inclination to hang their clothes to dry and they much prefer using a dryer. That’s fine, but it does mean that your socks will dry with a more crooked or unpredictable shape, so they will be much harder to fold and may not stay neatly folded no matter how hard you try – you’re not doing anything wrong, you just can’t achieve the same results with socks that have been in the dryer. This is the case with many of the homes in which I work, and in those cases, I will “potato” the socks, meaning fold the top of one over the other to keep the pair together in the drawer. (I do not recommend tying them together at all.)
To be clear, the downside of this method is that it causes more strain on the elastic, making the socks break down more quickly. Plus, fabric will take the shape it had when it was drying, so with this method, it is possible that the socks will be less comfortable. Folding is the ideal way to store socks, but I do understand that it is not possible for everyone.
Bottom line: If the way you are currently washing and storing socks works for you, keep doing it. If there is something you would like to improve, let’s figure out how to tweak your system so that it works for you.
Bonus tips: If pairing socks is a pain point for you, try doing it mindlessly as you are watching television. Or have your kids do it! Another tip is to just get sets of matching socks and use a different one for each member of the household. Now the only question will be how to spend the extra time you’ll have!
Bonus bonus tip: Washing smaller loads and not using the dryer seem to be the keys to not ending up with orphaned socks.

Hi there! I’m Amélie, a professional home organizer in San Antonio, Texas. I help people like you declutter their home, organize their belongings, and simplify their life. I love cleaning out a closet and removing a carload of donations from a home! My goal is to help you create a functional space that will make your life easier and more peaceful.
Interested? Check out my personalized services or book your complimentary consultation!
Simplify
You know how there are some concepts that seem obvious if you’re very familiar with them, but to someone else, those concepts are not at all clear? I’ve had that experience recently when saying “less is more” and I was reminded that some things need explaining. I am going to use some client examples in this post, and I want to make it *abundantly clear* that I would never shame anyone; I am using these examples precisely because *they are so relatable*.
Some people have a lot of clothes. So many clothes that the baskets never empty, the clothes never all get put away, and there are always piles of stuff in the laundry room. Most often, these people feel overwhelmed by their laundry. And all too often, their reasoning is that since they have so much trouble finding clean clothes and putting together an outfit each day, the solution must be that they need *more* clothes. They are very taken aback when I tell them that the solution is actually that they need to *get rid of* a lot of clothes!
The shortest, least complicated way to get dressed is to have fewer options in our closet.
Shannon Leyko
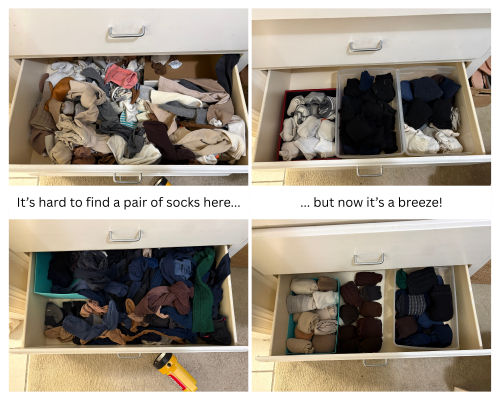
Let’s take the example of socks. I worked with a not-atypical client who had three drawers full of socks in her closet, plus a few bins of orphaned socks elsewhere in the house. The drawers had the intention of order (lights, darks, and hosiery), but everything was pell-mell inside them, and there were many orphaned socks and strays in the wrong places, along with some mismatched socks paired together out of desperation. They had taken over too much space and were a thorn in my client’s side each day because it was so hard for her to find what she wanted!
Now, how many socks does one person need? It depends. I mean, I would say that since there are different seasons, it is absolutely appropriate to have wool socks that you only wear in the winter and cotton socks for the summer. Life also presents different types of occasions, so sure, you might need knee-high stockings, black dress socks, white crew socks, ankle sports socks, and a pair of ugly Christmas socks thrown in for good measure. I’m all for variety!
Here’s what happened with this client: Even when I pointed out socks with holes or stains, my client did not want to get rid of them or thought she would need to replace them, because she was in a scarcity mindset. The remedy was easy, if a bit tedious: sort through all the socks, pair them up properly, then organize them by type/length/color. From that point on, not only were they easy to find, but she could see what she had at a glance! At the beginning of the session, she was afraid that she couldn’t get rid of any knee-high stockings, and that was because she genuinely couldn’t always find a pair when she needed one. But once we were done, she had enough to wear a different pair every day for almost three weeks if she had wanted to, and that is when she was able to let go of the excess.
Order allowed her to simplify, and simplifying made her life easier.

Let’s use another example inspired by a different client. Imagine doing a load of laundry and ending up with (among other things) 43 socks; after putting some order in things, you determine that you have 11 orphans and 16 pairs, each of them different. Now imagine instead doing a load of laundry and ending up with 14 socks, comprised of 7 pairs, 5 of which are identical. Isn’t sorting (and putting away) the second load so much easier? The way you get there is by having fewer socks, doing a load every week, and buying bundles of identical pairs whenever possible. David Tennant gets it!
And when this client realized that even if we did match all the orphaned socks that had accumulated, the drawer wasn’t spacious enough for them, her reaction was to say that she would need to purchase more storage. And I said that actually, her storage was fine, it was just that she had too many socks! It just felt like it wasn’t enough because they didn’t get put away properly once they were clean, ang again, that’s easier to do with fewer socks.
Because here’s the thing: The fewer items you have to manage, the less energy it will take from you – and therefore the more energy you have for important things. You can pare down to the essentials, switch to only one sock color, limit the number of special-occasion socks, and simplify both your closet and your life.
By the way, it’s easier to keep up than it is to catch up. That’s why clients hire me to help them catch up – then they are set up for success!
Here are some tips for success: It’s not about how many socks you can fit in your space or how many you could afford to buy; it’s about how many will make your life more manageable. To translate this more broadly, build a system that meets you where you are today. Which routines feel easy? Which routines (or spaces) do not serve you? What drains you and what would you need to feel better about it?
Hi there! I’m Amélie, a professional home organizer in San Antonio, Texas. I help people like you declutter their home, organize their belongings, and simplify their life. I love cleaning out a closet and removing a carload of donations from a home! My goal is to help you create a functional space that will make your life easier and more peaceful.
Interested? Check out my personalized services or book your complimentary consultation!
5 tips for organizing a closet
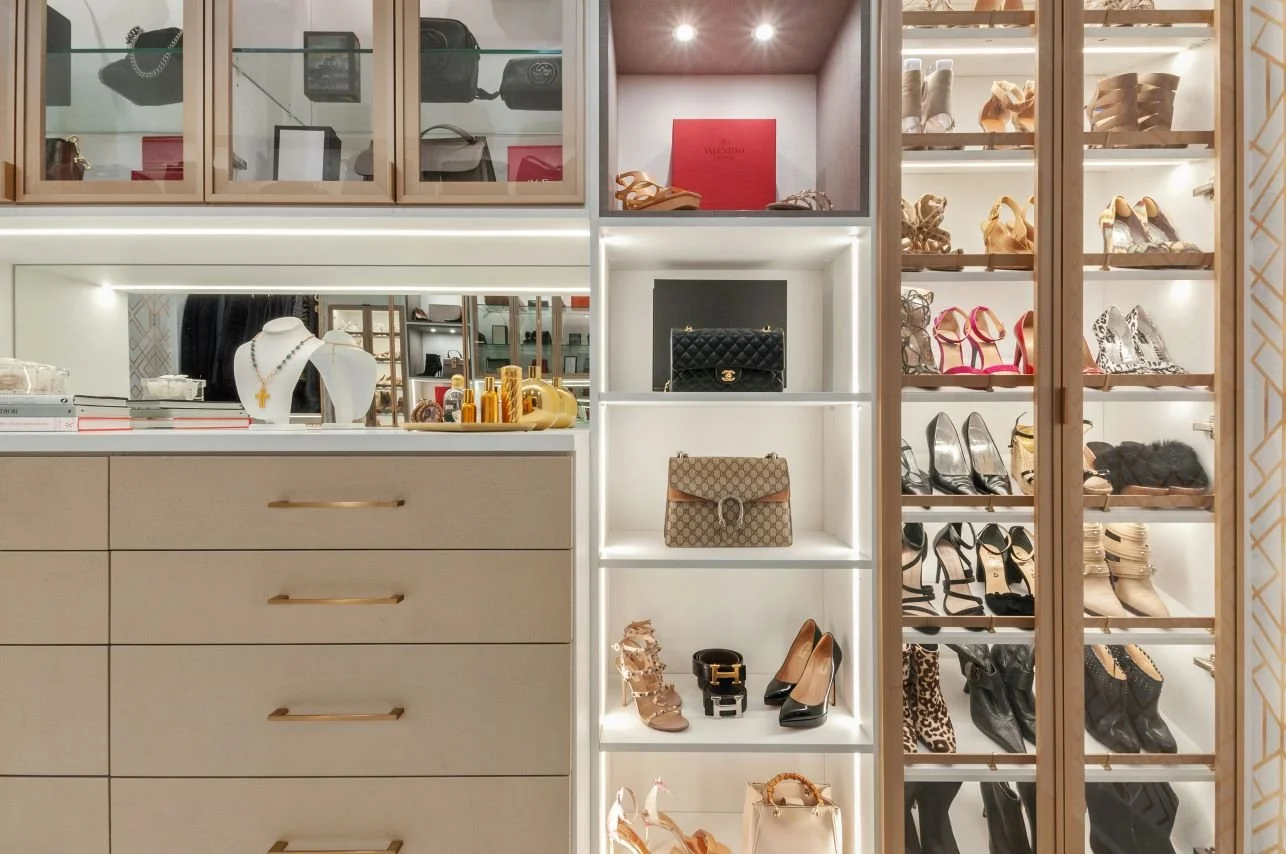
Your closet is often the first thing you look at in the morning, and it sets the tone for your day. Ideally, it should feel like a party where you know everyone and, more importantly, actually like everyone! Having an organized, functional closet not only helps you set yourself up for success, it also allows you to start off your day on the right foot because it will help you feel at peace and in control. Apparently, the New York Times said that 31% of people were more satisfied after clearing out their closet than after sex. Regardless of where you fall, read on for 5 simple organizing tips! (See here for product recommendations. As for decluttering tips, you get my list of 10 things to declutter from your closet when you sign up for my newsletter.)
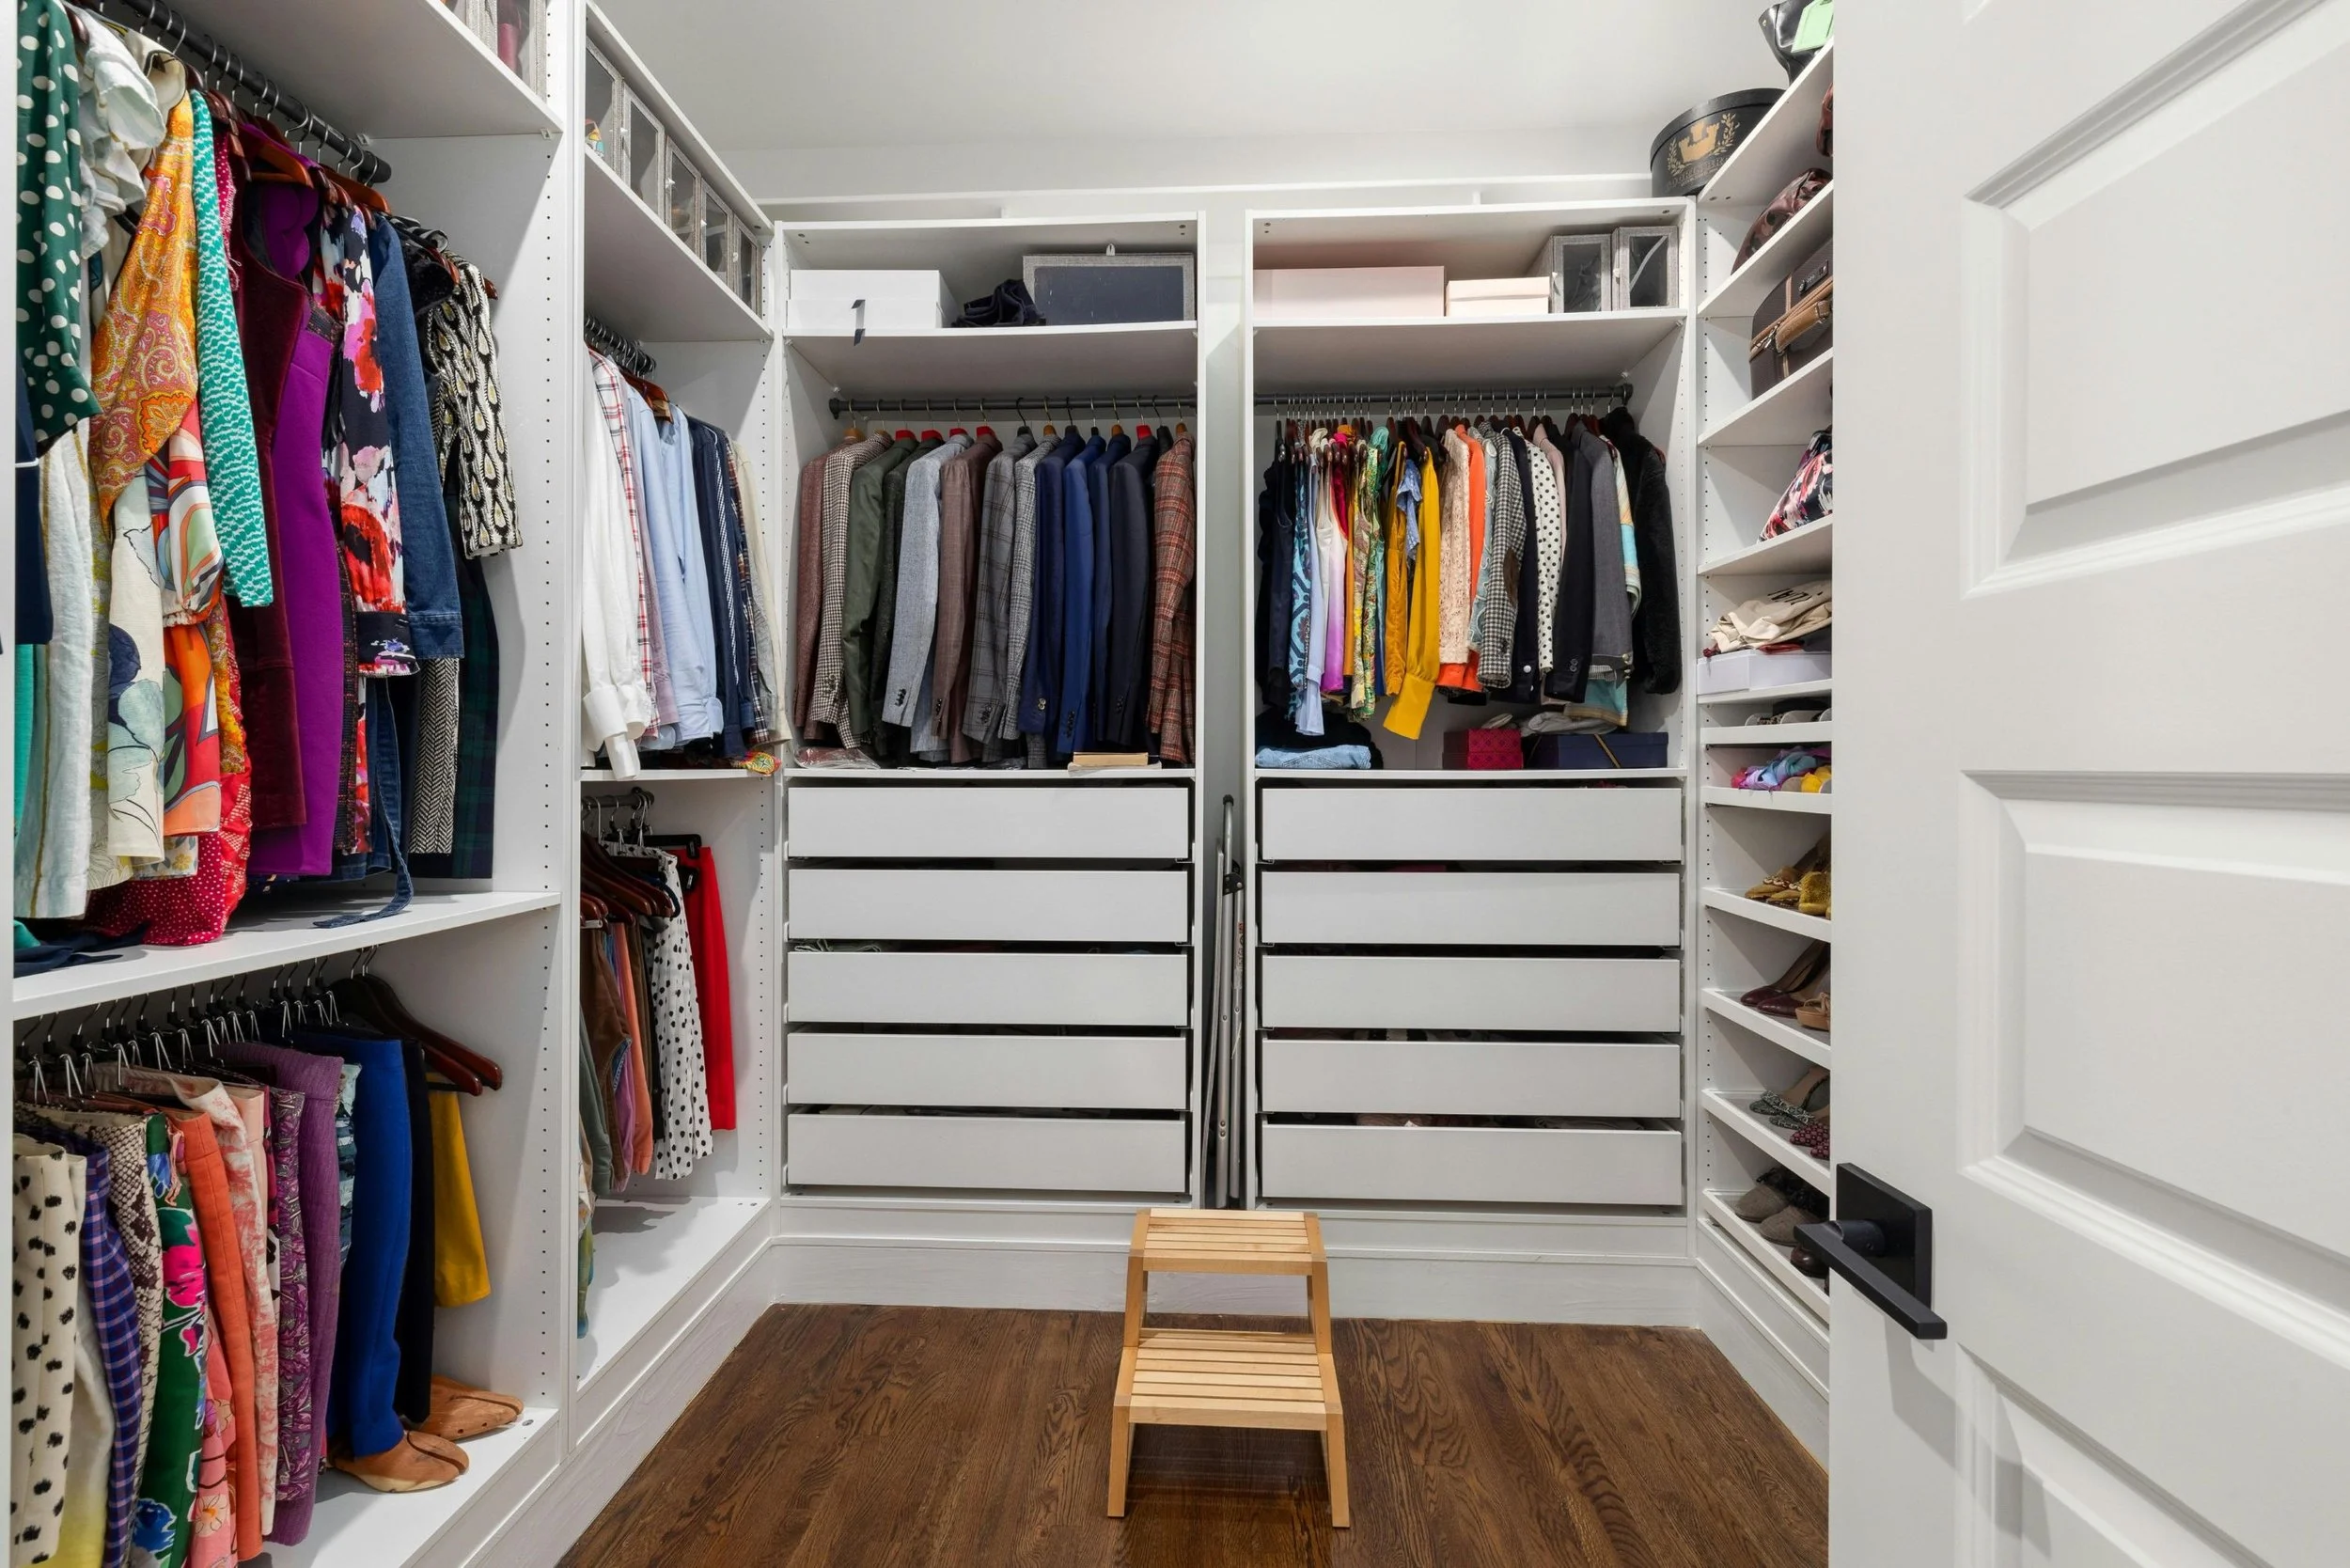
This photo was taken by Curtis Adams for Pexels.
1 – The easiest way to make your closet look better is…
There are small details that will help your closet look and feel more organized, but here’s the most effective one: use matching hangers. And absolutely get rid of the flimsy ones! Replacing your hangers is a simple step to take, but it will make such a big difference! Velvet hangers are inexpensive, yet look stylish, and are functional in that they help prevent your clothes from slipping off. Slim wooden hangers are also a great option, as are very sturdy plastic ones. You won't realize how good it feels to have all those hangers looking uniform until you try it!
2 – The floor is not for storage.
Another common issue is using the floor for storage. Ideally, you shouldn't have anything on the floor of your closet – I don't mean simply that it shouldn't be messy or cluttered, I mean that it should not be the designated home for items such as shoes, sandals, and boots. Try storing those on a shoe rack or on shelves, which will not only make them more visible and accessible, but will also help ensure that you are not tripping over your shoes when you reach for something else. The same is true of handbags and purses – try storing them on the top shelf in clear bags or acrylic boxes, so that they remain visible but do not get dusty. Alternatively, there are purse hangers that will keep them handy without bending the handles and straps.
3 – For the small things.
It is also worth looking at small accessories such as jewelry, belts, scarves, hair ties, etc. If you do not have the luxury of drawers with divider inserts, try a jewelry box (in a closet, I especially like the tall, shallow ones behind a full-length mirror that swings open) or specialty hangers for your belts and scarves. Again, the important thing is to keep your belongings both easily visible and easily accessible. You should also get rid of extra packaging, which I often come across in clients' closets (even if it's from a fancy store and looks nice, it will prevent you from seeing what it contains, and you will lose track of those items - or you will realize that the packaging was empty and just taking up space for nothing).
4 – Plan for the way you use your closet.
Next, see if specific items tend to pile up and see how you can remedy that. I suggest having a hamper in your closet for dirty clothes, as well as a donation box for those items you no longer want (when the box is full, simply donate the contents). I also pack all my travel items inside my largest suitcase, which keeps them contained until the next trip. Keep spare hangers directly on the hanging rod instead of making a pile elsewhere.
Consider installing a few hooks in your closet, too. Spare hooks can be great for those clothes that you wore once and therefore cannot be hung back in your closet, but that are not quite dirty enough to wash yet. You can also use a hook to set up your outfit for the day or for an upcoming special event.
5 – Use bins for folded items.
Most of the time, I recommend getting rid of hanging fabric shelves and stacking plastic drawers – they tend to be flimsy and really not as practical as one would think. Also, try not to stack folded clothes in piles – it’s impossible to reach the items on the bottom, and the piles will eventually topple over anyway. Instead, assuming vertical file-folding in a drawer is not an option, get some open bins and use those the same way you would a drawer. This helps keep items such as t-shirts visible and accessible. Bins are also great for swimsuits and coverups, or winter accessories like hats and gloves.

This photo was taken by Chastity Cortijo for Unsplash.
Hi there! I’m Amélie, a professional home organizer in San Antonio, Texas. I help people like you declutter their home, organize their belongings, and simplify their life. I love cleaning out a closet and removing a carload of donations from a home! My goal is to help you create a functional space that will make your life easier and more peaceful.
Interested? Check out my personalized services or book your complimentary consultation!
Do we really have 300,000 items in our homes?
You’ve probably heard that number being floated around: the average household contains 300,000 items. But does it really? It turns out I have a bit of inside information, as well as some thoughts, so here we go!
That number actually comes from a NAPO colleague of mine, Regina Lark, who was quoted in the LA Times in 2014 saying that the average house contains 300,000 items. I attended one of her webinars last month, where she explained that when asked, she said that she got the number from the UCLA’s 2012 book Life at Home in the Twenty-First Century – which I happened to be reading at the time! And then, try as she might, she was never able to find that reference, although she is convinced that she did read that number somewhere and did not make it up. I also could have sworn that it was in that book, but when I looked for it, I couldn’t find that figure either. However, her quote has since taken on a life of its own and is, to this day, being repeated everywhere as truth, probably because the LA Times is an important publication.

So, the book was published after UCLA conducted a great anthropological study with 32 American families in 2012, and they talk a lot about their methodology. They did count objects, but it was more of an estimate: they made educated guesses about certain groups of items, and they only ever counted items in plain sight – meaning that anything that would have been in a drawer, in a cabinet, or behind something visible was not counted. Here are some figures from that study, along with a quote that will not surprise you: “Middle-class America has the most possessions per family in history.” Households surveyed had an average of 438 books and magazines, 139 toys, and 39 pairs of shoes per family (again, these are only visible items). In home offices, the lowest number of plainly visible non-paper objects was 21, and the most was 2,337. In the garage, it ranged from 50 to 650. Having more items on one’s refrigerator (magnets, papers, etc.) was correlated with having more objects in the home. But there is no total anywhere in sight!
Now, here’s where my opinion comes into play. Let’s be generous by rounding up and saying that a person lives for 30,000 days. From those days, we wouldn’t really count childhood, so there’s maybe 25,000 days left? Let’s say the average household has two adults, and they are acquiring objects not just for themselves, but also for their 2.5 kids. Okay. So with my rough mathematical model here, those adults would have to acquire (while never discarding!) about 12 items each day in order to have 300,000 by the end of their life, right? So it would have to be an even faster rate of acquisition in order to have that many items while their kids are still living with them, as in the UCLA study. I’m not counting perishable items like groceries or cleaning products in this tally, and I wouldn’t be counting every last piece of paper either, since the UCLA anthropologists didn’t.
Speaking for my household, we are not acquiring items at nearly that rate. Sure, there are isolated times when I will buy a lot at once. For example, in one shopping spree, I could buy several outfits for my kids to go back to school as they grow, along with school supplies. But on an average day, I am not buying anything. And regardless of how much I buy, I do get rid of some items along the way (like the kids’ clothes that have been outgrown, plus the school supplies that get used up).
All this to say that while I do not have any idea how many items are in my household, and while I’m sure the number would seem very large if I were to learn it, I don’t think it’s anywhere close to 300,000!
Hi there! I’m Amélie, a professional home organizer in San Antonio, Texas. I help people like you declutter their home, organize their belongings, and simplify their life. I love cleaning out a closet and removing a carload of donations from a home! My goal is to help you create a functional space that will make your life easier and more peaceful.
Interested? Check out my personalized services or book your complimentary consultation!
Clear Your Clutter with Feng Shui
Feng shui is an Ancient Chinese practice of arranging environments to balance qi (life force) as well as promote health, harmony, and prosperity. Now, I’ve always been on the fence about feng shui – some aspects of it seems like woo to me, yet other aspects just seem like common sense. For example, I don’t believe in good or evil spirits that would, respectively, enter or flee a home if they see a mirror near the front door. That being said, I do think it’s very useful to have a mirror by the front door, were it only so that you can take a quick look at yourself before you set out for the day (and fix your appearance as needed!). Mirrors are also useful to reflect light, and they can be aesthetically pleasing focal points.
All this to say, I read a very interesting book recommended by a colleague of mine: Clear Your Clutter with Feng Shui, by Karen Kingston (that is an affiliate link). This book seemed particularly interesting to me because it explores the relationship between clutter and feng shui / life force. Clutter certainly does stop the flow of energy in a room – and maybe you would phrase it differently, by saying that it’s your eyes that can’t travel around the room freely, or that you feel stuck or weighed down in that room, or it makes you feel anxious and you can’t breathe properly, but I think that it adds up to the same.

Here is an excerpt: “You are energetically connected to everything you own. When your home is filled with things that you love or use well, it becomes an incredible source of support and nourishment for you. Clutter, on the other hand, drags your energy down and the longer you keep it, the more it will affect you.” The author also talks about the fact that clutter takes up a lot of mental energy, even as your subconscious mind tries to suppress it, and so you feel more energetic with less clutter – that is definitely something I have seen with clients, and I talk about it often on social media!
Karen Kingston goes on to define four categories of clutter: things you do not use or love, things that are untidy or disorganized, too many things in too small a space, and anything unfinished. It’s an interesting way to categorize it! The first category clearly overlaps with core tenets of the KonMari Method™. I certainly agree that things that are messy come across as clutter (even if they can be put away easily), and I’m a big believer in the container concept – meaning that the size of your space tends to dictate how many things you can comfortably keep. As for unfinished projects, they are one category that I always name as a source of clutter! I think I would add categories such as things that bring back bad memories, things that are tied to decisions you have been putting off, etc.
(On a side note, I strongly believe in the importance of choosing objects that you love. For example, you might have a kettle that you use frequently, but you don’t really like it – maybe it’s ugly, or water doesn’t pour out of it properly, whatever the reason. I encourage you to invest a bit more and buy a kettle that you love! Loving your everyday objects truly elevates your experience and makes you happier overall.)

This image was created by Klub Boks for Pexels.
In this book, the author also talked about bagua, or the concept of specific areas of a room or home being associated with aspects of your life such as health, prosperity, or relationships. The more cluttered a specific physical area is, the worse you will be doing in that figurative area in your life. According to this theory, the rear left corner of a room would be associated with knowledge. My instinct is to say that’s woo. And yet, I now realize that in my home office, that is precisely where I keep my bookcase of reference materials and dictionaries! I feel like this is something I’d like to experiment with, maybe by making the “travel” area of my home super inviting!
Have any of you thought about the relationship between feng shui and clutter?
Hi there! I’m Amélie, a professional home organizer in San Antonio, Texas. I help people like you declutter their home, organize their belongings, and simplify their life. I love cleaning out a closet and removing a carload of donations from a home! My goal is to help you create a functional space that will make your life easier and more peaceful.
Interested? Check out my personalized services or book your complimentary consultation!
Organizing v. cleaning
Have you ever noticed that even after your house is cleaned, it still feels cluttered? A lot of people conflate cleaning with organizing, perhaps even more so since Marie Kondo’s book was published in English with the title The Life-Changing Magic of Tidying Up. You see, “tidying up” sounds like something you do before company comes over, by quickly putting things away. But in this case, it actually refers to a specific method of organizing your belongings. I’ll talk more in depth about the KonMari Method™, since I am a Certified Consultant.
This photo was taken by Anton for Unsplash.
Marie Kondo says that cleaning opposes you to nature – for example, as you use your bathroom, it will get dirty, and that’s perfectly normal. You’ll have to clean it periodically to keep it in good condition. However, organizing, or tidying in the KonMari sense, is something that opposes you to yourself. It’s your own belongings that are getting in your way, so change must come from you.
Cleaning, or even putting your things away, is maintenance that is performed in the short term. Cleaning removes dust and dirt. Organizing with the KonMari Method™ is for the long term, and it aligns your possessions with your values. It also creates less upkeep in general, thereby freeing more time and energy. Organizing removes clutter and stress.
To create an easy analogy, cleaning is like mowing the lawn, while organizing is akin to landscaping your yard. It’s resetting your home versus transforming it.
And here’s a point that I really want to get across: the KonMari Method™ will empower you. It is something that I will do *with* you, by teaching you skills and helping you develop your mindset. By finding what sparks joy, you will be the most authentic version of yourself. We’re not following a specific aesthetic, and there’s no need to be a minimalist – it’s simply about eliminating the things that do not serve you and that are not enhancing your life.
This photo was taken by Chastity Cortijo for Unsplash.
Imagine opening your closet, and everything you see sparks joy instead of stress. Imagine standing in your kitchen and you know exactly where everything goes – and it stays that way, even weeks later.
If you’re tired of cleaning the same clutter again and again, let’s set up a KonMari® session. It’s typically a one-time investment for long-term change. You’ll have less stress, more calm, and more time for what matters most.
Hi there! I’m Amélie, a professional home organizer in San Antonio, Texas. I help people like you declutter their home, organize their belongings, and simplify their life. I love cleaning out a closet and removing a carload of donations from a home! My goal is to help you create a functional space that will make your life easier and more peaceful.
Interested? Check out my personalized services or book your complimentary consultation!
What to expect when working with a professional organizer
Are you overwhelmed by clutter in your home or workspace? Do you find it challenging to keep things organized and in order? If so, hiring a professional organizer may be the perfect solution for you – getting organized is an investment in your home and in yourself. In this blog post, I’ll walk you through what to expect when working with a professional organizer, helping you to understand the process and how it can transform your space.
1. Choosing your organizer
Just like you wouldn’t hire an electrician or financial planner without checking their references, you’ll want to make sure you hire an insured, trained professional when it comes to organizing your home. Members of NAPO abide by a code of ethics and have received education in the field; they offer professional, confidential, and non-judgmental services tailored to your needs. Likewise, KonMari® Consultants have completed supervised training and have been certified by Marie Kondo. Amélie is one of only a handful of people in the world to be a member of both organizations! If you suffer from specific challenges, you might want to turn to the ICD. You can also look up an organizer’s reviews.
What to consider:
- What type of qualifications are important to you?
- Is there a personality type that meshes best with yours?
- What style of organizing are you most drawn to?
- Can you form an idea of who this organizer is based on their website or social media presence?
2. Initial consultation
Before any organizing begins, a professional organizer will typically schedule an initial consultation. This meeting (which can be on the phone, online, or in person) allows you to discuss your challenges, goals, and expectations. During this time, the organizer will assess the scope of your project and discuss potential strategies, timelines, and pricing.
What to prepare:
- Have a list of your organizing challenges.
- Identify any specific areas you want to focus on.
- Be ready to discuss your goals and vision for the space.
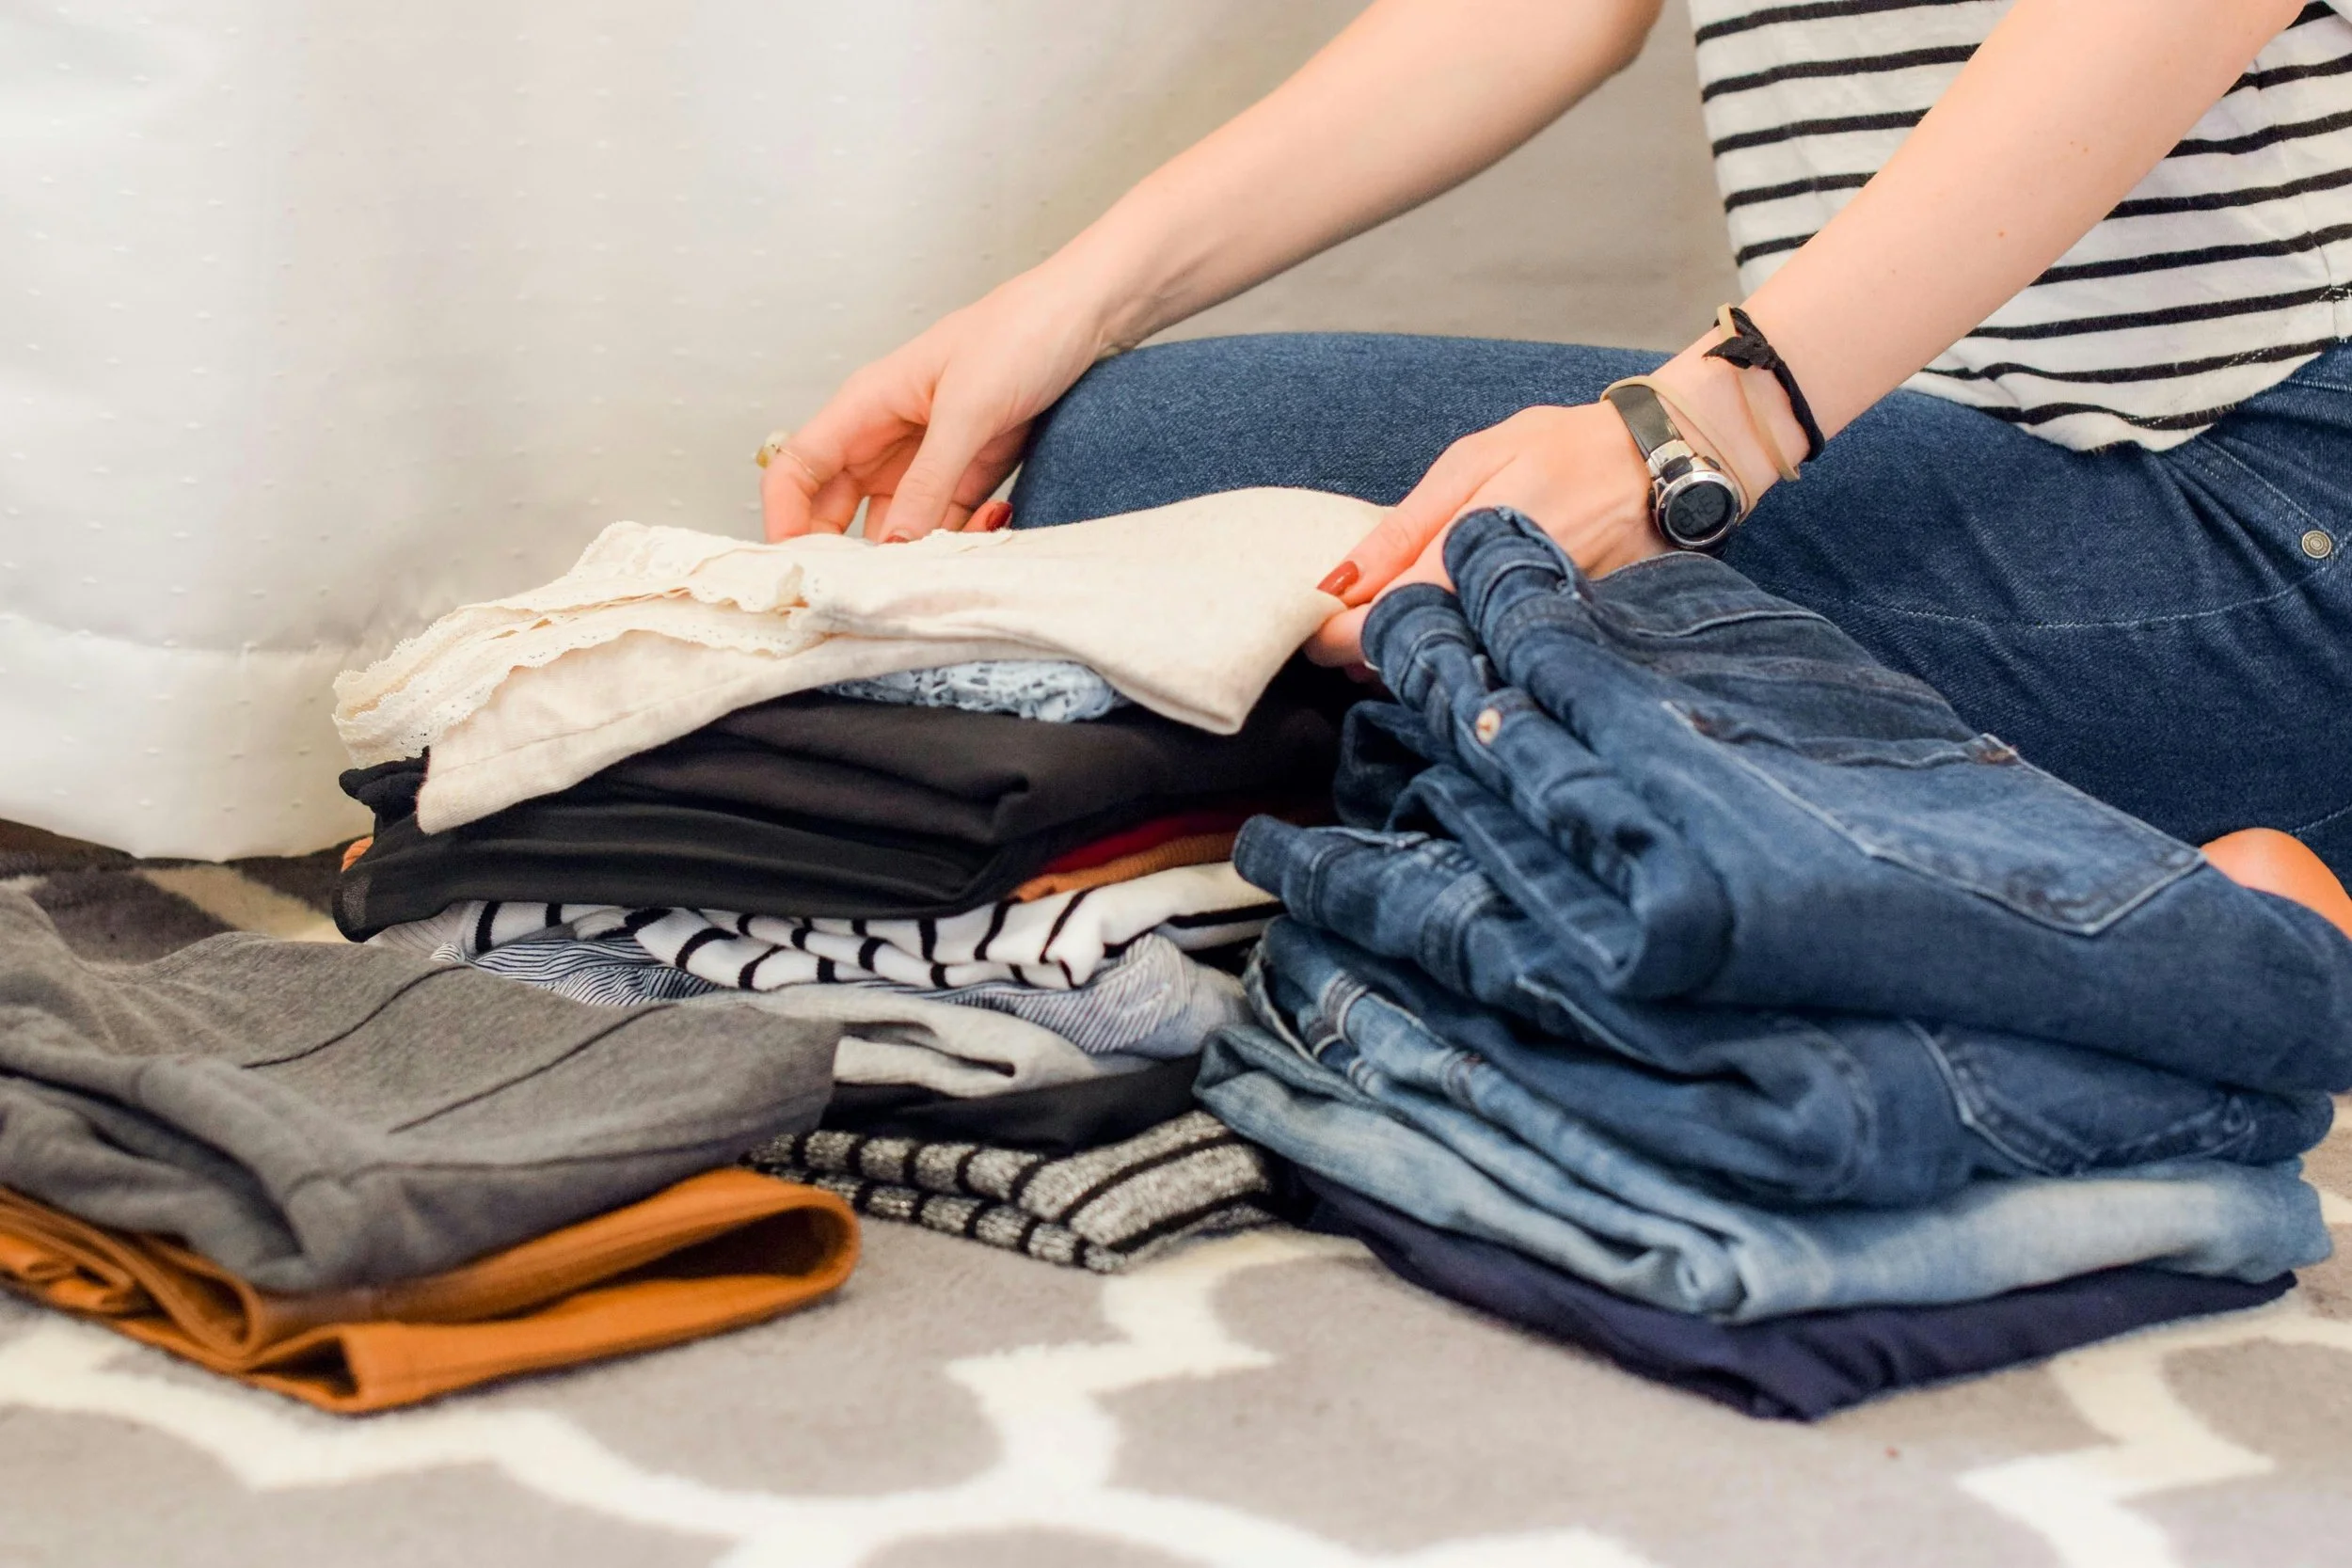
Photo by Sarah Brown for Unsplash.
3. Decluttering process
The first essential step in organizing is decluttering. Your professional organizer will guide you through deciding what to keep, donate, or discard. This can be an emotional process, so having an expert by your side can provide motivation, guidance, and support – though the final decision is always yours. Plus, an organizer like me can remove donations from your home and drop them off where they will be used, greatly simplifying your to-do list!
Key tips:
- Do NOT tidy up before your organizer gets there!
- Prepare some boxes or sturdy bags for carrying donations.
- Be honest about why you’re keeping certain items; understand that it’s okay to let go of things that no longer serve you.
- Embrace the feeling of liberation that comes with decluttering.
4. Hands-on organization
Once decluttering is complete, the fun part begins: organizing! Your professional organizer will work with you to create functional and aesthetically pleasing systems for storing your belongings. This might include everything from labeling bins to rearranging furniture and buying organizing supplies.
What to expect:
- Selecting organizing supplies based on your needs and budget.
- Using space-efficient storage solutions, including racks, bins, and specialty organizers.
- Customized systems that are easy for you to maintain.
5. Education and empowerment
A good professional organizer will not only help you organize your space but will also empower you with skills and strategies to maintain the organization over time. They’ll teach you how to create effective organizing systems that work for your specific habits and lifestyle.
Learning components:
- Practical tips for daily maintenance.
- Strategies for preventing clutter accumulation in the future.
- Recommendations for ongoing organization systems.

Photo by Luisa Brimble for Unsplash.
6. Follow-up support
Many organizers offer follow-up support and check-ins to ensure you’re still on track. This could include additional sessions to tackle new areas or to refine existing systems. Having ongoing support helps maintain motivation and accountability.
What you might experience:
- Scheduled follow-up sessions to reassess and adjust your organizing system or reset things.
- Resources for ongoing support, such as articles, workshops, or online communities.
- Encouragement to keep the momentum going after the initial project.
7. Realistic expectations
Remember that organizing is a process, not a one-time fix. It may take time to see the full results, depending on the extent of the work and your ability (as well as that of other household members!) to adjust to new systems. Professional organizers understand this and will work at a pace that feels comfortable for you.
Important points to consider:
- Be patient with yourself and the process.
- Celebrate small achievements along the way.
- Understand that developing new habits takes time.
Conclusion
Working with a professional organizer can be a rewarding experience that transforms your space and your mindset towards organization. By understanding what to expect, you can embark on this journey with confidence. From initial consultations to ongoing support, a professional organizer is dedicated to helping you create a functional, serene, and clutter-free environment.
Ready to take the first step? Reach out today and begin the process of reclaiming your space!
Hi there! I’m Amélie, a professional home organizer in San Antonio, Texas. I help people like you declutter their home, organize their belongings, and simplify their life. I love cleaning out a closet and removing a carload of donations from a home! My goal is to help you create a functional space that will make your life easier and more peaceful.
Interested? Check out my personalized services or book your complimentary consultation!
Gifting without the clutter
We all want to give gifts without creating clutter for the recipient. And when we come across something we just know they will love, it’s like everything falls into place! But what if we simply don’t know what to give them? I’m thinking of someone whose gifts from his father have consistently missed the mark for the last 20+ years, and I’m sure we would all like to avoid similar situations!

This photo was taken by Jess Bailey for Unsplash.
It turns out that gifts must actually fill two purposes: please the recipient, but also please the giver. The recipient might prefer meaningful or practical gifts, while the giver will often focus on the “wow factor” when the recipient unwraps the gift, instead of on the pleasure the recipient will have when they use the gift in the weeks, months, or years to come. The giver will also want to find a gift that aligns with their own tastes and values – someone who reads only fiction will not instinctively be drawn to gifting self-help books or biographies, despite the recipient’s own preferences.
One thing that my family has always done, and that is apparently controversial for some, is to create wish lists. Some people are completely opposed to the idea because to them, surprising the recipient is part of the fun. However, research actually shows that recipients are happier when they get what they wanted in the first place! And isn’t that what giving should really be about, making the recipient happy? We always take the time to write our own wish list and to ask our loved ones what they would like. (An online wish list has the added advantage of avoiding duplicate gifts, which are disappointing for all parties involved.)
As adults, my husband and I have reached the point where there aren’t always many material possessions that we want. Our wish list will therefore include items like an experience: a restaurant meal, concert tickets, a spa treatment, a magazine subscription, a class or workshop, or even a weekend getaway are all possible options. Experiences often make people happier than material goods, anyway. Creating a wish list is itself a joyful experience, because we go through the anticipation and visualization process of getting those things we really want.
With our children, I like to encourage decluttering before the holidays, which not only helps create more room for incoming presents, but can also help our kids verbalize what they would want. They might get rid of a toy because it is broken but ask for a replacement, or they might decide that they want more building blocks of a specific brand because they enjoy them so much, or they might realize that a certain type of toy has been outgrown and is no longer interesting to them. (We donate all items that are still in good condition, which is why I prefer doing this before the holidays so that other kids can enjoy them then, but of course decluttering after the holidays is still a great idea!)
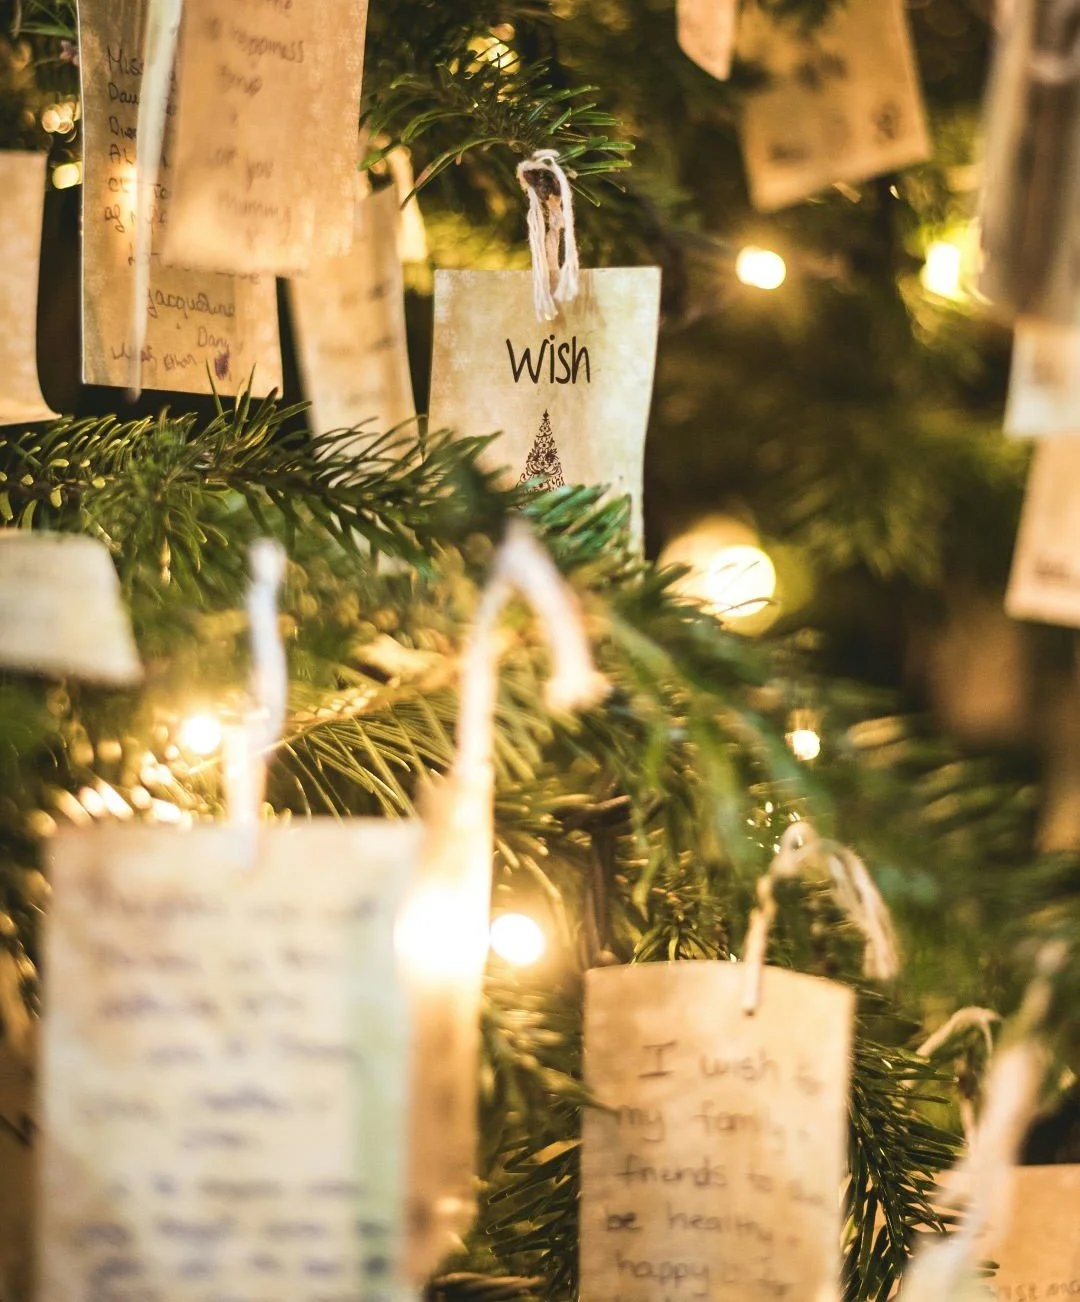
This photo was taken by Valentin Petkov for Unsplash.
When it comes to giving items to people we don’t know very well, or at least not well enough to ask them for a wish list, I like to choose things that are overall crowd-pleasers and that don’t create clutter. Some favorites include gourmet food or gift cards (to a restaurant, a favorite store, or something fun like the movie theater). These are usually superficial enough that they can be enjoyed by most people (or regifted, at worst), and they do not create clutter. That being said, research shows that something with even broader appeal could be better (say, a gift card to Amazon or Target or a Visa gift card, so that the recipient can get what they really want).
Finally, I will leave you with some words from Marie Kondo: “The purpose of a gift is to be received.” If you receive a gift that underwhelms you, make sure to thank the giver for their kindness, because it was indeed nice that they thought of you. You can try using the gift to see if it grows on you, but if it doesn’t, do not feel obligated to keep it! The giver would not want to burden you with it. Feel free to pass it on to someone else who could use it.
By the way, you can see my previous blog post with ideas for Advent calendar options that won’t create clutter!
Hi there! I’m Amélie, a professional home organizer in San Antonio, Texas. I help people like you declutter their home, organize their belongings, and simplify their life. I love cleaning out a closet and removing a carload of donations from a home! My goal is to help you create a functional space that will make your life easier and more peaceful.
Interested? Check out my personalized services or book your complimentary consultation!
How to get unstuck
It’s very common to get so overwhelmed by a messy, cluttered space that we get stuck! We get analysis paralysis and freeze because we don’t know what the next step is, and the whole task seems like too much. I know it happens to my clients a lot, and it sometimes happens to me, too! People who find themselves in that situation will often just give up – they will ignore the space, which means that it will stay the same or even get worse, but it still occupies a lot of mental bandwidth for them. So, what can we do to get unstuck?
If you feel so overwhelmed by a task that you are unable to start it, it’s because the first step isn’t small enough. So break the task down into smaller chunks to get a better handle on it!

Here is one simple tip I swear by: Pick a corner and start working from there. Maybe I start by picking things up off the floor so that I have room to walk around without tripping. Then I’ll pick a corner of the room and work my way clockwise until it’s done. If there are piles of boxes, I just do one box at a time.
You can also do this in small chunks of time! Obviously, when I go to a client’s home, I might be working for hours at a time. But you can set a timer and do this for 15 minutes, a little bit every day, and you will definitely see progress! The important thing is to keep the momentum going.
Another important point is that you need to define the task. Figure out what actions you need to take, or what your options might be for each item, before you even start.

Let’s say we are working through a pile pf papers. Your options might look like “shred,” “recycle,” “file with taxes,” “file with other important papers,” “keep only until a certain date,” or “act on it.” While you can’t necessarily account for everything, you’ll at least know roughly what to expect and can set yourself up accordingly with a paper bag to hold paper to be shredded, a recycling bin, and a filing system.
If the task is to unpack after a move or to sort through boxes of items that belonged to a deceased loved one, then you know you will need to open boxes and make decisions about the items inside. Keep or discard? And if you are keeping the item, where will you store it? Take it one box at a time.
Finally, get support when you need it.
This could look like having a friend or relative help you, or you can consider hiring a professional like myself or one of my colleagues. Home organizers love to help you solve those problems!
Hi there! I’m Amélie, a professional home organizer in San Antonio, Texas. I help people like you declutter their home, organize their belongings, and simplify their life. I love cleaning out a closet and removing a carload of donations from a home! My goal is to help you create a functional space that will make your life easier and more peaceful.
Interested? Check out my personalized services or book your complimentary consultation!
Writing in books
This is not a typical blog post, but it is certainly too long to be a social media post! I started thinking about people writing in books, and these are my musings on the topic.
It started when I saw a post by Jenny Lawson, a local writer and independent book shop owner, in which she talked about some books she had purchased from the late Shelley Duvall’s estate.

Picture from Jenny Lawson’s Instagram feed, @thebloggess
When she acquired a book, Shelley Duvall had the habit of writing her name, the date, and the city in which she was at the time. In her case, it increased the value of the book because she is famous. (Jenny Lawson is now contemplating doing the same thing, and she is famous enough that there would be a market for it.)
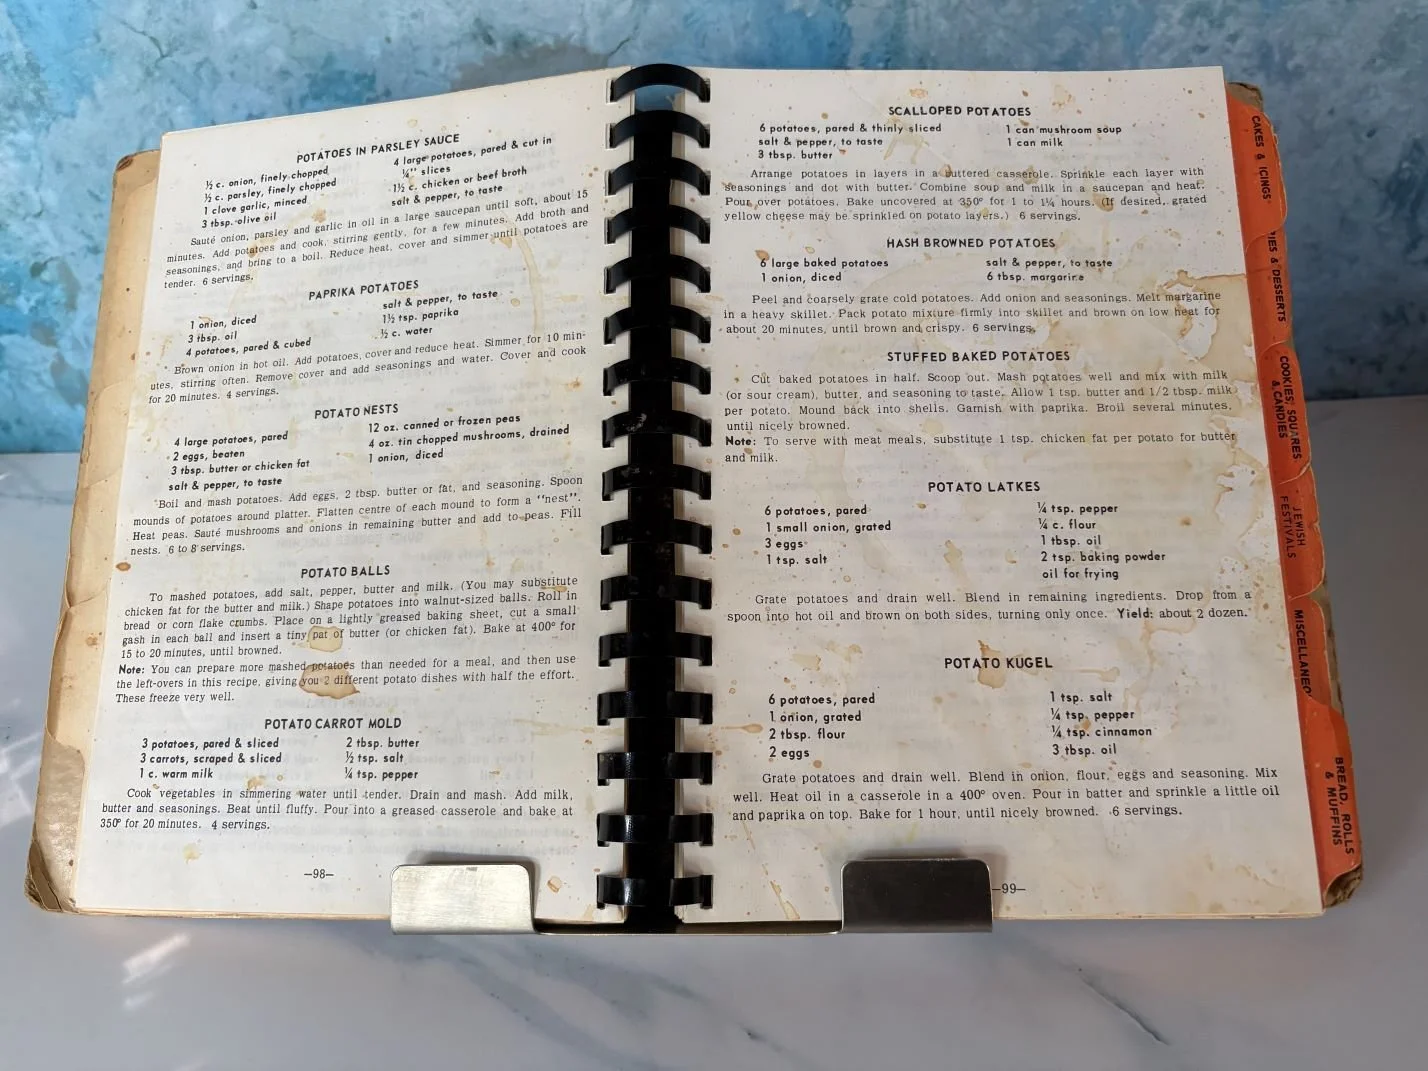
This got me thinking… When is writing in a book okay, and when does it take away from the value of the book? I personally never write in my books; when I make a modification to a recipe, for example, I write my comments on a sticky note and put that on the page, instead of writing directly in the book. When I buy a used book, I certainly prefer it if it hasn’t been marked up. Used children’s books bearing a gift inscription on the inside cover page always make me sad. So, us non-famous folks should just refrain from ever marking up the pages, right?
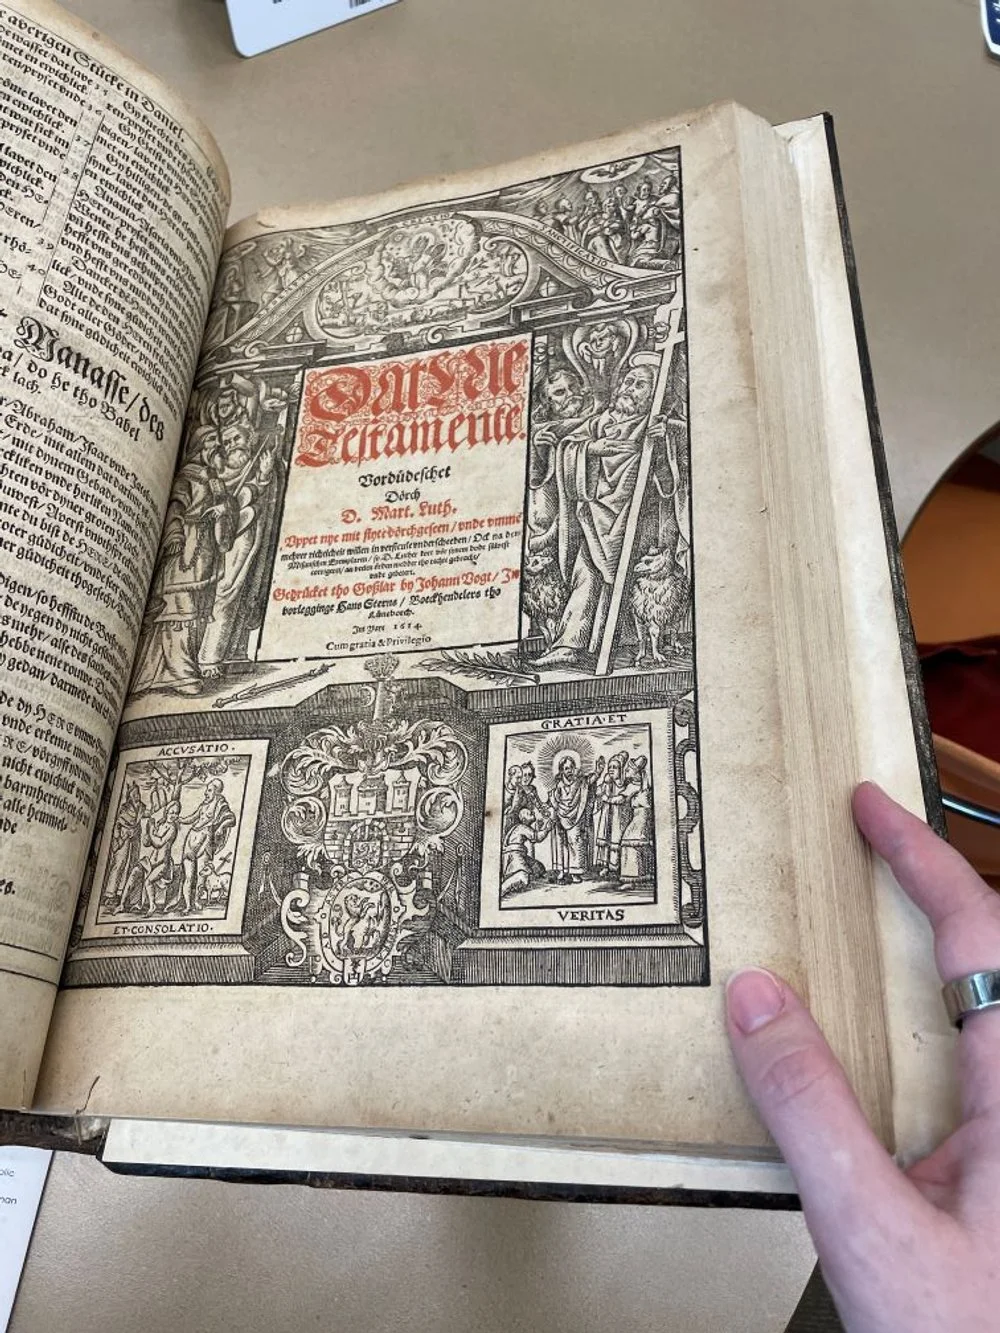
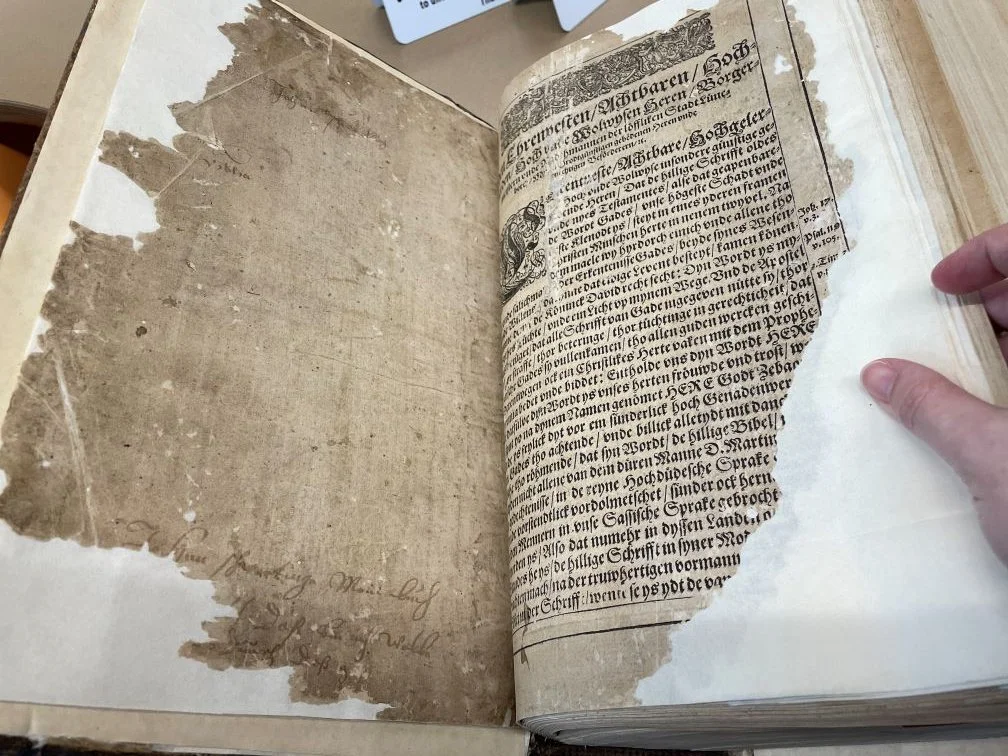
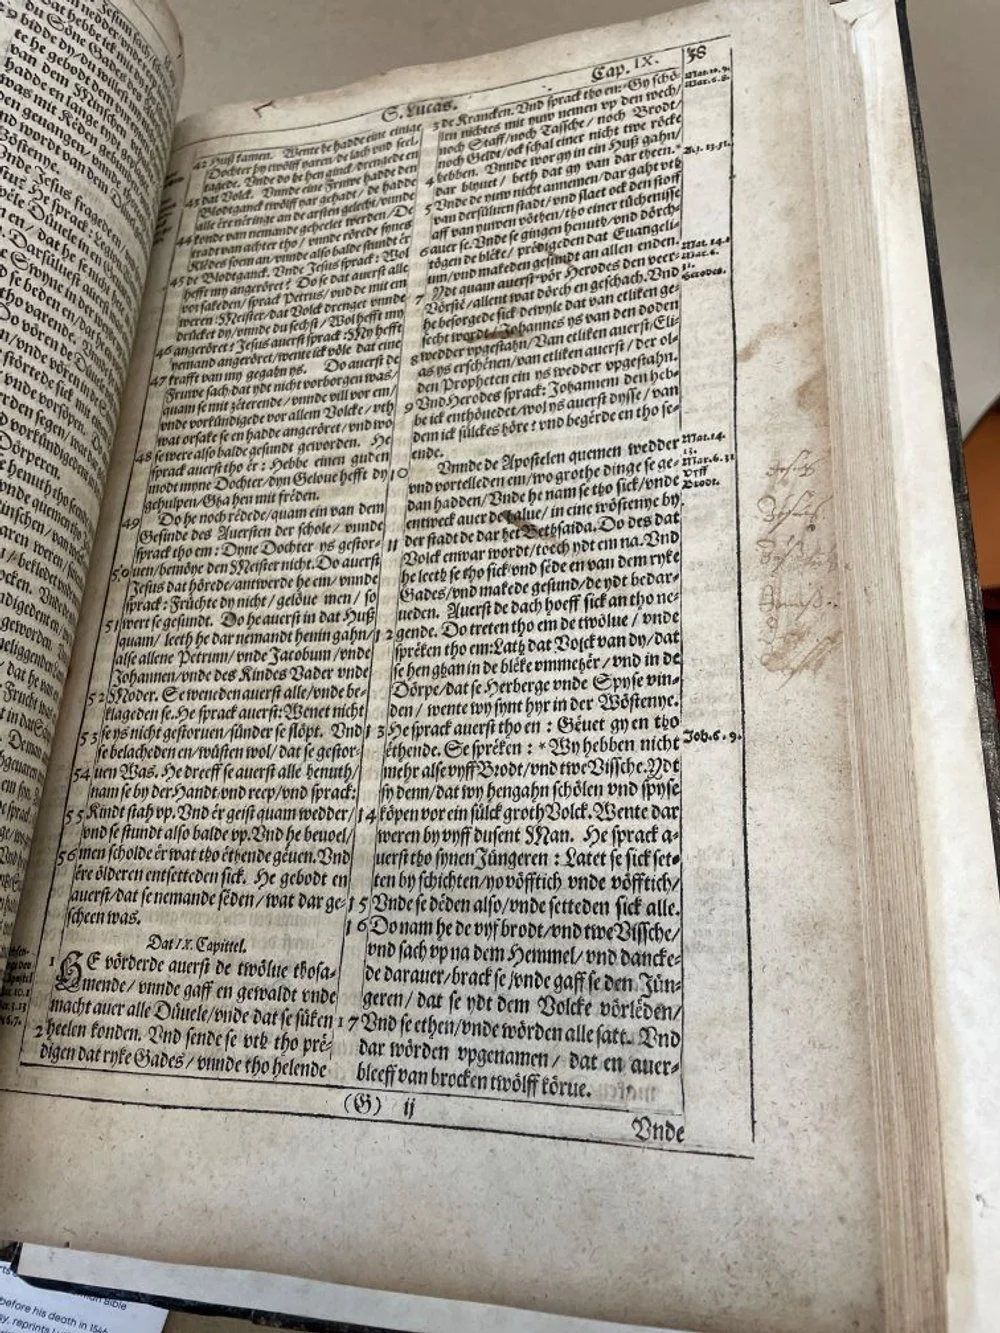
A few days after that, something else happened that changed my mind about it. I went to see the Low German Bible from 1614 and noticed that it was marked in some spots. The most notable is the name of one of the owners, Johan Schwarting, written on the inside cover along with the inscription “my book” in German. He acquired this Bible when it was already over 200 years old. A few other pages inside the Bible have notes that someone scribbled in the margin. And at this point, centuries down the line, I think that those hand-written notes automatically make the book more interesting, because it’s like a time capsule that makes us think about people who lived so long before we did.
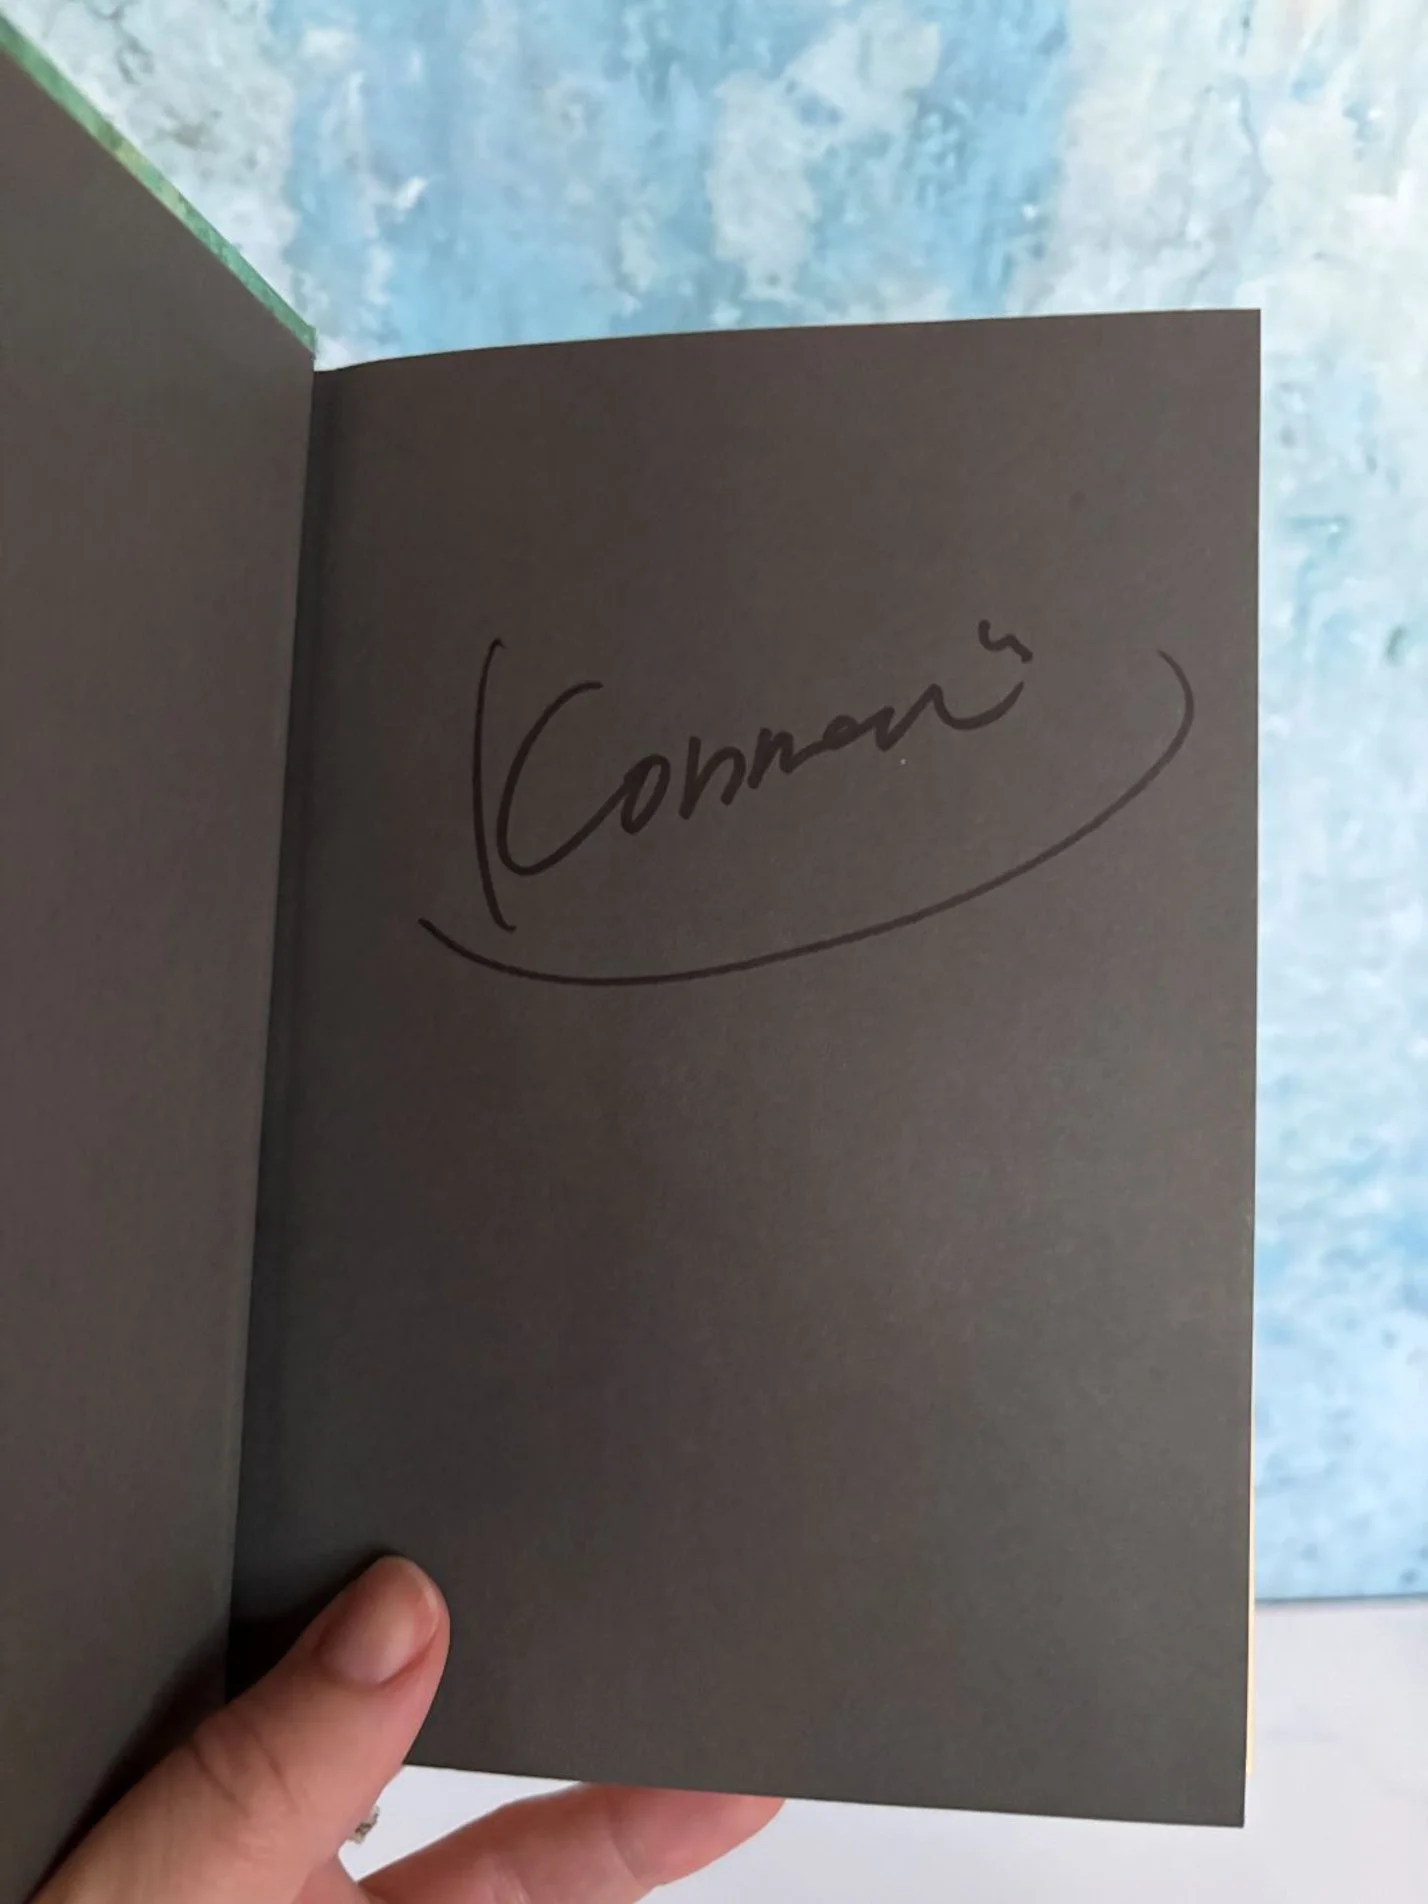
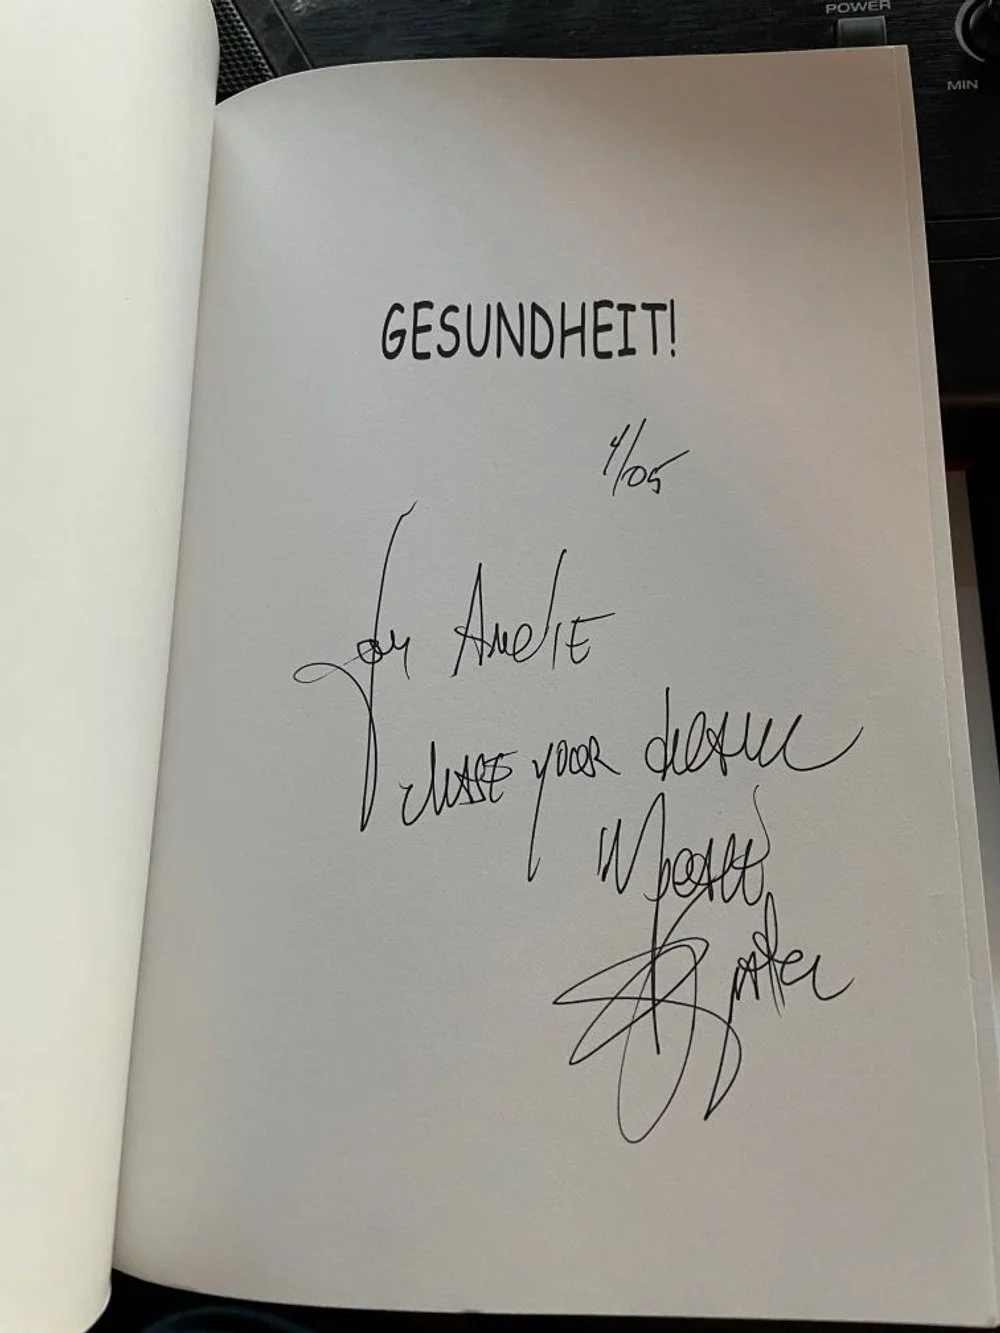
There are some types of markings that we all agree are good. Like when a book is signed by the author, that automatically makes it better, right?
Does it make a difference if the note was meant strictly for the person who wrote it versus meant for whomever might read it later?
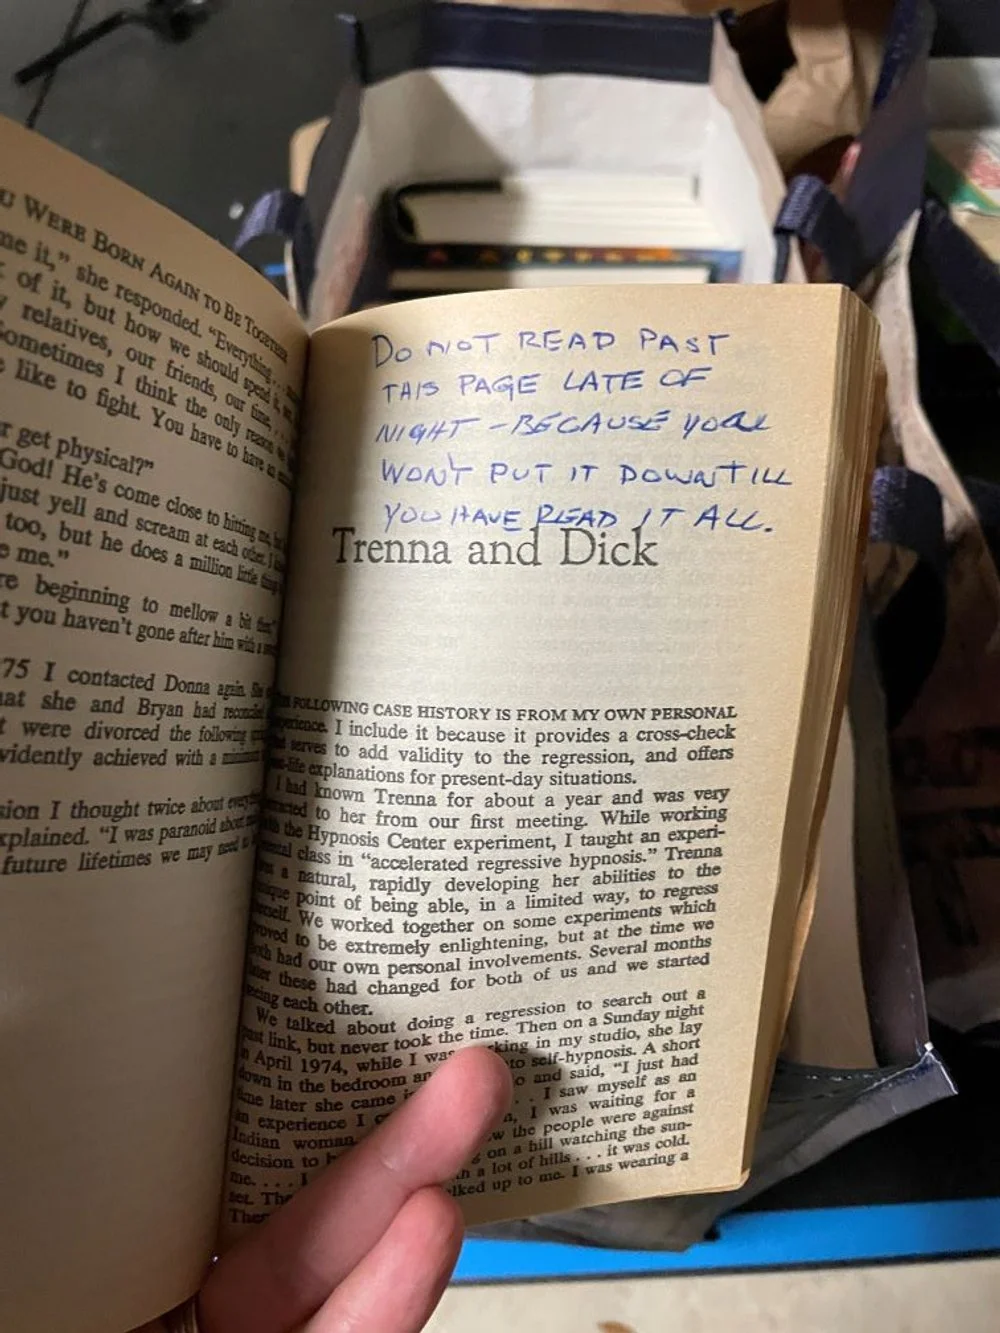
There are also some markings that would have significance to specific people, like if a loved one wrote the note. It could also be food residue from making latkes on a bubby’s recipe, and it just makes you think of her and her delicious latkes whenever you see it.
Is there a point after which markings become significant, or a positive thing in a book? I’m thinking that we would give significance to anything older than 100 years or so, right? Except, perhaps, in the case of a random person marking up what would otherwise be a pristine first edition of a now-famous work?
What is your policy about writing in books?
Hi there! I’m Amélie, a professional home organizer in San Antonio, Texas. I help people like you declutter their home, organize their belongings, and simplify their life. I love cleaning out a closet and removing a carload of donations from a home! My goal is to help you create a functional space that will make your life easier and more peaceful.
Interested? Check out my personalized services or book your complimentary consultation!
MYTH - “Your house must be perfect”
When people find out that I am a professional organizer, I typically get one of two responses. It’s either “I really need you in my life” (yes, please – click here for your complimentary consultation!) or “Oh, I bet your house is perfect!” And, about that latter statement… no, it’s not. But as I keep saying, there is a difference between having a tidy house (as in, picture-perfect at all times) and having a house that is *easy to tidy*. I aim for the latter because that’s what I feel is realistic.
Here's what I mean by that. Once you declutter and organize, all your things will have a home. Of course, your house still will get messy at times because, well, you live there, and you use your stuff! But if those items have a designated home, then when you want to put things away, you can do so quickly, so your house can look neat again without too much effort. But if your house is cluttered, those items don’t have anywhere to go, and that’s really the issue that I try to address with my clients.
Resets are important
Everyone needs to “reset” their home, myself included. It might be a nightly reset, like making sure the dishes have been washed and the kitchen counters are wiped clean each night. It could be weekly, like picking up toys and vacuuming, or doing the laundry that has piled up. It could be quarterly, like assessing your wardrobe when the weather changes every season or setting up the garage based on your needs for the next few months.
Sometimes, we need to do more than a reset – it might need to be a complete overhaul, because our life changes. Looking at my pantry, for example, I remember a time when it was used only to feed two adults; then we had to store jars of baby food and boxes of Mum-Mum crackers and rice puffs; now, it has school-safe snacks and other sundries that the kids access themselves. It works because we zone everything, and rezone as needed.

This is not my guest bedroom, but I like this photo because it does show proper zoning, with a defined zone for sleeping and one for sitting and working on the laptop. Photo by Pixabay for Pexels.
Zoning a room
Let’s bring this together with a real-life example from my own home: the spare room. When my husband and I first moved into the house, this room was strictly a guest bedroom, with a double bed and two nightstands. Eventually, we had kids, and the room that I had been using as a craft room (sewing supplies, wrapping paper, etc.) had to become a child’s bedroom, so we relocated the craft supplies to the guest bedroom. This meant trading the bed for a Murphy bed, which takes up very little room when not in use, and setting up the sewing machine on a sturdy folding table, which can be put away in the garage when we have guests. Eventually, during the pandemic, it doubled (tripled?) as a home classroom, with the sewing machine set aside on the floor and a laptop on the table instead. Fast-forward to today, and it’s also the music room, currently holding a marimba as well as a drum set, plus an electric guitar. Oh, and did I mention it’s where I do my ironing?
As you can imagine, this room has A LOT of stuff in it! But it works for us because we use all those things, albeit at different times. And yes, we do have to move them out of the way temporarily when we have guests, so our “guest bedroom” is certainly not Pinterest-worthy! But it is organized because we’ve set up the items there in zones and we kept only what we used. And, let’s be honest, because we have a contingency plan for where to temporarily store those items when the room is used as a guest bedroom! It is perfectly functional for our lives at the moment, though it’s not “perfect” at all.
Hi there! I’m Amélie, a professional home organizer in San Antonio, Texas. I help people like you declutter their home, organize their belongings, and simplify their life. I love cleaning out a closet and removing a carload of donations from a home! My goal is to help you create a functional space that will make your life easier and more peaceful.
Interested? Check out my personalized services or book your complimentary consultation!
10 Questions to Help You Make a Decluttering Decision
When I work with a client, I often help them decide what to keep and what to discard. Below are some of the questions I might ask them to help them decide. And for the record, when I say “discard,” I don’t necessarily mean “throw away”! Discarding something simply means that you no longer want to keep it – the item itself can be tossed, but also sold, donated, upcycled, recycled, given to a loved one, etc. As a matter of fact, if what is holding you back is knowing how to dispose of your item, I’ve got a blog post for that too!
First, know that the question you are instinctively asking yourself is often the answer. If you are holding up a dress and asking if it’s too short, it means that you feel like it’s too short for you, and there’s your answer. It does not matter whether the dress is objectively too short or not, because *you* feel a bit awkward in it, and therefore, it does not spark joy *for you*. Let it go!
That being said, if you are in a situation where you are on the fence about discarding an object, here are ten questions you can ask yourself to arrive at a decision.
1 – Do I love this item? If you love it, then you would almost always want to keep it. If not, then why do you still have it?
2 – Do I use this item? Maybe it is something that could be useful in theory, but it just doesn’t fit your lifestyle. Maybe it’s tied to your past self (and you’ve moved on) or your fantasy self (which is not realistic). It’s also possible that you use it, but do not actually like it, in which case you could upgrade to an item you do like.
3 – Is this something I would buy again today? Let’s say you bought a sweater that looked really nice, but now you feel self-conscious wearing it, you’re always pulling at it, it’s too scratchy, etc. Or you spent a lot of money on it, so you feel like letting it go would be wasting that money, but you don’t actually use the item (newsflash: that money is gone already, and keeping the item won’t bring it back). Another way to look at this would be to ask yourself whether you would bring it with you if you moved, or whether it would be worth the effort to clean it if you spilled red wine on it.
4 – Do negative feelings come up when I look at it or handle it? Think for example of “closet bullies,” those clothes that make you feel guilty – because you spent a lot of money but do not wear it, or because you have gained weight and it no longer fits. It could also be a gift that you do not actually like. You deserve better than being bullied in your own closet! Think of your closet as a party when you know everyone and like everyone, and curate your guest list accordingly.
5 – Is it worth the time, money, and energy it takes to maintain it? Everything you own takes up space, both physically and mentally, and will require maintenance. It could even end up being in your way all the time. Maybe you don’t want that board game with a million little pieces to put away each time. Maybe your nice Airstream trailer has turned into a white elephant.
6 – Am I keeping it because it needs to be repaired? There are often items in our home that we keep because we intend to repair them, or they are a project that we thought we would finish. It might be time to cut your losses on that one!
7 – Is this something I could borrow or rent easily if needed? Maybe your neighbor has a tall ladder you could borrow on occasion. Maybe you could just rent a wet vac if you were to need it, instead of keeping one in your garage at all times.
8 – Does it pass the 20/20 rule? Meaning, could you easily replace it if necessary, in about 20 minutes by going to the store and/or for about $20? If so, don’t worry about letting it go – it would not be an expensive mistake.
9 – Will anyone be happier if I keep this? I borrowed this question from Margareta Magnusson and Swedish Death Cleaning, and this is a great question to ask yourself when something is holding you back from getting rid of an item. It could be that you are saving it for someone in particular, in which case, just make plans to pass it on to that person! Otherwise, the answer is usually no.
10 – Is this bringing me closer to my ideal lifestyle? This question is from Marie Kondo’s KonMari Method®. Essentially, you have this vision of the life you want, or at the very least of what you want from your space. Where does that item fit in, if at all?
I hope those questions help give you more clarity when you are deciding which items to keep and which to discard. And if you want my help with your project, just get in touch!
Hi there! I’m Amélie, a professional home organizer in San Antonio, Texas. I help people like you declutter their home, organize their belongings, and simplify their life. I love cleaning out a closet and removing a carload of donations from a home! My goal is to help you create a functional space that will make your life easier and more peaceful.
Interested? Check out my personalized services or book your complimentary consultation!
What should I do with my stuff... in San Antonio?
I have seen this scenario a hundred times: you have a pile of stuff you want to get rid of, but you don’t have a plan. So, the pile doesn’t move and just becomes part of your décor. Sounds familiar? Let me help!
As a professional home organizer, I take my clients’ donations away after a session if they wish. But for everyone else in San Antonio, Texas, here are some resources where you can drop off your donations. Leave a comment if you have a favorite that I forgot! (Please do not suggest charities that only accept monetary donations or brand-new items straight from their wish list, as that is not the point of this post. This is for in-kind donations of gently used items.)
I have separated the sections below by theme; feel free to use the Find function (Ctrl + F ) to find a specific item, or just scroll through to read. There are options for donating, selling, or recycling responsibly.
Consider donating to women’s/children’s shelters, homeless shelters or other charities, such as…
- Haven for Hope (items for adults and children, household goods)
- Family Violence Prevention Services (clothes for women and babies, diapers, toiletries, household items)
- Child Safe (diapers, wipes, school supplies, gift cards)
- Margaret’s Place (toiletries, diapers, clothes, winter coats, school supplies, board games)
- Children Matter (toys, art supplies, household items)
- The Hope Center (food, clothing, household goods)
- San Antonio Ministries (toiletries, non-perishable snacks)
- I Support the Girls (bras, period products)
- Volunteer Services Council of TCID (coats, shoes, luggage, crafts and activities)
- The Strong Foundation (homeless families need all sorts of items, including appliances)
- VetStrong (formerly homeless veterans needs furniture and household goods, including mattresses!)
- Homeless shelters in San Antonio (clothes, toiletries, food)
- Boysville Auxiliary Thrift Store is a non-profit (accepts clothes and household items; can pick up furniture)
- Zappos will let you print a free shipping label for gently used shoes and clothes; items are donated to Soles4Souls or recycled
- Your local church or community center might be interested as well
For more specific items:
- Animal shelters (pet items, pet food, old towels and blankets)
- Food pantries for non-perishables (Goodwill has drop-offs)
- Dress for Success (work clothes)
- The Bra Recyclers (will donate or recycle bras)
- Brides Across America (wedding dresses up to 3 years old)
- Project MEND (medical equipment)
- Street2Feet (gently used athletic shoes, socks, and apparel)
- Lions Club or most optometrists (used eyeglasses, including prescription eyewear)
- Local daycares, schools, and libraries (toys, books, change of clothes)
- Local first responders (stuffed animals)
- National Crayon Recycle Program (crayons)
- LEGO® Replay (LEGO® bricks)
- The Book Rescuers (books, including textbooks!)
- Nationwide Trophy Recycling Program (trophies)
- Coinstar kiosks, choose your charity (coins, including foreign currency to UNICEF Change for Good)
- Spare Parts (arts and craft supplies)
- St. Jude Children’s Research Hospital (donate gift cards, even partially used)
- Resupply will pick up furniture
- World Computer Exchange (old computers)
- Computers With Causes (old computers and equipment)
- The Tech Take Back Box (electronics)
- Fur the Animals (old fur coats)
- Freecycle (post what you have, or search for “ISO [your item]”)
For household goods and clothes and with possible pickup:
- Goodwill
- AMVETS
- Habitat for Humanity (some appliances, furniture, home décor, light fixtures, electronics, rugs, patio furniture, etc.)
- Give Back Box (to mail in small items)
- Or use Donation Town to schedule a pick-up with a local charity
To make a bit of extra cash in person:
- Yard sale
- Nextdoor, Facebook Marketplace, community Facebook group
- Half-Price Books (books, magazines, music, movies, board games)
- Clothes Mentor (seasonal women’s clothes)
- Too Good to Be Threw (high-end fashion and furniture)
- H&M (any clothes or even fabric for recycling – you receive a coupon for your next purchase)
- DSW will give gently used shoes to Soles 4 Souls; you get 50 points per pair
- Bricks & Minifigs (LEGO®)
- My Comic Shop buyer associates (comic books)
- Lone Star Coins (gold and silver, including coins, jewelry, silverware; collectible bills as well)
- Play It Again (sporting equipment)
To make a bit of extra cash online:
- eBay.com (just about anything)
- Gazelle.com (cellphones, tablets)
- Amazon Trade-in (tech, cell phones, gaming)
- ThredUp (women and children’s clothes)
- The Real Real (designer clothes and accessories)
- The TakeBack Bag for recycling clothes
- Replacements.com buys (and sells) china, crystal, and silverware
To pay for a pick-up:
- 1-800-GOT-JUNK (my clients get a 10% discount!)
Resources for proper disposal/recycling:
- Batteries Plus (batteries, light bulbs, small electronics)
- Best Buy (batteries, electronics)
- Staples (office supplies, tech, etc.)
- Drugstores (expired medications)
- Office Depot (drop-off shredding) or Shred Nations (mobile shredding)
- If you live within city limits, recycling centers will take household hazardous waste and bulk waste
- Earth 911 (hazardous materials, etc.)
- Terracycle (hazardous materials, etc., but also various packaging such as cosmetics or cleaning products)
- Green Disk (electronic media recycling)
- Target (annual car seat trade-in event; you get 20% off towards buying select baby gear)
- In San Antonio, Goodwill recycles fabric too!
Hi there! I’m Amélie, a professional home organizer in San Antonio, Texas. I help people like you declutter their home, organize their belongings, and simplify their life. I love cleaning out a closet and removing a carload of donations from a home! My goal is to help you create a functional space that will make your life easier and more peaceful.
Interested? Check out my personalized services or book your complimentary consultation!
The KonMari Method® and Swedish Death Cleaning
This post contains two affiliate links. If you make a purchase using an affiliate link, I’ll get a very small commission, at no cost to you.
In a world increasingly obsessed with minimalism and organization, two popular methods have gained significant attention: the KonMari Method® and Swedish Death Cleaning. While both approaches aim to create a more organized space and promote mindfulness about our belongings, they stem from different cultural backgrounds and philosophies. I will explore the similarities and differences in the two methods, after a quick summarization of each one, based on my takeaways from the two books cited below and my professional experience.

A common way to shorten Japanese names is to combine the first syllable of the surname with the first two syllables of the given name, so Marie Kondo’s nickname is KonMari, which is now registered. The KonMari Method® is Marie Kondo’s organizing philosophy, and KonMari® Consultants like me have been trained and certified in that particular method.
Swedish Death Cleaning (or döstädning) is a well-known concept in Sweden and in Scandinavian culture at large, in which you eliminate unwanted items from your home so that your loved ones are not burdened with the task after your passing.
PHILOSOPHICAL FOUNDATIONS
The KonMari Method®
The KonMari Method® is a celebration of joy and mindfulness in organizing. Marie Kondo's approach, explained in detail in The Life-Changing Magic of Tidying Up, emphasizes the emotional relationship you have with your belongings, advocating that you should only keep items that "spark joy." The method encourages individuals to touch each item, consider its value, and make conscious decisions about what to retain. This philosophy promotes creating a personal sanctuary and cultivating happiness and self-care through mindful organization. The main question to ask yourself is, “Does this item spark joy?”
Swedish Death Cleaning
On the other hand, Swedish Death Cleaning is rooted in a cultural perspective on death and legacy. Popularized abroad by Margareta Magnusson, author of The Gentle Art of Swedish Death Cleaning, this method encourages individuals, particularly older adults, to declutter their possessions while they are still capable, so that their loved ones don’t have to deal with a mountain of belongings after they pass away, while grieving. The process focuses on gently assessing items and determining what to keep, discard, or pass on, often fostering a sense of closure and emotional readiness for the future. The two main questions to ask yourself are, “Will I ever need this again?” and “Will anyone I know be happier if I save this?”
SIMILARITIES
Despite their different cultural contexts and philosophical underpinnings, both the KonMari Method® and Swedish Death Cleaning share common goals.
1. Mindfulness and intentionality: Both methods advocate a mindful approach toward belongings. They encourage individuals to assess and reflect on what they own and why they keep it.
2. Decluttering: At their core, both methods aim to declutter spaces. They seek to eliminate excess belongings that don’t bring value or happiness to one’s life. And both methods advocate doing this once, with lasting results, as opposed to doing a bit here and a bit there for years on end.
3. Emotional connection: Each approach recognizes the emotional weight possessions carry. Both methods prompt individuals to consider their feelings toward their items and how those feelings impact their living spaces.
4. Prioritization: Both methods emphasize the importance of prioritization—whether it’s the need to reduce clutter to ease the burden on loved ones or the decision to keep only joy-sparking items.
5. How to live one’s life: Despite using different vocabulary and framing things differently, both methods have the same end goal: to allow you to spend more time on the things that matter to you (i.e., living your ideal life or planning for an easier, calmer future). While it is true that Swedish Death Cleaning enables acceptance and grief, it is steeped in positivity and joy, just like the KonMari Method®.
DIFFERENCES
While the similarities are notable, there are also differences between the two methods.
1. Cultural context: Swedish Death Cleaning arises from the Swedish perspective on mortality and legacy, while Marie Kondo’s philosophy is grounded in Japanese culture’s emphasis on simplicity and mindfulness. The inevitability of death is central to Swedish Death Cleaning, while Kondo’s approach is focused on joy and meaningful living.
2. Target audience: Swedish Death Cleaning is primarily aimed at older adults who wish to prepare for their death and reduce the burden on their families. In contrast, the KonMari Method® is aimed at anyone, regardless of age, seeking general organization in their life.
3. Process: The KonMari Method® is structured around a specific order of categories (clothing, books, papers, miscellaneous, and sentimental items) to promote an effective decluttering process; decluttering is done by category, not by room. Swedish Death Cleaning lacks a formalized step-by-step structure but instead promotes a more personalized, introspective approach depending on individual circumstances and emotional readiness. However, both start with easy wins and keep sentimental items for the end.
4. Focus: While both methods promote living your best life, Swedish Death Cleaning encourages you to keep in mind the effect your passing (and passing ON of items) will have on your loved ones, whereas the KonMari Method® is focused on you and your current life. Moreover, the KonMari Method® focuses on what you keep, whereas Swedish Death Cleaning (and most other methods!) focus on what to let go.
WHICH METHOD IS RIGHT FOR YOU?
Ultimately, the choice between the KonMari Method® and Swedish Death Cleaning depends on individual preferences and circumstances. If you are an older adult or facing significant life transitions, Swedish Death Cleaning may resonate more strongly with you, allowing for closure and preparation for the future. Conversely, if you seek to infuse joy into your existing living space and foster a more positive relationship with your belongings, the KonMari Method® may be your best fit. Think of the method that most resonates with you and motivates you.
Incorporating elements from both methods can also be beneficial. Evaluating what sparks joy while considering the emotional and practical aspects of our possessions can create a uniquely tailored approach to organizing that respects your past, present, and future.
In conclusion, both the KonMari Method® and Swedish Death Cleaning offer powerful insights into organizing and decluttering, emphasizing mindfulness and emotional connection. Whether you are preparing for the future or simply seeking a more joyful space, understanding these methods can help guide your journey toward a more organized life.
Hi there! I’m Amélie, a professional home organizer in San Antonio, Texas. I help people like you declutter their home, organize their belongings, and simplify their life. I love cleaning out a closet and removing a carload of donations from a home! My goal is to help you create a functional space that will make your life easier and more peaceful.
Interested? Check out my personalized services or book your complimentary consultation!
Limiting beliefs
I’ve been thinking about limiting beliefs recently. By “limiting belief,” I mean things that you believe, subconsciously or not, and that end up getting in the way of the life you want. This can happen on different scales and different topics, but let me use a few very recent examples from my life to illustrate.
I went to Fiji during spring break. It was a spur-of-the-moment decision, essentially made possible by the confluence of different factors (major sale on plane tickets, low season which meant lower hotel prices, window of time when I could step away from responsibilities at home, not to mention bucket-list item). But even then, even as much as I was looking forward to it, I didn’t feel completely comfortable with the idea. The types of thoughts swirling in my mind were, “Do I deserve to go?” “People like me don’t go to Fiji.” “That’s crazy, that’s not the kind of trip I can go on.” And why? (Spoiler alert: I did go, and I had a wonderful time!)

Here’s another example from earlier this month. I live in San Antonio, where there is a SeaWorld park that offers dolphin interactions. Being in the water with, and touching, a dolphin has been a life-long dream of mine. And yet. And yet, I wasn’t booking the experience, because it just seemed like a crazy thing to do. Other people do this, but it’s too... what, fancy? out there? only rich people do that? only lucky people? My husband then gifted me the experience for my birthday. Honestly, considering that you don’t even have to buy tickets to the park for this (only tickets for the dolphin encounter, which is technically just outside the park), it’s really affordable! I had such a good time, too; it was everything I’d hoped for. This is something that was easily doable, right where I live, and still it took someone else to get me to do it. I’m grateful to my husband, but I really should have done it for myself years ago!

Then I went to see Brené Brown speak at Trinity University on April 16th. This event was open to the public, and free to boot, and still there was a little part of me that felt like it was too much for me. And again, it can be big things like “She’s one of the most sought-after speakers world-wide – do I even deserve to be in that room?” to little things like “What about parking?” and “I don’t usually go out in the evenings.” I know this is a pattern for me, so I just got a ticket and went. And obviously, I am super glad I did! Dr. Brown is an engaging speaker, and hearing her speak about leadership was inspirational.

Of course, having this hesitation can also be an issue before big life changes, like when we moved to Texas from Quebec. It seemed like such a big step that just the thought of it could have prevented us from moving, which would have meant turning down my husband’s dream job offer and, ultimately, living a very different life than we do today.
Those limiting beliefs will karate-chop you in the kneecap if you let them! Growing requires you to step out of your comfort zone. The truth is that I am the kind of person who loves to travel and have new experiences; even though I have certain limiting factors like budget and schedule and my own anxiety, when I can make it work, I will. That’s a much nicer story to tell myself, and it will serve me far better than staying at home. So it’s not just that you have to seize your joy; you have to create your joy.
The reason I’m bringing this up here is because I now recognize the same thought patterns in some of my clients. Some people think they don’t deserve to have pretty bras neatly arranged in a drawer, or they feel like they’re not the kind of person who could have an organized home, or they’re not worth the investment, or they just don’t see themselves hiring a professional. And that’s not true! You have to believe that you’re worth it before it can happen, and trust me, it CAN happen! You also have to stop standing in your own way – have enough faith in yourself to step out of your comfort zone and make the changes necessary to lead your ideal life.

A quick word about what sparks joy
I wanted to tell you a quick personal story about finding what sparks joy. I like to bookmark items that I’m thinking about buying so that I can think it over or wait for a sale. When one such company had a sale not too long ago, I seized the occasion and bought two items I’d been eyeing, a long-sleeved blouse and a summer dress.
I received the items and tried them on that evening. When I put on the long-sleeved blouse, I wanted to like it. I liked the fabric and the color, I had loved how it looked on the model, and I wanted to look like that. I guess I was trying to talk myself into loving it, even though it wasn’t as I had pictured it... I decided to set it aside on my clothes chair and sleep on it before removing the tags.
Then I tried on the summer dress. As soon as I put it on, I was smiling like crazy! I love that dress, I feel great in it, and I really think it looks good on me. Plus, it has pockets! I was twirling in front of the mirror and imagining myself wearing it when it got a little warmer. I cut off the tags right away.
The next morning, as I was getting dressed for the day, I put on some pants, put on the blouse, and looked at myself in the mirror. That’s when it hit me – this blouse really didn’t spark joy! The shoulders were too broad, the sleeves were too puffy, and I felt like I was wearing a clown shirt. That blouse just wasn’t me. I still love the idea of it, but in real life on my own body, it wasn’t happening. Returning it was clearly the right decision.
You see, my gut had told me this already. I wasn’t feeling it when I put it on, but I tried to talk myself into liking it on me, for various reasons that sounded right, but with little regard for all the hesitation I felt. Whereas with the dress, I immediately felt lighter, and there was no doubt whatsoever that it was right for me. So, this is your sign to trust your gut about what sparks joy! I want you to feel that good about all your clothes, and to let go of the rest with gratitude.

Bonus tip: I try to stick to the one-in-one-out rule as much as possible. It can be hard to decide which items to let go of to make room for new ones, so here’s a tip. Try on the ones that you haven’t worn in a long time. In this case, I tried on a few dresses that I hadn't worn at all last summer – I mean, there was dust on the hangers, okay? And I sure loved those dresses, because they had made me very happy when I got them, and I once loved wearing them. But when I tried them on again that day, I had to admit that there were two of them that just weren’t doing it for me anymore. The fit was wrong, or there was something else I just didn’t like about them.
Now listen, I don’t know if they were always that way and I either didn’t see it or didn’t care, or maybe it’s my taste or my body that have changed. It doesn’t matter. In that moment, when I wore them again, I realized it was time to let them go. So don’t hesitate to try on clothes that you think you love if it’s been a while since you last wore them – you might realize that your feelings about them have changed! I ended up getting rid of two dresses that day to make room for the new dress.
Storing Christmas ornaments
[Note that this post contains some affiliate links. This means that if you were to make a purchase on Amazon using one of those links, I would get a tiny commission, at no extra cost to you. The hard-sided bin I recommend is one I own and paid for myself; the tree bag is the one I would buy if I had to part with my current model, which is no longer being made.]
Here is how I store Christmas ornaments to make things easier on myself when I put up the tree the following year. Really, a lot of organizing is about making things easier for Future-You! (You can also check out my recommendations on how to store your gift wrapping supplies.)
First, make sure to donate any ornaments you no longer love, and discard those that are damaged.
Tree ornaments
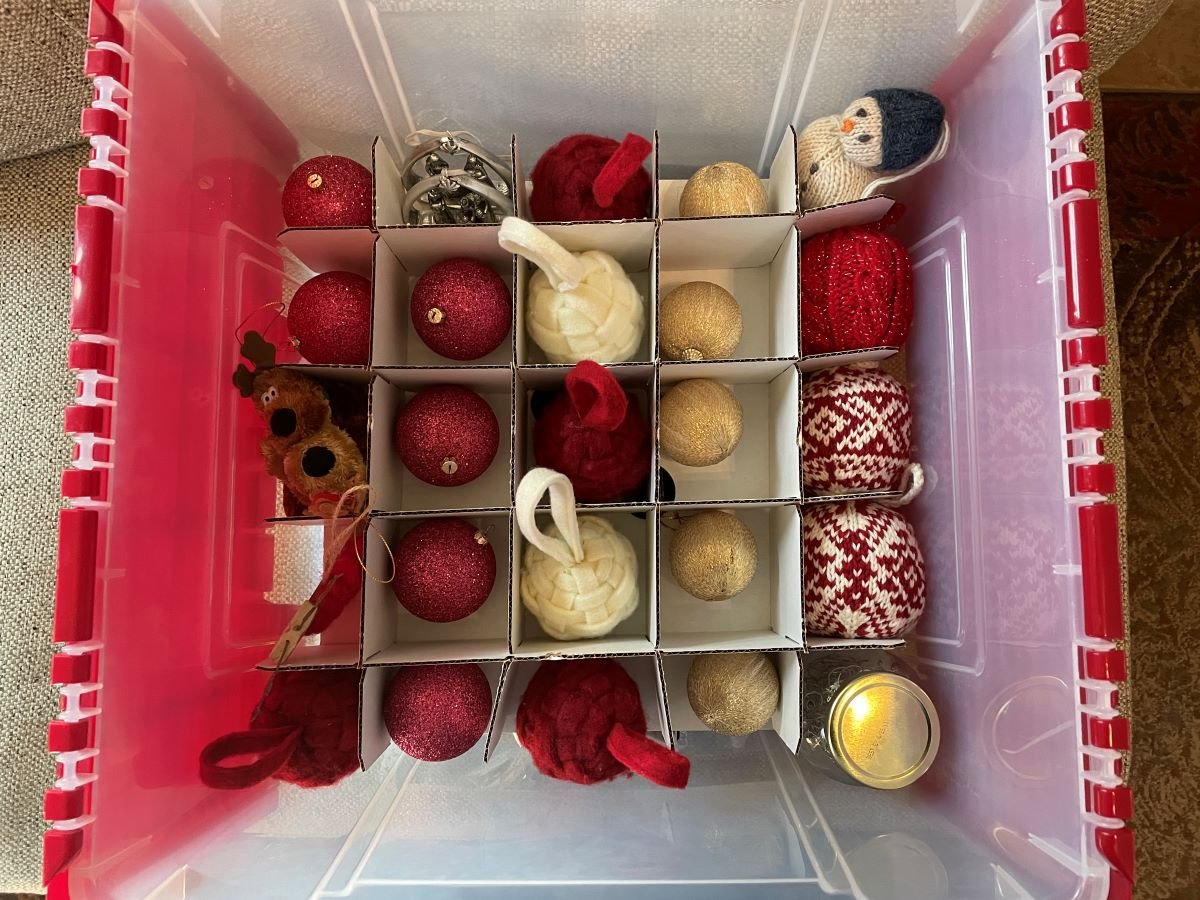
I use a hard-sided storage box like this one, though some soft-sided boxes (like this small one or that larger one) look great, too. I especially love the cardboard dividers inside, which keep your ornaments secure and tidy! They also help set a limit as to how much stuff you can keep – if you are getting those boxes for the first time, make sure you have decluttered your decorations and then buy a box (or more) with enough compartments for your collection.


Resist the temptation to cover things in layers of tissue paper. You run the risk of tossing out ornaments because you can’t see them and assume it’s just a wad of paper! You can always create a nest of tissue paper in a cardboard compartment for something especially fragile, or get a special box for it, but make sure you can still see everything. Another idea would be to store the small fragile ornament in colored tissue paper to make sure it stands out.
To take things one step further, here’s what I recommend: put all the smallest ornaments on the bottom layer in the box. Those are the last ornaments that you’ll be putting in your Christmas tree, so it makes sense for them to be the last ornaments you’ll unpack from that box! You can put the other layers on a flat surface in the meantime and fill them, then transfer them back to the box when you’re ready. I’ve added a jar of extra hooks in one slot.
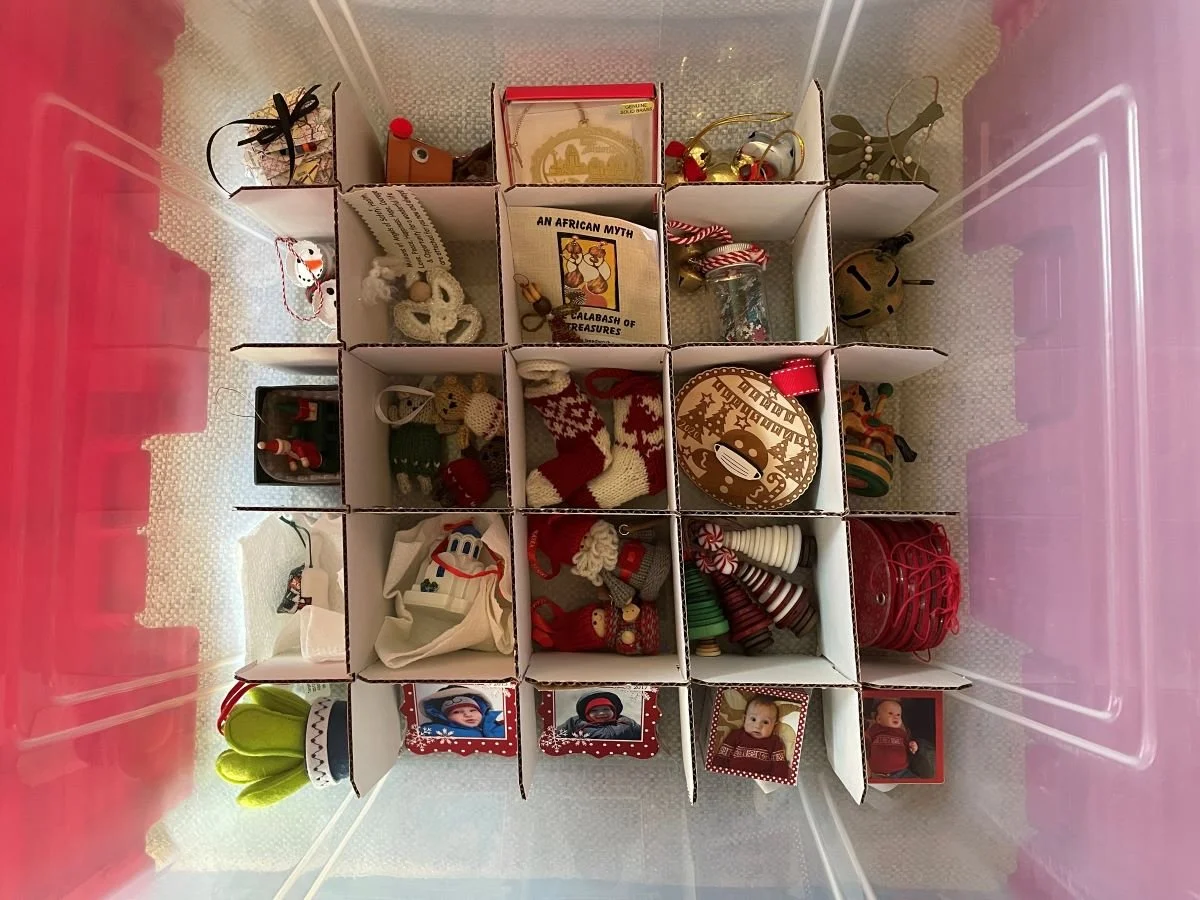

When there are a lot of the same series of very small ornaments, I put them together in a clear plastic bag so that they are visible and are stored together.

I also wrap garlands around a piece of cardboard, which keeps them tangle-free until the following year.


Another idea is to use velcro straps to wrangle garlands or strings of lights if you prefer that to cardboard.

Artificial trees and wreaths
As for storing an artificial Christmas tree, I’m a big fan of sturdy bags like this. The large handles and wheels make it easier to carry. It’s water-resistant and will help protect the tree from dust and critters. Just make sure you take the tree apart (it’s often in three sections), fold back the branches to prevent them from getting bent, and store them in the bag, biggest on the bottom, with the pole end toward the middle. This also helps keep the tree and its accessories contained in one spot. Ideally, you’ll want to store it someplace that doesn’t get too hot or too cold (so, not the attic or garage), especially if it has white limbs or fake snow, though this isn’t much of an issue with green trees. The same is true with artificial wreaths, for which you should get a container of the appropriate size.
Let me know if you have any decorations that I have not addressed here!
Goodwill
When I do a complimentary donation haul for my clients, most of the time, I drop off the items at Goodwill. There are certain things that I will make the effort to donate elsewhere if I know they can’t be sold (for example, strollers and highchairs, or bras and toiletries). But I still run into a lot of people who don’t want their stuff to go to Goodwill because it will be resold, and they prefer to donate directly to someone who will use the item. I suppose that’s fair, but have you ever stopped to wonder what Goodwill does with the money they make from donations?
I recently got to visit the Goodwill Resource Center in Austin with my local chapter of NAPO, and it was so interesting! Ashley Sondon, the Director of Donation Acquisitions, gave us a tour of the place and answered all our questions.
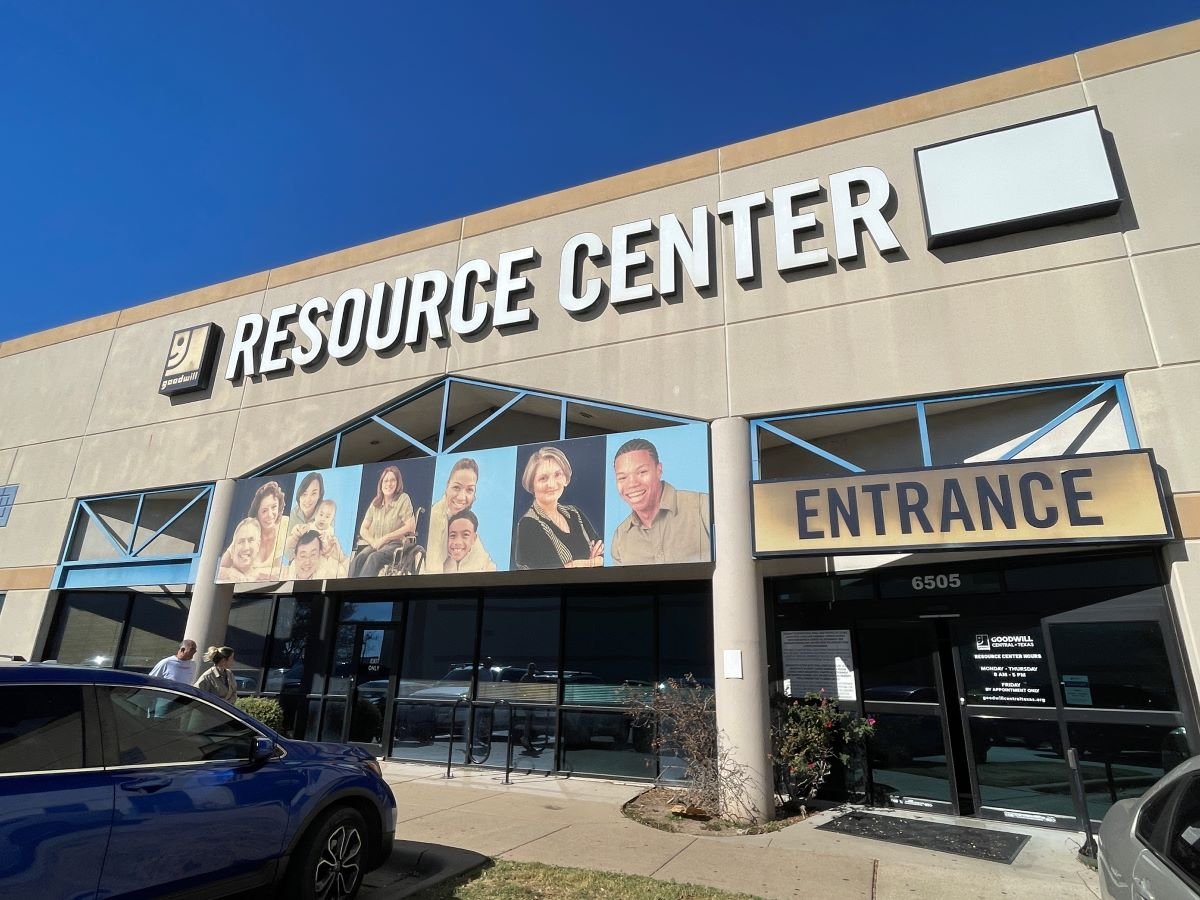
Most of us know Goodwill as a secondhand store, but it is so much more than that! Goodwill is very involved in helping the community. In Central Texas, they focus on helping newly released prisoners who don’t have resources; in Florida, they are more focused on helping veterans – this is all based on local needs. Goodwill of Central Texas offers education, job training, childcare, parenting classes, financial literacy classes, access to computers, you name it! They don’t just help someone find a job, they help educate and train that person for a career that interests them, and also teach them life skills. So really, when you donate to Goodwill, that’s what you are supporting!
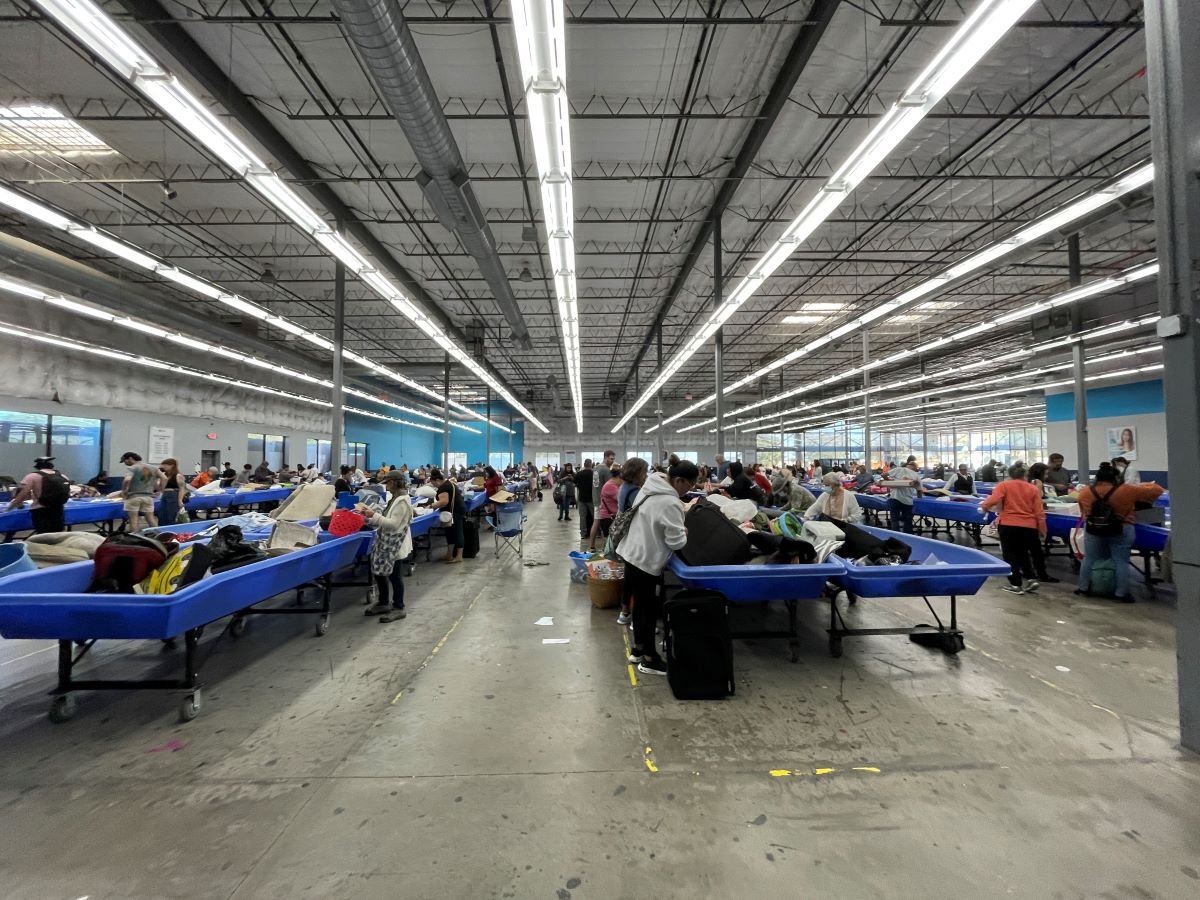
So, what happens when you donate items to Goodwill? First, they are sorted and will be put on the shelves of the store where they were donated. If they haven’t sold after 4 weeks (which you can check with the color of the price tag), they are moved to the outlet store. There, they are put in a bin that is roughly the size of a dining room table and 12 inches deep. Each bin is wheeled out onto the floor and things are sold by weight; they wheel out about 1000 bins each day, and each new bin is greeted by shoppers as if it were full of Black Friday deals! Whatever is left in the bin at the end of its time on the floor is wheeled to the back, baled up, and sold to third-parties or recycled if possible.


Last year, Goodwill kept 93 million tons of items out of landfills, which was 80% of donations!
There are programs in place to deal with specific categories. For example, Goodwill has a partnership with Dell to wipe and refurbish electronics when possible, and recycle the ones that cannot be resold. You can also shop online at Goodwill, where high-end items have been vetted (which isn’t the case in the brick-and-mortar stores). They partner with the Food Bank to collect non-perishable food donations. I was also surprised to see various bins of recyclables like glass and plastic bottles sorted out – I didn’t know you could donate those! Honestly, there are some drop-off points that are not careful with breakables, so I still don’t think that donating glass jars is a great idea, but I did see intact glass jars back there, so you never know!
I had also previously advised my clients to separate the clothes they donate and clearly identify the ones meant for recycling (torn, stained, etc.). Ashley Sondon said that, as it turns out, those clothes do pretty well in the bins at the outlet, because there are people who buy them for crafting. So go ahead and donate them! Goodwill can also recycle items like car seats, but some items are off limits, like mattresses, ammunition, or construction materials. Up-to-date information is on their website, and I will gladly help my clients figure out their options!

Reba Bassett, Ana Contreras, Lilly Bullion, Sahiba Bassi, Kathy Blair, Amélie Saint-Jacques, and Kelly Dever at the Goodwill Resource Center in Austin TX (photo by Reba bassett)
Hanson on packing for a tour
[I got to speak to Taylor and Zac Hanson (yes, that Hanson!), about how they pack for extended trips such as a tour. For background on how this “interview” from October 25th, 2024, came to be, please check out this post. Note that answers have been edited for brevity, but remain true to the spirit of what was said.]

Taylor, Zac, and Isaac Hanson, on stage in Finland; image from hanson.net
Amélie: I am a professional home organizer certified by Marie Kondo. My husband and I are from Montreal, QC and now live in San Antonio, TX. We typically drive up for the summer, so I know firsthand that packing for four days or two weeks is completely different than packing for two months! What are some packing tips you have for long trips – some things that you bring with you or do for yourself that spark joy?
Taylor Hanson: One of the gifts of travel is that it removes options and forces you to get down to the essentials. It can be stressful at times because you don’t have all the things that you like, but you have to ask yourself what you actually need. And in some ways, it’s comparable to what Marie Kondo tries to do, which is to minimize and to get rid of the things you don’t use and that become clutter. So, in one sense, it’s one of the greatest ways to force yourself to get organized because you don’t have the option, you just can’t take everything.
There are two big categories of things that I bring: show stuff [instruments, equipment, etc.] and non-show stuff [personal items]; there’s work and play. You have to bring a laptop and phone, because technology is so present these days. Zac brings video games, everyone knows that. I always have my camera, and some drawing and art supplies. I also force myself to bring an iPad loaded with books and movies (which then take up so much less space). Having something to draw with and something to read is my outlet. You need a go-to brain release thing! But touring is its own unique, bizarre thing that most people never get to experience; it’s like the circus, and you put up a tent in every city.
Force yourself to start with what’s essential; the peripheral stuff comes last. That’s my answer.
Zac Hanson: There’s a reality to how much weight you can carry. I learned years ago that you really can’t take with you more than two weeks’ worth of clothing. I’ve got four [packing cubes]: one for shirts, one for pants, underwear, exercise clothes… And once those are full, that’s all that can go! And I don’t stress over it. My wife asks how it is that I can pack for a two-month tour in 12 minutes! [Laughs] It’s just a question of whether I want to bring brown shirts or gray shirts, but it’s going to be the same number.
On tour, the biggest thing that you don’t realize is that you have very little personal space or time. Overpacking is when you bring everything you think you’re going to do, but really, you only need things that will give you a little bit of peace and a little bit of mental privacy. For me, that’s always been video games, which bring you into another world and are relatively small. So even if I’m sitting next to Taylor, I’m in my little private space for an hour or however long I have. And I think books can be the same way.
You have to prioritize; you can’t do as much as you think you’re going to do, so focus on those one or two things to help you relax.
Taylor: Bring the things that give you peace and that spark joy. Also, for me, the love of food, the love of place, and discovery, is a huge part of the balance of not being able to have your stuff or a room full of your favorite whatevers. You need to appreciate what is unique and the opposite of your safe space at home, so enjoy being present in the moment when you travel.
Zac: Bring with you what you really want to do, not everything you could do. Don’t bring with you what you don’t want to find yourself doing.
Packing light
[This post became so unwieldy that I split it into two parts. For part 2 – in which I talk with Hanson! – click here. Also note that this post contains some affiliate links. This means that if you were to make a purchase on Amazon using one of those links, I would get a tiny commission, at no extra cost to you. I only recommend items that I own myself and am glad I bought!]
In late August, I had to fly to Canada for four days for my grandmother’s funeral, and I managed to do it with only a backpack and a purse. I really felt like I had unlocked a new achievement by travelling so light!

I wore my travel pants (light, lots of pockets, easy to wash and air-dry), a simple black t-shirt (this one is made of isothermal wool), and an infinity scarf (adds a splash of color and doubles as a wrap if the airplane gets cold). I’ve written before about my favorite travel accessories (see part 1 and part 2, and if you only remember only one thing from that, let it be packing cubes).
I wanted to bring what I would need for the next 24 hours in my personal item. You see, even with a carry-on, sometimes there isn’t any room left in the overhead bins, so you have to check your bag and it might get misplaced. But the next day was my grandmother’s funeral, so it was super important that I have my outfit! And once my dress, shoes, cardigan, toiletries, and pajamas were in my backpack, along with my water bottle, wallet, book, etc., there was so little left to pack that I couldn’t justify bringing a rolling carry-on with me. So, I used a second compression packing cube for a few more clothes and stuffed it in the empty backpack pocket meant for a laptop. This meant I had to have a purse in addition to the backpack, but it was small enough that I was confident I wouldn’t have to check anything even though I was probably in the last boarding group.

The backpack I have is this 40-L model, and what I love most about it is that it is very structured, so that even when full, it will fit under an airplane’s seat (my other, larger backpack does not because it gets lumpy and expands too much). I have been using it for a year, which was a record of four roundtrips by plane or car, and so far, I really like it.
This all made me think of how different it is to pack for four days versus for two months. My family and I have often driven up to Canada for the summer, and while we typically had a rooftop carrier, last year we stayed for a shorter period of time and managed to fit everything inside the car. I always feel like we are bringing so much with us on those trips! Some of it is unavoidable because we bring a few gifts for our family in Canada and then bring some things back to the States with us (like cans of maple syrup). Plus, one of my kids celebrates a birthday in July, so we’re always bringing back presents. Taking that into consideration, we really have to pare back on what to bring with us!
And then, before publishing this blog post, I unexpectedly had the opportunity to talk to Taylor and Zac Hanson, who basically do this as part of their job, so I wanted to get their thoughts! Let’s back up a little: I have been a big Hanson fan for the past 27 years and was lucky enough to be part of a virtual meet & greet in October, during which I got to ask them a question. I didn’t really have questions about their latest album, and I thought that asking them why they don’t include San Antonio in their tour dates was a boring question. (I mean, they answer stuff like that every day, including twice from other participants in this very meet and greet, and honestly, what could I possibly learn from it aside than that the city where I live doesn’t have as big a music culture as Austin?) So, since packing was already on my mind, I went in another direction and asked them about their process when they pack for such long periods of time when they go on tour. This was the best I could do with less than 36 hours’ notice, alright? Here are their answers.